Manfred Bergmann's blog2026-05-14T02:00:00+02:00http://retro-style.software-by-mabe.com/Manfred Bergmann / Software by MaBe<![CDATA[ ACE BASIC 3.0.1 - Variable Arrays and 68000 Compat ]]>2026-05-14T02:00:00+02:00http://retro-style.software-by-mabe.com/blog/ACE+BASIC+3.0.1+-+Variable+Arrays+and+68000+CompatACE BASIC 3.0.1
A small follow-up to the 3.0 release. Two things worth talking about: variable-sized arrays, and the fact that the compiler itself now runs on a stock 68000.
Variable-Sized Arrays
Until now, DIM required a compile-time constant for the array size:
DIM nums&(100)
That works for fixed-size buffers, but it forces you to either pick a worst-case size or use ALLOC and manage the memory by hand. Version 3.0.1 lifts that restriction. DIM now accepts variables and expressions:
LONGINT n
INPUT "How many entries"; n

DIM nums&(n)

FOR i& = 0 TO n - 1
  nums&(i&) = i& * i&
NEXT i&
Under the hood, constant-sized arrays still live in BSS as before. Variable-sized arrays are heap-allocated at runtime via ALLOC, with a small header storing the dimension sizes so multi-dimensional indexing keeps working. From the source-code side nothing changes -- you write DIM the way you always did, just with a variable instead of a literal.
68000 Compatibility
The other change is about hardware reach. Starting with version 2.7 the compiler was built for 68020 by default, which meant ACE itself needed at least an A1200 or an accelerator to run. With 3.0.1 the compiler is built for plain 68000 again, so it runs on any Amiga -- a stock A500 included.
The runtime libraries now ship in two variants:
lib/ -- 68020 builds (the default)
lib/68000/ -- 68000 builds (require vc.lib)
The bas script auxiliary tool looks at your source for OPTION 2- and picks the matching runtime automatically. If your program uses 68020 instructions (OPTION 2+, or the default), it links the 68020 libraries. If you opt out with OPTION 2-, it links the 68000 variants:
OPTION 2-

PRINT "This runs on a stock A500."
The same applies to the bundled tools: yap (the preprocessor) and parseusing are now compiled with OPTION 2-, and there is a 68000 build of vlink as well. So the whole toolchain -- compiler, preprocessor, linker, and runtime -- can be used on a 68000 machine.
If you only target 68020 and up, nothing changes for you. The default is still 68020 code generation, and the default runtime is the 68020 build. The 68000 path is opt-in via OPTION 2-.
Brief Mentions
YAP macro limit raised to 2048: the preprocessor now handles much larger sets of #define macros.
SuperOptimizer v2.28: updated, with a new SuperOptimizer guide in the documentation.
Bug fix -- math libraries always opened at startup: previously the compiler only opened mathieeesingbas and mathieeesingtrans when the main program referenced them. If an EXTERNAL module used floats or trig but the main program did not, the program would crash on the first math call. Both libraries are now opened unconditionally at startup.
Conclusion
A small release, but a useful one. Variable-sized arrays remove a long-standing limitation of DIM, and 68000 compatibility brings the compiler itself back to every Amiga out there. If you have a stock A500 sitting around, you can now use it to compile ACE programs.
The project lives on GitHub. Bug reports and feature requests are welcome.
]]><![CDATA[ ACE BASIC 3.0 - Classes IEEE and More ]]>2026-03-02T01:00:00+01:00http://retro-style.software-by-mabe.com/blog/ACE+BASIC+3.0+-+Classes+IEEE+and+MoreACE BASIC 3.0
The previous posts followed ACE BASIC from v2.5 through v2.9 -- AGA screens, GadTools, closures, MUI, structs, RTG graphics, tail-call optimization, and HTTP networking. Version 3.0 is a major release. It introduces an object system with generic functions, switches the floating-point format to IEEE 754, adds type-based pattern matching, atoms, multitasking primitives, and ships a set of new submodules including a JSON parser. There is a lot here, so let's go through it.
Object System
This is the headline feature. ACE BASIC now has classes with single inheritance and polymorphic dispatch via generic functions. The new keywords are CLASS, METHOD, EXTENDS, and GENERIC.
If you are familiar with Common Lisp's CLOS or Julia's multiple dispatch, the design will feel natural. Classes define data. Methods are standalone functions that take class instances as parameters. Generic declarations wire up the runtime dispatch.
Defining a class
A class groups data members together, much like a struct but with a type identity that enables runtime dispatch:
CLASS Disc
    LONGINT tag
    SINGLE radius
END CLASS

CLASS Rect
    LONGINT tag
    SINGLE w
    SINGLE h
END CLASS
Classes contain only data -- no methods are defined inside the class block. Instance creation and member access use the same -> syntax as structs:
DECLARE CLASS Disc d
d->radius = 5.0

DECLARE CLASS Rect r
r->w = 10.0
r->h = 3.0
Each instance carries a hidden type descriptor at offset 0. This is what the runtime uses for dispatch.
Methods and generic dispatch
Methods are defined outside the class. The first parameter is a typed class instance, which tells the runtime which class this method specialization belongs to:
METHOD Mark(Disc c)
    c->tag = 1
END METHOD

METHOD Mark(Rect r)
    r->tag = 2
END METHOD
Two methods with the same name, each taking a different class. To enable runtime dispatch, you declare a GENERIC:
GENERIC METHOD Mark(CLASS)
    ON Disc
    ON Rect
END GENERIC
The GENERIC declaration says: "Mark is a generic function that dispatches on one class argument. There are specializations for Disc and Rect." The CLASS placeholder in the signature marks the dispatched parameter. ON lists the concrete types that have specializations.
Now when you call Mark, the runtime checks the actual type of the argument and dispatches to the correct specialization:
Mark(d)    '..calls Mark(Disc c), sets d->tag to 1
Mark(r)    '..calls Mark(Rect r), sets r->tag to 2
Methods can return typed values, just like FUNCTION:
METHOD SINGLE CalcArea(Disc c)
    CalcArea = c->radius * c->radius
END METHOD

METHOD SINGLE CalcArea(Rect r)
    CalcArea = r->w * r->h
END METHOD

GENERIC SINGLE METHOD CalcArea(CLASS)
    ON Disc
    ON Rect
END GENERIC

SINGLE area
area = CalcArea(d)    '..25.0
area = CalcArea(r)    '..30.0
They can also take additional non-dispatched parameters:
METHOD LONGINT Scale(Disc c, LONGINT factor)
    Scale = 100 + factor
END METHOD

METHOD LONGINT Scale(Rect r, LONGINT factor)
    Scale = 200 + factor
END METHOD

GENERIC LONGINT METHOD Scale(CLASS, LONGINT)
    ON Disc
    ON Rect
END GENERIC

LONGINT s
s = Scale(d, 5)    '..105
s = Scale(r, 5)    '..205
Multiple dispatch
This is where things get interesting. A generic function can dispatch on more than one class parameter. Consider a collision detection system:
CLASS Disc
    SINGLE radius
END CLASS

CLASS Rect
    SINGLE w
    SINGLE h
END CLASS

GENERIC LONGINT METHOD Collide(CLASS, CLASS)
    ON Disc, Disc
    ON Disc, Rect
    ON Rect, Disc
    ON Rect, Rect
END GENERIC

METHOD LONGINT Collide(Disc a, Disc b)
    Collide = 11
END METHOD

METHOD LONGINT Collide(Disc a, Rect b)
    Collide = 12
END METHOD

METHOD LONGINT Collide(Rect a, Disc b)
    Collide = 21
END METHOD

METHOD LONGINT Collide(Rect a, Rect b)
    Collide = 22
END METHOD

DECLARE CLASS Disc c1, c2
DECLARE CLASS Rect r1, r2

result = Collide(c1, c2)    '..11 (disc-disc)
result = Collide(c1, r1)    '..12 (disc-rect)
result = Collide(r1, c1)    '..21 (rect-disc)
result = Collide(r1, r2)    '..22 (rect-rect)
The runtime dispatches on the types of both arguments simultaneously. Each combination of types maps to a different method specialization. This is genuine multiple dispatch -- the same mechanism found in CLOS and Julia, now available in ACE BASIC.
Inheritance
Classes support single inheritance with EXTENDS. Child classes inherit all parent members:
CLASS Shape
    LONGINT x
    LONGINT y
END CLASS

CLASS Rect EXTENDS Shape
    LONGINT w
    LONGINT h
END CLASS

CLASS ColorRect EXTENDS Rect
    LONGINT col
END CLASS
The memory layout follows the inheritance chain. Shape takes 12 bytes (4 for the type descriptor, 4 each for x and y). Rect adds w and h for 20 bytes. ColorRect adds col for 24 bytes. Parent members are always at the same offsets, so a Rect can be passed anywhere a Shape is expected.
Generic dispatch walks the parent chain. If a child class has no specialization for a generic function, the runtime walks up the inheritance tree until it finds one:
GENERIC LONGINT METHOD Info(CLASS)
    ON Shape
    ON Rect
END GENERIC

METHOD LONGINT Info(Shape s)
    Info = 1
END METHOD

METHOD LONGINT Info(Rect r)
    Info = 2
END METHOD

DECLARE CLASS Shape s1
DECLARE CLASS Rect r1
DECLARE CLASS ColorRect cr1

Info(s1)     '..returns 1 (direct match: Shape)
Info(r1)     '..returns 2 (direct match: Rect)
Info(cr1)    '..returns 2 (inherited: ColorRect -> Rect)
ColorRect has no Info specialization, so the runtime walks up: ColorRect -> Rect, finds a match, and dispatches there. If there were only a Shape specialization, a three-level walk (ColorRect -> Rect -> Shape) would find it.
Atom dispatch
The ATOM type (more on this below) can also participate in generic dispatch. This enables pattern matching on symbolic values mixed with class types:
CLASS Widget
    LONGINT id
END CLASS

CLASS Knob
    LONGINT id
END CLASS

GENERIC LONGINT METHOD React(CLASS, ATOM)
    ON Widget, #:click
    ON Widget, #:hover
    ON Knob, #:click
END GENERIC

METHOD LONGINT React(Widget w, #:click evt)
    React = 10 + w->id
END METHOD

METHOD LONGINT React(Widget w, #:hover evt)
    React = 20 + w->id
END METHOD

METHOD LONGINT React(Knob b, #:click evt)
    React = 30 + b->id
END METHOD

DECLARE CLASS Widget wg
DECLARE CLASS Knob bt
wg->id = 1
bt->id = 2

React(wg, #:click)    '..11
React(wg, #:hover)    '..21
React(bt, #:click)    '..32
Dispatch happens on both the class type and the atom value. This is a natural fit for event handling -- the class identifies the widget, the atom identifies the event kind.
TYPECASE
Related to the object system is TYPECASE, which provides type-based pattern matching with variable narrowing:
CLASS Animal
    LONGINT legs
END CLASS

CLASS Dog EXTENDS Animal
    LONGINT goodboy
END CLASS

SUB LONGINT CheckDog(Animal a)
  LONGINT result
  result = 0
  TYPECASE a
    CASE Dog
      result = a->goodboy
    CASE ELSE
      result = a->legs
  END TYPECASE
  CheckDog = result
END SUB

DECLARE CLASS Dog d
d->legs = 4
d->goodboy = 1

DECLARE CLASS Animal a
a->legs = 99

CheckDog(d)    '..returns 1 (matched Dog, reads goodboy)
CheckDog(a)    '..returns 99 (fell through to ELSE, reads legs)
Inside the CASE Dog branch, the variable a is narrowed to Dog type, so a->goodboy is accessible even though the SUB parameter is declared as Animal. The matching follows ISA semantics -- a Dog instance matches both CASE Dog and CASE Animal, so order matters. Put specific types first.
ATOM Type
Atoms are a new primitive type for lightweight symbolic constants. The literal syntax uses #: followed by a name:
ATOM status
status = #:ok

IF status = #:ok THEN
  PRINT "All good"
END IF
Atoms are compile-time constants that produce unique integer values via FNV-1a hashing. They are useful for tagging and dispatch -- anywhere you would otherwise define a set of CONST values. As shown above, atoms can also participate in generic method dispatch, which makes them especially powerful for event-driven patterns.
Atoms can also be dispatched on their own without classes:
GENERIC LONGINT METHOD Process(ATOM)
    ON #:ok
    ON #:fail
    ON #:retry
END GENERIC

METHOD LONGINT Process(#:ok result)
    Process = 1
END METHOD

METHOD LONGINT Process(#:fail result)
    Process = -1
END METHOD

METHOD LONGINT Process(#:retry result)
    Process = 0
END METHOD

Process(#:ok)      '..returns 1
Process(#:fail)    '..returns -1
Process(#:retry)   '..returns 0
IEEE 754 Floating Point
This is a breaking change, and a necessary one. ACE has used Motorola Fast Floating Point (FFP) since its original release in the early 1990s. FFP is a non-standard 32-bit format that was fast on the 68000 but is incompatible with everything else. No modern toolchain, library, or hardware uses it.
Version 3.0 migrates to IEEE 754 single-precision floating point throughout the compiler and runtime. All float literals, constants, and runtime operations now use the standard format. This means:
Float values are compatible with C libraries and OS functions that expect IEEE floats
The VBCC compiler (which replaced GCC in this release) handles IEEE floats natively
Math operations use the mathieeesingbas and mathieeesingtrans libraries instead of the FFP equivalents
Existing programs that rely on specific FFP bit patterns need to be recompiled
For most programs, recompiling is all that is needed. The syntax is identical -- SINGLE is still the type, and float literals look the same. The difference is under the hood. This change also fixed a crash when printing float values that was caused by K&R float parameter promotion mismatches between the FFP and IEEE calling conventions.
TASKPROC -- Multitasking Support
The Amiga is a multitasking operating system, and ACE can now launch Exec tasks. The TASKPROC keyword marks a zero-parameter SUB as a task entry point:
SUB BackgroundWork TASKPROC
  ' This runs as a separate Exec task
  ' Automatically saves/restores registers
  ' Calls Wait(0) before returning
END SUB
A TASKPROC SUB automatically saves and restores registers on entry and exit, and calls Wait(0) before returning to signal the parent that it is done. It takes no parameters and cannot be called directly from ACE code -- it is meant to be passed to the new taskutil.b submodule:
REM #using ace:submods/taskutil/taskutil.o

#include <submods/taskutil.h>

TaskLaunch("worker", @BackgroundWork, 4096)
' ... do other work ...
TaskTerminate("worker")
TaskLaunch creates an Exec task with the given name, entry point, and stack size. TaskGetData retrieves a task's data pointer for inter-task communication. TaskTerminate signals a task to shut down.
New Submodules
Version 3.0 ships seven new submodules. The most interesting ones build on the new object system.
Hashmap
The hashmap.b submodule implements a CLASS-based string-keyed hashmap with open addressing:
It supports iteration, a builder pattern, searching, higher-order functions, sorting, and automatic growth when elements are added beyond the initial capacity. Where the List submodule from v2.8 gives you linked-list semantics, Dynarray gives you indexed random access. More examples are in the submods/dynarray/ folder.
JSON
The json.b submodule is a complete JSON parser, generator, and pretty-printer. It uses Hashmap and Dynarray as its intermediate representation:
REM #using ace:submods/json/json.o
REM #using ace:submods/hashmap/hashmap.o
REM #using ace:submods/dynarray/dynarray.o

#include <submods/json.h>

ADDRESS root

root = JsonParse("{""name"":""ACE"",""version"":3,""features"":[""objects"",""ieee""]}")

PRINT JsonGetStr$(root, "name")     '..prints "ACE"
PRINT JsonGetLng&(root, "version")  '..prints 3

JsonPrettyPrint(root)
JsonFree(root)
Having JSON support means ACE programs can now parse configuration files, consume web API responses (using the HTTP client from v2.9), or generate structured output. The combination of HTTP client and JSON parser makes it possible to write practical network clients in ACE BASIC. More examples are in the submods/json/ folder.
Other submodules
fad.b (Files And Directories): Over 20 SUBs for file system operations -- existence checks, metadata queries, path manipulation, and directory iteration. Examples in submods/fad/.
iff.b: IFF ILBM picture loading, extracted from the built-in compiler commands into a standalone submodule.
testkit.b: Shared test assertion library used across all submodule test suites, eliminating duplicated test boilerplate.
Bounded String Operations
This is a safety improvement that happens under the hood. ACE's string operations (LET, MID$, LINE INPUT#, etc.) did not previously check destination buffer sizes. A string longer than the target buffer would silently overwrite adjacent memory -- the kind of bug that causes mysterious crashes hours later.
Version 3.0 adds bounded string operations at the runtime level. The compiler now emits the destination buffer size alongside string assignments, and the runtime's _strncpy and _strncat functions enforce the limit. This applies to string variable assignments, array element assignments, struct member assignments, and LINE INPUT# from files.
There is no syntax change. Existing code benefits automatically when recompiled.
Brief Mentions
VBCC Toolchain: The compiler build itself now uses the VBCC compiler instead of GCC. The runtime libraries have been rebuilt with VBCC as well. This simplifies the build process and aligns the whole toolchain around a single compiler.
EXIT WHILE / EXIT REPEAT: You can now break out of WHILE...WEND and REPEAT...UNTIL loops early, analogous to the existing EXIT FOR. A small quality-of-life addition.
FREE Statement: Per-block memory deallocation. FREE releases memory allocated by ALLOC for a specific block, while CLEAR ALLOC frees everything. This gives you finer control over memory lifetime.
SUB Tracing: The -t compiler flag and TRON/TROFF runtime commands let you trace SUB, FUNCTION, and METHOD entry and exit. Useful for debugging complex call chains and generic dispatch.
CyberGraphX Support: Screen mode 13 now also works with CyberGraphX in addition to Picasso96, broadening RTG hardware compatibility.
Struct SUB Parameters: You can now use struct type names directly as SUB parameter types (e.g. SUB Foo(MyStruct s)), and the compiler generates the pointer setup automatically. No more DECLARE STRUCT boilerplate at the top of every SUB that takes a struct.
Runtime Optimizations: Lookup tables, O(1) argument access, and dynamic allocation improvements in the runtime libraries.
Replaced ami.lib with amiga.lib: The custom ami.lib has been replaced with the standard amiga.lib for better compatibility, plus dedicated ace_clib.s and ieee_math.s modules for ACE-specific needs.
Conclusion
Version 3.0 is a very big release. The object system with classes, generic functions, and multiple dispatch turns ACE into a language where you can model problems with proper abstractions. The design follows the multimethod tradition -- classes define data, methods are standalone, dispatch happens at runtime based on actual types. IEEE 754 floats align ACE with every other toolchain and library in existence. TYPECASE and atoms provide clean pattern matching. The new submodules -- hashmap, dynarray, JSON -- show what the object system enables in practice. And bounded string operations make the runtime safer by default.
Combined with the HTTP client from v2.9, ACE can now fetch JSON from a web API, store the results in a hashmap, iterate with a dynamic array, and display them in a MUI interface. That is a long way from where this project started.
The project lives on GitHub. Bug reports and feature requests are welcome.
]]><![CDATA[ ACE BASIC - Structs RTG and More ]]>2026-02-16T01:00:00+01:00http://retro-style.software-by-mabe.com/blog/ACE+BASIC+-+Structs+RTG+and+MoreAnother round of updates
The previous posts covered ACE BASIC up to v2.8 -- closures, MUI, linked lists, and CubicIDE integration. Version 2.9 is out now with struct enhancements, new string functions, RTG graphics, tail-call optimization, an HTTP client, double-precision floats, and SAGA audio.
Struct Enhancements
Structs in ACE have been fairly basic until now -- flat collections of scalar and string fields. Version 2.9 changes that. Structs can now contain typed arrays, embed other structs, hold typed pointers to structs, reference their own type, and contain arrays of structs. This makes it possible to model real data structures without falling back to raw PEEK/POKE arithmetic.
Typed array members
Previously, only STRING could use the SIZE keyword to declare a fixed-size buffer inside a struct. Now any base type works:
STRUCT Packet
  BYTE header SIZE 4
  LONGINT values SIZE 10
  SHORTINT flags SIZE 8
  SINGLE coords SIZE 3
  STRING name SIZE 32
END STRUCT
Each array member reserves the appropriate amount of space inline in the struct. Access is through indexed notation:
DECLARE STRUCT Packet p

p->values(0) = 100&
p->values(1) = 200&
p->coords(0) = 1.5
p->coords(2) = 3.5

FOR i% = 0 TO 3
  p->header(i%) = 65 + i%
NEXT i%
The index can be a constant, a variable, or an expression. The compiler generates the correct element size multiplication and offset calculation automatically.
Nested structs
Structs can now embed other structs as members. The -> operator chains through the nesting:
STRUCT Vec2
  LONGINT x
  LONGINT y
END STRUCT

STRUCT Rect
  Vec2 topLeft
  Vec2 bottomRight
END STRUCT

DECLARE STRUCT Rect r

r->topLeft->x = 10&
r->topLeft->y = 20&
r->bottomRight->x = 100&
r->bottomRight->y = 200&
This also works with deeper nesting. A struct that embeds a struct that embeds another struct gives you three levels of -> chaining. The compiler resolves the offsets at compile time, so there is no runtime cost for the nesting.
Typed struct pointers
A struct member can be declared as a pointer to a specific struct type. This tells the compiler what type lives at the other end, so you can chain -> through the pointer:
STRUCT Inner
  LONGINT x
  LONGINT y
END STRUCT

STRUCT Outer
  Inner *ptr
  LONGINT z
END STRUCT

DECLARE STRUCT Outer o

o->ptr = ALLOC(SIZEOF(Inner))
o->ptr->x = 42&
o->ptr->y = 99&
Without typed pointers, you would have to store a plain ADDRESS, cast it manually, and use PEEK/POKE. With typed pointers, the compiler knows the layout and does the offset math for you.
Self-referential structs and struct arrays
A struct can contain a pointer to its own type, which is the classic building block for linked lists and trees:
STRUCT Node
  STRING name
  Node *next
END STRUCT
And you can embed a fixed-size array of structs inside another struct:
STRUCT Vec2
  LONGINT x
  LONGINT y
END STRUCT

STRUCT Polygon
  Vec2 pts SIZE 5
  LONGINT count
END STRUCT

DECLARE STRUCT Polygon poly

poly->pts(0)->x = 10&
poly->pts(0)->y = 20&
poly->pts(2)->x = 50&
The syntax poly->pts(i)->field combines struct array indexing with field access in a single expression. This is probably the most complex access pattern ACE supports now, and it works with variable indices and in loops.
New String Functions
Version 2.9 adds eleven new string functions. Here is a quick overview:
Function
Description
TRIM$ / LTRIM$ / RTRIM$
Strip leading/trailing whitespace
STARTSWITH / ENDSWITH
Test prefix or suffix (returns boolean)
RINSTR
Search for substring from the right
REPLACE$
Replace all occurrences of a substring
REVERSE$
Reverse a string
REPEAT$
Repeat a string N times
LPAD$ / RPAD$
Pad to a given width
FMT$
sprintf-style formatting
MID$ (statement)
In-place modification of a substring
The one I find most useful is FMT$. It works like C's sprintf but returns a BASIC string:
It supports %s, %d, %x, %c, and %% with up to eight arguments. This is much cleaner than concatenating strings with STR$ calls.
P96/RTG Screen Support
Until now, ACE only supported planar Amiga screens -- OCS, ECS, and AGA modes that use bitplane graphics. Version 2.9 adds Picasso96 retargetable graphics with a new screen mode 13. This gives you chunky (linear) framebuffers with 8, 15, 16, 24, or 32-bit color depth. It works on any P96-compatible hardware.
Opening a P96 screen is straightforward:
SCREEN 1, 800, 600, 8, 13
Mode 13 tells ACE to use P96 instead of the native chipset. The depth parameter sets the color depth in bits. For 8-bit screens, you get a 256-color palette just like AGA, but the framebuffer is chunky instead of planar. For HiColor and TrueColor depths, there is a new COLOR r,g,b syntax for direct RGB drawing.
All the standard drawing commands -- LINE, CIRCLE, PRINT, LOCATE -- work on P96 screens because Picasso96 patches the graphics library. But you can also write directly to the framebuffer via POKE for maximum speed:
' Get the chunky framebuffer address
bitmapAddr& = SCREEN(4)
frameAddr& = PEEKL(bitmapAddr& + 8)

' Write a pixel at (x, y) on an 8-bit screen
POKE frameAddr& + CLNG(y%) * CLNG(800) + CLNG(x%), colorIndex%
This opens up possibilities for software rendering, chunky-to-chunky blitting, and effects that would be painful on planar screens.
The following example combines direct framebuffer writes (the rainbow gradient) with OS drawing primitives (lines, rectangles, circles) on the same chunky buffer:
' P96 Chunky Screen - 800x600, 256 colors
SCREEN 1, 800, 600, 8, 13
WINDOW 1,"",(0,0)-(799,599),0,1

' Rainbow palette
FOR i% = 0 TO 253
  ' ... compute r%, g%, b% for rainbow gradient ...
  PALETTE i%, r%/255, g%/255, b%/255
NEXT

' Direct framebuffer fill with rainbow bars
bitmapAddr& = SCREEN(4)
frameAddr& = PEEKL(bitmapAddr& + 8)
FOR y% = 0 TO 599
  i% = (y% * 254) / 600
  FOR x% = 0 TO 799
    POKE frameAddr& + CLNG(y%) * 800& + CLNG(x%), i%
  NEXT
NEXT

' OS drawing on top: lines, circles, filled shapes
COLOR 255, 0
LINE (20,80)-(380,80)
CIRCLE (200,180),80
CIRCLE (200,180),60,,,,f
LINE (400,80)-(600,180),200,bf
Tail-Call Optimization
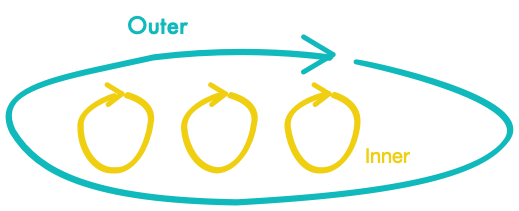
Recursive functions in ACE use the system stack. Each call pushes a frame, and if the recursion is deep enough, you run out of stack and crash. Version 2.9 adds automatic tail-call optimization (TCO) for self-recursive SUBs with numeric parameters. When the compiler detects that a recursive call is the last thing a SUB does, it replaces the call with a jump back to the top of the SUB, reusing the same stack frame.
Enable it with OPTION O+:
OPTION O+

SUB LONGINT Gcd(a&, b&)
  IF b& = 0 THEN
    Gcd = a&
  ELSE
    Gcd = Gcd(b&, a& MOD b&)
  END IF
END SUB

' This would overflow the stack without TCO
ASSERT Gcd(1000000, 3) = 1
Without TCO, Gcd(1000000, 3) requires around 333,000 recursive calls and would need roughly 48 KB of stack space -- well beyond the default. With TCO, it uses about 24 bytes regardless of depth.
The optimization works through the peephole optimizer. After the compiler generates the recursive JSR instruction, the peephole pass recognizes the pattern (restore frame, JSR to self, return) and replaces it with parameter shuffling and a BRA to the function entry. No parser changes were needed.
TCO only applies when the recursive call is in tail position -- there must be no computation after the call. The accumulator pattern is the standard way to write tail-recursive functions:
OPTION O+

SUB LONGINT Factorial(n&, acc&)
  IF n& <= 1 THEN
    Factorial = acc&
  ELSE
    Factorial = Factorial(n& - 1, n& * acc&)
  END IF
END SUB

result& = Factorial(12, 1)   '..479001600
HTTP Client
Version 2.9 ships an HTTP client submodule that provides networking from ACE BASIC. It supports HTTP and HTTPS (via AmiSSL), chunked transfer encoding, and streaming responses. The implementation is split into three submodules: tcpclient.b for raw TCP sockets, amissl.b for TLS, and httpclient.b for the HTTP protocol layer.
The API is struct-based. You declare connection and request/response structs, then call the appropriate functions:
#include <submods/httpclient.h>

DECLARE STRUCT TcpConn conn
DECLARE STRUCT HttpRequest req
DECLARE STRUCT HttpResponse resp

LONGINT status

' High-level: one-call HTTP HEAD
status = HttpHead(req, resp, conn, "http://www.google.com/")
PRINT "Status:"; status    '..prints 200
For more control, there is a low-level API that lets you open a connection, send a request, read headers, and read the body in chunks:
This is the first time ACE BASIC has any kind of network access built in. Fetching data from a web API, downloading files, or even posting data to a server is now possible from BASIC.
Brief Mentions
A few more additions worth noting:
DP-Float submodule: Double-precision floating-point math via the mathieeedoubbas and mathieeedoubtrans libraries. ACE's native SINGLE type uses Motorola Fast Floating Point (32-bit). The DP-Float submodule gives you 64-bit IEEE doubles with 32 functions covering arithmetic, trigonometry, hyperbolic functions, exponents, and string conversion. Originally written by David Benn (the creator of ACE), now integrated as an external submodule.
SAGA Sound submodule: 16-bit audio playback on Vampire V4 hardware using the SAGA chipset. Supports 16 channels, 8 or 16-bit samples, stereo volume control, and sample rates up to 56 kHz.
Turtle graphics moved to submodule: The 13 built-in turtle commands (FORWARD, BACK, TURNRIGHT, etc.) have been removed from the compiler and runtime. They now live in the turtle.b submodule. Existing programs just need to add #include <submods/turtle.h> and link the submodule. This keeps the compiler smaller and makes the turtle library easier to maintain independently.
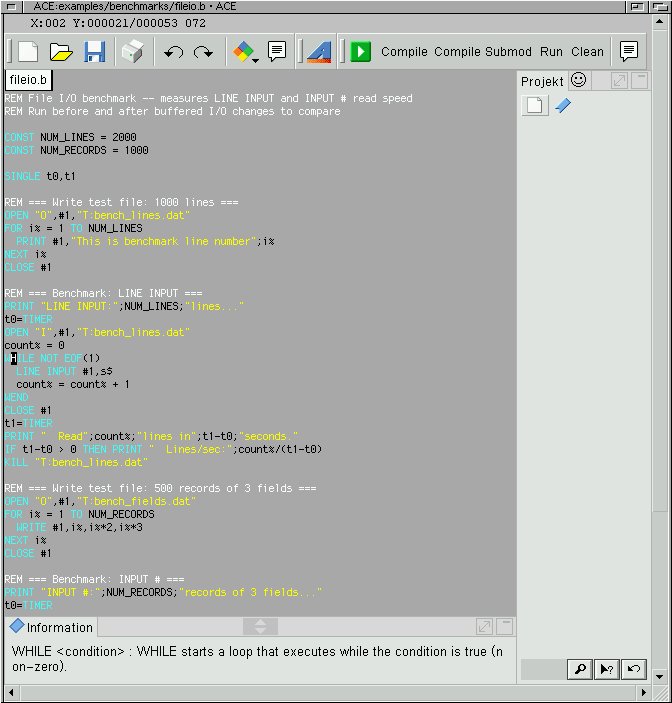
Buffered File I/O: The runtime functions behind LINE INPUT #, INPUT #, and INPUT$ now use bulk Read+Seek calls instead of reading one character at a time. This gives roughly 12x throughput improvement for file reading operations.
CubicIDE plugin improvements: The plugin now uses regedit for proper preset and filetype registration. The autocase dictionary, syntax highlighting, and quickinfo have been updated to cover all current keywords and functions.
Conclusion
Version 2.9 makes ACE BASIC significantly more capable for systems programming. Structs now support the kind of nesting and composition you need for working with OS data structures and building your own. RTG support opens up high-resolution, high-color graphics beyond the Amiga chipset. Tail-call optimization makes recursive algorithms practical. And the HTTP client brings network access to ACE BASIC for the first time.
The project lives on GitHub. Bug reports and feature requests are welcome.
]]><![CDATA[ Developing with AI - Understanding the Context ]]>2026-02-13T01:00:00+01:00http://retro-style.software-by-mabe.com/blog/Developing+with+AI+-+Understanding+the+ContextIntro
AI coding tools like Claude Code have become part of many developers' daily work. They can write code, run tests, search code, and handle complex tasks with many steps. But to use them well -- and to avoid surprises in the middle of a session -- you need to understand one key concept: the context window.
This post explains what the context is, how it works, why running out of it makes your results worse, and what you can do to stay in control.
What Is the Context?
Here is the key idea: the context is an array. It is a list of message objects on the client side. This list gets sent to the LLM with every single API call. The LLM itself has no state. It has no memory between calls. Everything it "knows" about your conversation is only there because the client sends it each time.
The array follows a strict pattern where user and assistant messages take turns:
The content field of each element can be a plain string or an array of typed content blocks. These blocks include:
Text blocks: The actual text from you or the assistant.
Tool use blocks: When the AI wants to read a file, run a command, or search your code, it creates a tool_use block with the tool name and its parameters.
Tool result blocks: After the tool runs, its output goes back into the array as a tool_result block in the next user message.
Thinking blocks: When extended thinking is turned on, the AI's reasoning steps show up as thinking blocks. These are large but get removed from older turns to save space.
There is also a system prompt that is sent along with the array but is not part of it. It holds the AI's main instructions -- what tools it has, how it should behave, what rules to follow. In Claude Code, this system prompt is quite large.
The key point to remember: this array is the AI's entire short-term memory. If something is not in the array, the AI does not know about it. If the array gets too long, older content gets shortened or removed. Every tool call, every file read, every command output -- it all goes into this array and takes up space.
CLAUDE.md -- Instructions That Stay in the Context
AI coding tools support project-level instruction files that get loaded into the context when a session starts. In Claude Code, this file is called CLAUDE.md. Other tools like Cursor use AGENTS.md or similar names, but the idea is the same.
When a Claude Code session starts, it reads CLAUDE.md files from several places:
Project root: ./CLAUDE.md -- shared with your team through version control.
User-level: ~/.claude/CLAUDE.md -- your personal settings for all projects.
Local overrides: ./CLAUDE.local.md -- personal, project-specific, not committed.
Auto memory: ~/.claude/projects/<project>/memory/MEMORY.md -- notes that Claude saves from earlier sessions.
These files are added to the context as system reminders. They stay there for the whole session and survive compaction (more on that below). This makes CLAUDE.md the right place for things that should never be forgotten: build commands, coding rules, architecture decisions, test strategies.
But there is a trade-off. Everything in CLAUDE.md uses context space on every API call. If you put 5,000 tokens of instructions in it, that is 5,000 tokens less for your actual conversation. So, keep it short. Only put things there that are always needed.
Context Window Limits
Every LLM has a maximum context window size -- the upper limit on how large the array can be. Current Claude models offer:
Model
Context Window
Max Output
Claude Opus 4.6
200K tokens
128K tokens
Claude Sonnet 4.5
200K tokens
64K tokens
Claude Haiku 4.5
200K tokens
64K tokens
There is also a 1M token beta for some models, but the default is 200K. That sounds like a lot, but it fills up faster than you might think. Let's look at what goes into the array during a typical session:
System prompt: ~10-15K tokens
CLAUDE.md files: 1-5K tokens
Each file you read: hundreds to thousands of tokens
Each tool call and result: different sizes, but it adds up fast
Each conversation turn: your message plus the AI's answer
Extended thinking: can be very large per turn (but gets removed from older turns)
A session where you read ten files, run a few commands, and have some back-and-forth can easily use 100K+ tokens. A complex session that touches many files can hit the limit within an hour.
What Happens When You Run Out: Compaction
When the context array gets close to the window limit, Claude Code triggers auto-compaction. This happens at about 83% of the context window (around 167K tokens for a 200K window). Here is what happens:
The system makes an extra API call asking the AI to summarize the whole conversation so far.
The summary replaces all previous messages in the array.
The conversation continues with just the summary as history.
This sounds fine in theory. In practice, compaction has real problems:
You will lose information. A summary cannot keep every detail. Specific variable names, exact error messages, careful decisions from earlier in the session -- these get shortened into approximations. The AI may "forget" things you decided earlier.
It costs money. The summary step is an extra API call using the same model. You pay for it.
The timing is hard to predict. Auto-compaction triggers based on token count, not at a good moment in your work. It might happen right in the middle of a complex change across many files, losing track of what was already done and what still needs doing.
Problems can get worse over time. If important instructions get lost during compaction, the AI may start making mistakes. Those mistakes create more context (error messages, corrections), which leads to more compaction, which loses more context. This is a downward spiral.
You can trigger compaction manually with /compact (and even guide it with /compact focus on the API changes). This gives you more control over what gets kept. But the basic problem stays: once context is compacted, the original details are gone.
The Goal: Stay Within the Context Window
The best strategy is simple: do not let compaction happen. If you can finish your task within the context window, the AI has full access to everything that was said and done during the session. No summaries, no lost details, no degradation over time.
This means being careful about how you use context:
Do not load whole files into the conversation if you only need a few functions. Point the AI at specific line ranges.
Use /context to check your usage. Know where you stand before starting a big task.
Be aware that MCP servers add tool definitions to every request. A few MCP servers can use a lot of context before you even write a single line.
Break large tasks into phases (see below).
A good rule of thumb: if you think your task will use more than 80% of the context window, split it into phases. If you are already at 95% and almost done, push through. Otherwise, plan for a clean context reset.
Multi-Phase Development with State Files
For tasks too large for a single context window -- a big refactoring, a new feature across many files, a migration -- I find the best approach is multi-phase development with state files.
The idea is straightforward:
Break the task into phases that each fit within a context window.
Keep a state file that holds everything needed to continue from one phase to the next.
Reset the context between phases by starting a new session and having the AI read the state file.
The state file is the key. It works as a handoff document that connects one context to the next. A good state file looks something like this:
# Project State: Auth Module Migration

## Goal
Migrate from session-based auth to JWT tokens across the API.

## Completed (Phase 1)
- Created JWT utility module at src/auth/jwt.ts
- Updated User model with refresh token field
- Added token generation to login endpoint
- Tests passing for jwt.ts (14/14)

## In Progress (Phase 2)
- Replacing session checks in middleware (3 of 7 routes done)
- Routes completed: /api/users, /api/projects, /api/settings
- Routes remaining: /api/billing, /api/admin, /api/webhooks, /api/export

## Decisions Made
- Using RS256 algorithm (asymmetric) for token signing
- Access token TTL: 15 minutes
- Refresh token TTL: 7 days
- Storing refresh tokens in database, not Redis

## Known Issues
- /api/admin has custom middleware that needs special handling
- Rate limiter depends on session ID; needs new key strategy

## Next Steps
1. Continue middleware migration for remaining routes
2. Update rate limiter to use JWT subject claim
3. Add token refresh endpoint
When you start a new phase, the conversation is fresh. The AI reads the state file, sees where things stand, and picks up where the last phase stopped -- without carrying the weight of everything that happened before.
This approach has several nice properties:
Each phase gets the full context window. No compaction, no degradation.
The state file is easy to read. You can check it, edit it, and fix mistakes before the next phase.
It works across sessions, machines, and even different AI tools. It is just a markdown file.
It forces you to think about how to split tasks. This usually leads to better results regardless of which tools you use.
You can ask the AI to create and update the state file as part of each phase: "Before we finish this phase, update the state file with what we did and what comes next."
Subagents: Separate Contexts for Parallel Work
Claude Code has another way to manage context well: subagents. These are separate AI instances that the main agent can give tasks to. The important thing is that each subagent runs in its own, separate context window.
When the main agent starts a subagent, here is what happens:
A new AI instance is created with a fresh, empty context.
The subagent only gets a task description and its own system prompt -- not the main conversation history.
The subagent works on its own: reading files, searching code, running commands, making many tool calls.
When done, the subagent sends back a short summary of what it found to the main agent.
Only that summary goes into the main agent's context array.
This is important: all the work the subagent did -- every file it read, every search it ran, every step of reasoning -- stays in the subagent's own context. It does not fill up the main context. The main agent only gets the final result.
Claude Code has several built-in subagent types:
Explore: Fast code search (runs on a smaller, faster model).
Plan: Research and design approaches (read-only, no file changes).
General-purpose: Complex tasks with many steps and full tool access.
Bash: Command execution in a separate context.
The main agent works as a coordinator. It decides when to hand off work, what to hand off, and how to use the results. You can even run several subagents at the same time -- for example, one searches for all uses of an old API while another reads the migration guide.
The practical benefit for context management is quite significant. Think of a task where you need to understand how authentication works across a large codebase. Without subagents, the main agent reads file after file, and each file goes into the main context. Twenty files later, you have used a huge part of your context window just for exploration.
With subagents, the main agent just hands off the work: "Explore the codebase and explain how authentication works." The Explore subagent reads those twenty files in its own context, puts the findings together, and sends back a two-paragraph summary. The main context gets those two paragraphs instead of twenty files worth of content. Pretty cool.
There are limits. Subagents cannot start other subagents (no nesting). And if many subagents return detailed results, those summaries still use main context space. But when used wisely, subagents are one of the best tools for keeping the main context lean.
Practical Tips
A few more strategies worth knowing:
Use CLAUDE.md for lasting context. Anything that should survive across sessions -- build commands, rules, architecture notes -- goes in CLAUDE.md. It is reloaded on every API call and survives compaction.
Manual compaction is better than auto-compaction. If you must compact, do it manually at a good stopping point (/compact) instead of letting it trigger at random. You can guide the summary: /compact focus on the database migration progress.
Use git as a checkpoint. Commit often during AI-assisted sessions. If context gets worse after compaction, you can always start a fresh session and point the AI at the git log to understand what happened.
Check usage with /context. This command shows you what is using space. Run it before starting a big task.
Structured data survives compaction better than prose. If you are tracking task lists or test results, use structured formats (markdown tables, JSON) instead of long descriptions.
Conclusion
The context window is the basic constraint of AI-assisted development. Understanding it -- knowing that it is an array on the client, that the AI has no state, that every interaction uses space, that compaction loses information -- changes how you work with these tools.
The most effective developers I have seen treat context like a limited resource. They plan their sessions, split large tasks into phases, use state files to pass information between phases, hand off exploration to subagents, and try to avoid hitting the compaction wall.
The tools are powerful. But they work best when you understand what is happening behind the scenes.
]]><![CDATA[ ACE BASIC - Closures MUI and More ]]>2026-02-10T01:00:00+01:00http://retro-style.software-by-mabe.com/blog/ACE+BASIC+-+Closures+MUI+and+MorePicking up where we left off
The previous two posts covered ACE BASIC v2.5 (AGA screen support) and v2.6 (GadTools gadgets, ASSERT, 68020 code generation). Development has not slowed down. Versions 2.7 and 2.8 bring functional programming features, a high-level MUI interface, Lisp-style linked lists, double-buffered graphics, and CubicIDE integration. There is a lot of ground to cover, so let's get started.
Closures and Function Pointers
The biggest language addition in v2.7 is support for function pointers, partial application, and closures. These are the building blocks for higher-order programming -- passing behavior around as data.
Function references and INVOKE
The @ operator takes a reference to a SUB and returns an address you can store and call later with INVOKE:
DECLARE SUB Hello

funcPtr& = @Hello
INVOKE funcPtr&

SUB Hello
  PRINT "Hello from a function pointer!"
END SUB
@Hello produces a long integer that holds the address of the Hello subroutine. INVOKE funcPtr& calls whatever SUB that address points to. This is the simplest form -- no arguments, no return value, just indirect dispatch.
BIND and partial application
Things get more interesting with BIND. It captures a function reference together with one or more arguments, producing a closure that remembers the bound values:
DECLARE SUB LONGINT AddN(LONGINT n, LONGINT x)

adder& = BIND(@AddN, 5)
result& = INVOKE adder&(10)
PRINT result&               '..prints 15

SUB LONGINT AddN(LONGINT n, LONGINT x)
  AddN = n + x
END SUB
BIND(@AddN, 5) creates a closure that captures 5 as the first argument to AddN. When you INVOKE adder&(10), it calls AddN(5, 10) and returns 15. The bound value is captured at bind time -- if you change the variable later, the closure still sees the original value.
This is partial application (sometimes called currying). You fix some arguments now and supply the rest later.
Returning closures from SUBs
You can create closures inside a SUB and return them to the caller. This is the classic "factory" pattern:
DECLARE SUB LONGINT AddN(LONGINT n, LONGINT x)
DECLARE SUB LONGINT MakeAdder(LONGINT n)

add5& = MakeAdder(5)
result& = INVOKE add5&(10)
PRINT result&               '..prints 15

SUB LONGINT MakeAdder(LONGINT n)
  MakeAdder = BIND(@AddN, n)
END SUB

SUB LONGINT AddN(LONGINT n, LONGINT x)
  AddN = n + x
END SUB
MakeAdder(5) returns a closure that adds 5 to whatever you pass it. The local variable n is captured by value inside the closure, so it survives after MakeAdder returns.
The INVOKABLE keyword
Version 2.8 adds the INVOKABLE keyword for SUBs that are meant to be used as callbacks -- particularly for the List library's higher-order functions and similar patterns where closures are passed as ADDRESS parameters:
DECLARE SUB LONGINT Transformer(LONGINT v) INVOKABLE

cb& = BIND(@Transformer)
result& = MapValue(cb&, 7)
PRINT result&               '..prints 14

SUB LONGINT Transformer(LONGINT v) INVOKABLE
  Transformer = v * 2
END SUB

SUB LONGINT MapValue(ADDRESS cb, LONGINT in)
  MapValue = INVOKE cb(in)
END SUB
When a closure is passed as a generic ADDRESS parameter (as cb in MapValue above), the compiler cannot know at compile time whether it points to a plain SUB or a closure with bound arguments. INVOKABLE generates the calling convention that allows INVOKE to detect this at runtime and do the right thing. Without it, passing a closure as a callback could silently produce wrong results.
Lisp-Style Linked Lists
Closures become genuinely useful when you have data structures that accept callbacks. Version 2.8 ships a List submodule that implements Lisp-style linked lists built from cons cells. Each cell holds a typed value (integer, long, single, string, or nested list) and a pointer to the next cell.
Building lists
The builder pattern provides a clean way to construct lists:
LNew starts a new list, LAdd& appends a long integer value, and LEnd returns the finished list. The & suffix indicates the type -- LAdd% for integers, LAdd! for singles, LAdd$ for strings, LAddList for nested lists.
You can also build lists directly with LCons& (prepend) or LSnoc& (append), but the builder pattern reads more naturally for most cases.
Higher-order functions
The real payoff is the set of higher-order functions that operate on lists using closures:
DECLARE SUB ADDRESS DoubleValue(ADDRESS carVal, SHORTINT typeTag) INVOKABLE
DECLARE SUB SHORTINT IsEven(ADDRESS carVal, SHORTINT typeTag) INVOKABLE
DECLARE SUB ADDRESS SumValues(ADDRESS acc, ADDRESS carVal, SHORTINT typeTag) INVOKABLE

ADDRESS nums, doubled, evens

'..Build a list: (1 2 3 4 5 6)
LNew
  FOR i% = 1 TO 6 : LAdd&(i%) : NEXT i%
nums = LEnd

'..Map: double every element -> (2 4 6 8 10 12)
doubled = LMap(nums, BIND(@DoubleValue))

'..Filter: keep only even numbers -> (2 4 6)
evens = LFilter(nums, BIND(@IsEven))

'..Reduce: sum all elements -> 21
LONGINT total
total = LReduce(nums, BIND(@SumValues), 0&)

LFree(nums)
LFree(doubled)
LFree(evens)

SUB ADDRESS DoubleValue(ADDRESS carVal, SHORTINT typeTag) INVOKABLE
  LONGINT lngVal
  lngVal = carVal
  DoubleValue = lngVal * 2
END SUB

SUB SHORTINT IsEven(ADDRESS carVal, SHORTINT typeTag) INVOKABLE
  LONGINT lngVal
  lngVal = carVal
  IsEven = (lngVal MOD 2 = 0)
END SUB

SUB ADDRESS SumValues(ADDRESS acc, ADDRESS carVal, SHORTINT typeTag) INVOKABLE
  LONGINT accLng, valLng
  accLng = acc
  valLng = carVal
  SumValues = accLng + valLng
END SUB
Every callback receives the cell's raw value as ADDRESS carVal and a type tag as SHORTINT typeTag. The type tag tells you what kind of value the cell holds (LTypeInt, LTypeLng, LTypeSng, LTypeStr, LTypeList). Since our list contains only long integers, the callbacks here just cast carVal to LONGINT directly. A generic callback would dispatch on typeTag to handle multiple types -- the test suite in the repository shows that pattern.
LMap applies a callback to every element and returns a new list. LFilter returns a new list containing only elements for which the callback returns non-zero. LReduce folds the list into a single value using an accumulator. All three take a BIND(@callback) closure, which is where the INVOKABLE keyword matters.
The submodule also provides LForEach for side-effecting iteration, and destructive variants LNmap and LNfilter that modify the list in place. The full API is documented in the [List submodule README].
MUI Support
MUI (Magic User Interface) is the standard third-party GUI toolkit on the Amiga. It provides object-oriented widgets with automatic layout, font sensitivity, user-customizable appearance, and a consistent look across applications. Most serious Amiga applications from the mid-1990s onward use MUI.
Version 2.7 adds a MUI submodule that wraps the raw MUI API into builder-style calls. To appreciate what it does, consider the alternative.
The raw approach
Programming MUI directly from ACE BASIC means working with tag arrays and MUI_NewObjectA calls. A minimal "Hello World" window takes around 150 lines of code: you allocate tag items, fill in tag IDs and values, create each MUI object by hand, set up notifications with DoMethodA, run the event loop, and dispose everything. The [SimpleMUI.b] example in the repository shows this approach in full.
The submodule approach
With the MUI submodule, the same program fits in about 30 lines:
#include <submods/MUI.h>

LIBRARY "intuition.library"
LIBRARY "utility.library"

ADDRESS app, win, grp, txt

MUIInit

txt = MUITextCentered("Hello from MUI!")

MUIBeginVGroup
    MUIGroupFrameT("Welcome")
    MUIChild(txt)
grp = MUIEndGroup

win = MUIWindow("Hello MUI", grp)
app = MUIApp("HelloMUI", "$VER: HelloMUI 1.0", win)

IF app <> 0& THEN
    MUINotifyClose(win, app, MUIV_Application_ReturnID_Quit)
    MUIWindowOpen(win)

    WHILE MUIWaitEvent(app) <> MUIV_Application_ReturnID_Quit
    WEND

    MUIDispose(app)
END IF

MUICleanup

LIBRARY CLOSE "utility.library"
LIBRARY CLOSE "intuition.library"
MUIInit opens muimaster.library. MUITextCentered creates a text object. MUIBeginVGroup/MUIEndGroup define a vertical layout group. MUIWindow and MUIApp wrap the objects into a window and application. The event loop calls MUIWaitEvent which blocks until something happens and returns an event ID. MUIDispose frees the entire object tree.
The pattern for buttons is similarly concise -- create them with MUIButton, set up click notifications with MUINotifyButton, and dispatch on event IDs in the loop.
The submodule currently provides wrappers for text, buttons, string and integer input fields, checkmarks, cycle gadgets, radio buttons, list views, horizontal and vertical groups, menus, tabs, and hooks. That covers most typical application GUIs.
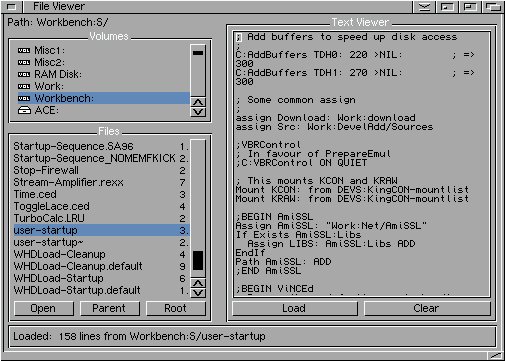
Here is a screenshot of the MUI File Browser example -- a more complete application built with the submodule:
Double-Buffered Graphics
When you draw directly to the visible framebuffer, the display can update mid-frame and show a partially drawn image. This is screen tearing, and it ruins any kind of smooth animation.
The classic solution is double buffering: draw to a hidden back buffer, then swap it with the visible front buffer during the vertical blank interval. Version 2.7 includes a DoubleBuffer.h include file that implements this entirely in ACE BASIC -- no compiler changes were needed.
How it works
On the Amiga, the hardware displays whatever bitmap the ViewPort's RasInfo points to, and drawing commands go to whatever bitmap the RastPort points to. Double buffering exploits this separation:
DbufInit allocates a second bitmap with AllocBitMap (matching the screen's dimensions and depth) and redirects the RastPort to draw into it.
DbufSwap makes the back buffer visible by updating RasInfo->BitMap and calling ScrollVPort to regenerate the copper list, then WaitTOF to sync with the vertical blank. Drawing is then redirected to the previously-displayed buffer.
DbufCleanup restores the original bitmap and frees the allocated memory.
The bitmap pointer swaps are done with POKEL -- direct memory writes to the RastPort and RasInfo structures at their documented offsets.
The bouncing ball demo
Here is the core animation loop from examples/gfx/dbuf_demo.b:
#include <ace/DoubleBuffer.h>

SCREEN 1,320,256,4,1
WINDOW 1,,(0,0)-(320,256),32,1

DbufInit

IF NOT DbufReady THEN
  PRINT "Failed to allocate back buffer!"
  WINDOW CLOSE 1
  SCREEN CLOSE 1
  STOP
END IF

SINGLE bx, by, dx, dy
bx = 160 : by = 128 : dx = 3 : dy = 2

WHILE INKEY$ = ""
  LINE (0,0)-(319,255),0,bf         '..clear back buffer
  bx = bx + dx : by = by + dy

  IF bx - 15 < 0 OR bx + 15 >= 320 THEN dx = -dx : bx = bx + dx
  IF by - 15 < 0 OR by + 15 >= 256 THEN dy = -dy : by = by + dy

  CIRCLE (CINT(bx), CINT(by)), 15, 2,,,,F   '..filled ball
  CIRCLE (CINT(bx), CINT(by)), 15, 1        '..outline

  COLOR 3
  LOCATE 1,1
  PRINTS "Double Buffer Demo - Press any key"

  DbufSwap                           '..swap and sync
WEND

DbufCleanup
WINDOW CLOSE 1
SCREEN CLOSE 1
Each frame: clear the back buffer, update positions, draw, swap. The ball bounces smoothly without any tearing.
One important gotcha: DbufCleanup must be called before SCREEN CLOSE. The second bitmap is allocated with the OS AllocBitMap call, which is not tracked by ACE's automatic cleanup. If you skip DbufCleanup, that memory leaks until reboot.
CubicIDE Integration
[CubicIDE] (also known as GoldEd Studio) is a popular programmer's editor on the Amiga. Version 2.8 ships with a CubicIDE plugin that adds:
Syntax highlighting for ACE BASIC source files (.b, .bas)
Quick help -- the bottom bar of the CubicIDE window shows the syntax of the BASIC command under the cursor
Source navigation in the sidebar for quick jumping between SUBs and functions
Toolbar buttons for compile, compile-and-run, and submodule compilation
Submodule linking is handled by the bas build script via REM #using <path> comments in your source. For example, REM #using ace:submods/mui/MUI.o at the top of your file tells bas to link the MUI submodule when compiling.
Brief Mentions
A few smaller additions worth noting:
YAP preprocessor: The legacy APP preprocessor has been replaced by YAP (Yet Another Preprocessor). YAP supports macros, conditional compilation, and include directives with a cleaner syntax. It is now the default for all #include and #define processing.
ELSEIF keyword: You can now write IF/ELSEIF/ELSE/END IF chains without nesting. A small quality-of-life improvement that reduces indentation in multi-branch logic.
Compiler refactoring: About 1,500 lines of duplicated code were removed from the compiler internals. This does not change any user-facing behavior, but it makes the codebase easier to maintain and extend going forward.
Conclusion
Versions 2.7 and 2.8 take ACE BASIC in a decidedly more modern direction. Closures and function pointers bring functional programming patterns to a language that has been purely imperative for 30 years. The List submodule demonstrates what that enables. MUI support makes sophisticated GUI applications practical. Double buffering rounds out the graphics story. And CubicIDE integration makes the development workflow smoother on the Amiga itself.
The project lives on [GitHub]. Bug reports and feature requests are welcome.
]]><![CDATA[ ACE BASIC - GadTools and More ]]>2026-01-31T01:00:00+01:00http://retro-style.software-by-mabe.com/blog/ACE+BASIC+-+GadTools+and+MorePicking up where we left off
In the previous post I introduced ACE BASIC v2.5 and its new AGA screen support. Since then, development has continued and version 2.6 is now available. This release focuses on three main areas: a high-level interface for GadTools gadgets, an ASSERT statement for defensive programming, and native 68020 code generation for faster arithmetic.
Let's dive in.
GadTools Gadget Support
GadTools is an Amiga system library that provides standardized, Intuition-aware gadgets with a modern look and feel. Before v2.6, using GadTools from ACE required about 230 lines of boilerplate code: opening libraries, setting up visual info structures, creating gadget lists, and carefully managing memory. Now, all of that is handled by a single GADGET statement.
The new syntax supports these gadget types:
Type
Description
BUTTON_KIND
Push button
CHECKBOX_KIND
Boolean checkbox
INTEGER_KIND
Numeric input field
STRING_KIND
Text input field
LISTVIEW_KIND
Scrollable list
MX_KIND
Mutual-exclude radio buttons
CYCLE_KIND
Dropdown cycle gadget
PALETTE_KIND
Color palette chooser
SCROLLER_KIND
Scroll bar
SLIDER_KIND
Horizontal or vertical slider
TEXT_KIND
Read-only text display
NUMBER_KIND
Read-only numeric display
Each gadget is created with a single line that specifies its ID, position, type, and any GadTools tags for customization.
Note: ACE already had a GADGET command for legacy Intuition gadgets. The syntax is similar but not identical. Legacy gadgets use numeric types (1=BUTTON, 2=STRING, 3=LONGINT, 4=POTX, 5=POTY) and numeric style parameters. GadTools gadgets use _KIND constants and flexible TAG=value pairs for configuration. They also require a label parameter and provide the modern 2.0+ look. Both syntaxes remain available -- use legacy gadgets for simple cases or Kickstart 1.x compatibility, and GadTools gadgets for richer interfaces on AmigaOS 2.0+.
Example: A GadTools GUI
Let's walk through a complete example that creates a window with a slider, a string gadget, and a button. This is based on [examples/gui/GTGadgets.b] in the ACE distribution.
Setting up constants
First, we define constants for our gadget IDs and the window close event:
Each gadget needs a unique ID so we can identify which one triggered an event. The special value 256 indicates that the user clicked the window's close button.
This opens window 1 with the given title, positioned at (0,0) with a size of 400x100 pixels. The flags value 30 enables the close button, drag bar, depth gadget, and sizing gadget.
Setting the gadget font (optional)
GADGET FONT "topaz.font", 8
The GADGET FONT command specifies which font GadTools should use for rendering gadget labels and text. Here we use the classic Topaz 8-point font. If omitted, the system default font is used.
ID: The gadget's unique identifier (our constants)
State: ON to enable or OFF to initially disable the gadget
Label: Text displayed next to the gadget
Position: Bounding rectangle as (left,top)-(right,bottom)
Type: One of the _KIND constants
Tags: Optional GadTools tag=value pairs for customization
The slider uses GTSL_Min, GTSL_Max, and GTSL_Level to set its range and initial value. The GTSL_LevelFormat tag displays the current value using printf-style formatting. The string gadget uses GTST_String for its initial content and GTST_MaxChars to limit input length.
GADGET WAIT 0 blocks until the user interacts with a gadget or the window. The parameter 0 means wait indefinitely. After an event, GADGET(1) returns the ID of the gadget that was activated. For sliders and string gadgets, GADGET(3) and GADGET(2) return the current numeric value and string content respectively.
The CASE statement dispatches based on which gadget triggered the event. When the slider changes, we show its value in a message box. When the user presses Enter in the string gadget, we display what they typed. The button just beeps, and the window close event sets the termination flag.
Cleanup
Finally, we close everything in reverse order:
GADGET CLOSE GAD_BUTTON
GADGET CLOSE GAD_STRING
GADGET CLOSE GAD_SLIDER
WINDOW CLOSE 1
END
That's it -- a complete GadTools GUI in about 30 lines instead of 230.
Runtime attribute access
Version 2.6 also adds GADGET SETATTR and GADGET GETATTR for modifying gadget properties at runtime:
GADGET SETATTR GAD_SLIDER, GTSL_Level=10   ' Set slider to 10
level& = GADGET GETATTR(GAD_SLIDER, GTSL_Level)  ' Read current value
This allows dynamic UI updates without recreating gadgets.
The ASSERT Statement
Defensive programming is about catching errors early. The new ASSERT statement helps with that:
ASSERT expression [, "message"]
If the expression evaluates to false (zero), ACE halts execution and prints an error message. If the expression is true (non-zero), execution continues silently.
SUB ProcessData(ADDRESS buffer, LONGINT size)
  ASSERT buffer <> 0, "ProcessData: buffer cannot be null"
  ASSERT size > 0, "ProcessData: size must be positive"

  ' ... proceed with processing
END SUB
When an assertion fails, you get immediate feedback about what went wrong and where. The optional message string helps identify the problem without needing a debugger.
ASSERT is particularly useful during development. You can sprinkle assertions throughout your code to verify invariants, check preconditions, and catch logic errors before they cause mysterious crashes. In production, the assertions serve as documentation of your assumptions.
68020 Code Generation
The Motorola 68000 CPU in the original Amiga does not have native 32-bit multiply and divide instructions. ACE works around this by calling library routines for these operations. This works, but it is slow.
The 68020 and later processors (68030, 68040, 68060, and the Vampire accelerators) do have native 32-bit arithmetic instructions: MULS.L, DIVS.L, and DIVSL.L. Version 2.6 can now generate these directly.
To enable 68020 code generation, compile with the -2 flag:
ace -2 myprogram.b
When should you use this? If your target hardware is an A1200, A3000, A4000, or any accelerated Amiga, the -2 flag can significantly speed up integer-heavy code. Loops with multiplication or division inside see the biggest gains -- the native instructions are several times faster than the library calls.
Here is a simple benchmark:
DEFLNG a-z

start& = TIMER
FOR i = 1 TO 1000000
  result = i * 7 / 3
NEXT i
elapsed& = TIMER - start&

PRINT "Time: "; elapsed&; " ticks"
On a 68060 at 50 MHz, this loop runs about 3x faster when compiled with -2. On a Vampire V4 the difference is even more pronounced because the FPGA-based CPU executes the native instructions very efficiently.
Note that executables compiled with -2 will not run on a stock 68000 machine. If you need to support all Amigas, compile without the flag and accept the slower library calls. If you know your audience has accelerated hardware, use -2 for the extra speed.
What's Coming in v2.7
Development continues. Here is a preview of what's planned for version 2.7:
MUI (Magic User Interface): High-level support for MUI, the popular object-oriented GUI toolkit for AmigaOS. MUI offers sophisticated widgets, automatic layout, and a consistent look across applications.
INVOKE and BIND: These new statements enable functional programming patterns. BIND captures the current value of variables and associates them with a subroutine, and INVOKE calls it. This is effectively currying rather than true closures -- the bound values are captured at bind time and do not reflect later changes to the original variables. True closure semantics may be added in a future version.
Bug fixes: As always, various fixes and improvements based on user feedback.
Conclusion
ACE v2.6 makes GUI programming dramatically easier with built-in GadTools support, adds ASSERT for catching bugs early, and offers 68020 code generation for faster arithmetic on accelerated hardware. Combined with the AGA support from v2.5, ACE is becoming a capable tool for modern Amiga development.
The project lives on [GitHub]. Bug reports and feature requests are welcome.
]]><![CDATA[ ACE BASIC - AGA Screen Support ]]>2026-01-27T01:00:00+01:00http://retro-style.software-by-mabe.com/blog/ACE+BASIC+-+AGA+Screen+SupportA bit of history
ACE is a freely distributable AmigaBASIC compiler originally written by David Benn. It takes BASIC source code and produces Motorola 68000 assembly, which is then assembled and linked into a native Amiga executable. ACE supports a large subset of AmigaBASIC and adds many features on top: recursion, structures, turtle graphics, shared library access, subprogram modules, and more.
The last official release was in 1998. After that, ACE went silent.
Last year I was looking for a high-level language to program on the Amiga. I evaluated BlitzBasic and a few other BASIC dialects, but ACE stood out. It is simple, produces standalone executables, and gives you direct access to the Amiga operating system. I tried a few things, liked what I saw, and just recently decided to pick up development. The project now lives on [GitHub] (please file tickets there if you find any bugs).
What's new in v2.5
Version 2.5 is the first release under the new stewardship. Here is a summary of what changed:
AGA Screen Support (modes 7-12): Full support for AGA chipset screens with up to 256 colors (8-bit depth), including HAM8 modes.
Modern toolchain: vasm and vlink replace the legacy a68k assembler and blink linker.
FFP/vbcc compatibility fix: Fixed Motorola Fast Floating Point handling in the runtime library for vbcc compatibility.
GNU Makefile build system: New Makefiles replacing the old AmigaDOS build scripts.
Project housekeeping: Directory restructuring, documentation consolidated, and a test suite with 35 test cases covering syntax, arithmetic, floats, and control flow.
The most visible new feature is AGA support, so let's look at that in more detail.
AGA Screen Support
AGA (Advanced Graphics Architecture) is the Amiga's third-generation chipset, found in the A1200, A4000, and CD32. It supports screen modes with up to 256 colors from a 24-bit palette (8 bitplanes), as well as HAM8 which can display up to 262,144 colors.
Previous versions of ACE only supported OCS/ECS screen modes (modes 1-6) with a maximum of 32 colors (5 bitplanes). Version 2.5 adds six new modes:
Mode
Description
Max Colors
7
Lores AGA
256
8
Hires AGA
256
9
Super-Hires AGA
256
10
HAM8 Lores
262,144
11
HAM8 Hires
262,144
12
HAM8 Super-Hires
262,144
A new CHIPSET function allows runtime detection of the installed chipset (0 = OCS, 1 = ECS, 2 = AGA), so programs can check for AGA before attempting to open an AGA screen. The PALETTE command now works with all 256 color registers using 24-bit precision via the system's SetRGB32() call on AGA hardware.
Example: 256 colors on an AGA screen
Let's walk through a complete example that opens an AGA screen and displays all 256 colors as gradient bars.
Checking for AGA
First, we check whether the machine actually has an AGA chipset. If not, the program prints a message and stops.
DEFLNG a-z

IF CHIPSET < 2 THEN
  PRINT "This demo requires AGA chipset."
  PRINT "Please run on A1200, A4000, or CD32."
  STOP
END IF
CHIPSET returns 0 for OCS, 1 for ECS, and 2 for AGA. The DEFLNG a-z directive at the top makes all variables default to long integers, which is generally a good idea for performance on the 68000.
Opening the screen
Next, we open a 256-color AGA lores screen:
SCREEN 1,320,200,8,7
The parameters are: screen ID (1), width (320), height (200), depth (8 bitplanes = 256 colors), and mode (7 = AGA lores). Under the hood, ACE uses OpenScreenTagList() with the appropriate AGA mode ID to set up the screen.
Setting up the palette
With 256 color registers available, we set up four gradient ramps: red, green, blue, and gray. Each gradient uses 64 colors.
'..Colors 0-63: Red gradient
FOR i = 0 TO 63
  PALETTE i, i/63, 0, 0
NEXT i

'..Colors 64-127: Green gradient
FOR i = 0 TO 63
  PALETTE i+64, 0, i/63, 0
NEXT i

'..Colors 128-191: Blue gradient
FOR i = 0 TO 63
  PALETTE i+128, 0, 0, i/63
NEXT i

'..Colors 192-255: Gray gradient
FOR i = 0 TO 63
  PALETTE i+192, i/63, i/63, i/63
NEXT i
The PALETTE command takes a color index and three floating-point values for red, green, and blue intensity in the range 0.0 to 1.0. On AGA hardware this maps to full 24-bit color precision via SetRGB32(). On OCS/ECS the same command uses SetRGB4() with only 12-bit precision.
Drawing the color bars
We open a borderless window on the screen and draw four horizontal bars, one for each gradient:
WINDOW 1,,(0,0)-(320,200),32,1

PRINT "AGA 256-Color Demo"
PRINT "Mode 7: 320x200, 8 bitplanes"
PRINT

'..Red bar
FOR c = 0 TO 63
  COLOR c
  LINE (c*5,50)-(c*5+4,70),,bf
NEXT c

'..Green bar
FOR c = 0 TO 63
  COLOR c+64
  LINE (c*5,80)-(c*5+4,100),,bf
NEXT c

'..Blue bar
FOR c = 0 TO 63
  COLOR c+128
  LINE (c*5,110)-(c*5+4,130),,bf
NEXT c

'..Gray bar
FOR c = 0 TO 63
  COLOR c+192
  LINE (c*5,140)-(c*5+4,160),,bf
NEXT c
COLOR sets the current drawing color to a palette index. LINE (x1,y1)-(x2,y2),,bf draws a filled rectangle (the bf flag stands for "box fill"). Each bar consists of 64 small rectangles, each in a slightly different shade.
Waiting and cleanup
Finally, we wait for a keypress and close everything:
COLOR 255
LOCATE 23,1
PRINT "Press any key to exit";

WHILE INKEY$="":SLEEP:WEND

WINDOW CLOSE 1
SCREEN CLOSE 1
The SLEEP in the wait loop is important -- without it the program would busy-wait and hog the CPU. On the Amiga, being friendly to other tasks matters.
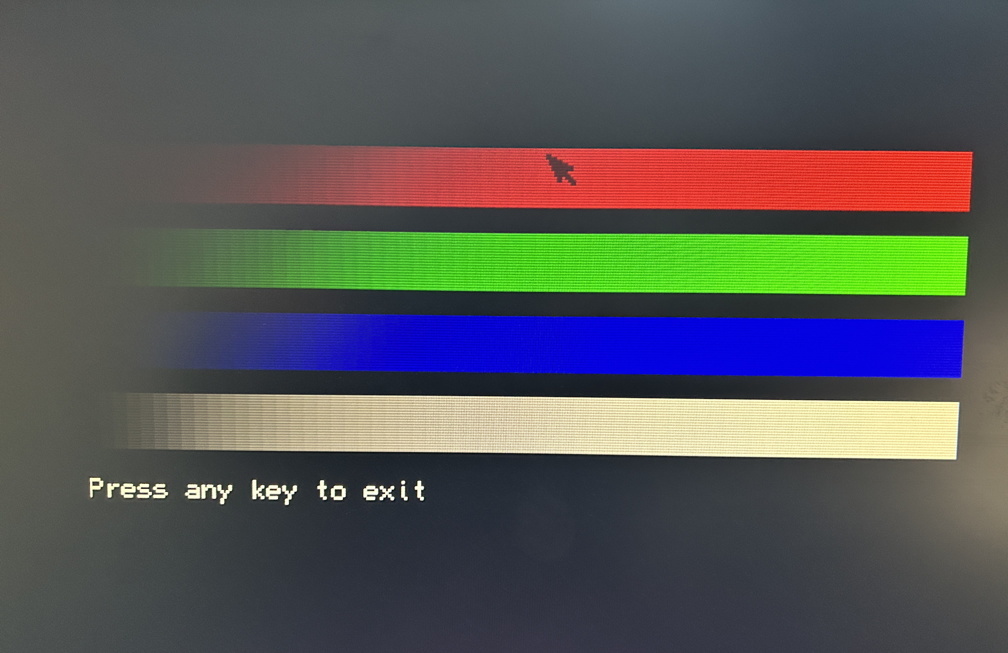
Here is a screenshot of the demo running on a Vampire V4SA:
Conclusion
AGA support in ACE v2.5 opens up 256-color and HAM8 screen modes for BASIC programmers on A1200, A4000, and CD32 hardware. Combined with runtime chipset detection, programs can gracefully handle different Amiga configurations while taking advantage of the more capable hardware when available.
There is more to come. Version 2.6 already adds GadTools gadget support, an ASSERT statement, and native 68020 code generation. But that is a topic for another post.
]]><![CDATA[ Polymorphism and Multimethods ]]>2023-03-02T01:00:00+01:00http://retro-style.software-by-mabe.com/blog/Polymorphism+and+MultimethodsPolymorphism
What is Polymorphism and what is it useful for?
In OOP (Object-Oriented Programming) polymorphism is well-known. It allows to separate an interface from multiple implementations that can have different behaviour.
Polymorphism comes from the greek polús (many) and morphe (form). Multiple forms, makes sense.
Unless a variable, defined to an interface, is statically wired (using new in Java) the concrete object referenced by the variable is not known at compile time. So, which polimorphic method of the interface is called is determined at runtime. This is called dynamic dispatch.
Let's make a simple example in Scala:
trait IPerson {
  def sayHello()
}

class Teacher extends IPerson {
  override def sayHello() {
    println("Hello, I'm a teacher.")
  }
}

class Pupil extends IPerson {
  override def sayHello() {
    println("Hello, I'm a pupil.")
  }
}

class Student extends IPerson {
  override def sayHello() {
    println("Hello, I'm a student.")
  }
}
This implements three different persons which say 'hello' in a different way. The beauty with this is that when you have an object that is of type IPerson you don't need to know which concrete implementation it is. It usually is sufficient to know that it supports saying hello by calling sayHello. This abstraction is great because it allows a decoupling of the interface and the concrete implementations which may even be defined in different areas or modules of the application sources.
OO languages like Scala, Java, C#, etc. combine data and behaviour in classes. An additional step in separation and decoupling is to separate data and behaviour. While that is possible in OO languages it is often not the norm, and once the language allows to mix data (state) and behaviour into classes it needs a lot of discipline to refrain from it.
Other languages separate data from behaviour naturally, which enables more decoupled design because data and behaviour can develop orthogonally. Many of those languages implement polymorphism with a concept called multimethods.
Multimethods
I choose Common Lisp as representative to show multimethods (because I like Lisps and this one in particular :), but also Groovy, JavaScript, Python or other languages support multimethods either natively or via libraries.
Single dispatch
In Common Lisp multimethods are implemented as generic functions. Common Lisp in general has a very powerful object system.
As a first step we create the classes used later in the dispatch:
(defclass person () ())  ;; base
(defclass teacher (person) ())
(defclass pupil (person) ())
(defclass student (person) ())
Similarly as the trait in Scala we first create a generic function definition:
(defgeneric say-hello (person))
Now we can add the concrete methods:
(defmethod say-hello ((person teacher))
  (format t "Hello, I'm a teacher."))

(defmethod say-hello ((person pupil))
  (format t "Hello, I'm a pupil."))

(defmethod say-hello ((person student))
  (format t "Hello, I'm a student."))
At this point we have a complete multimethod setup.
We can now call the methods and see if it works:
CL-USER> (say-hello (make-instance 'teacher))
Hello, I'm a teacher.

CL-USER> (say-hello (make-instance 'student))
Hello, I'm a student.
The runtime system will search for methods it can dispatch on based on a generic function definition. The method implementations can be in different source files or packages/namespaces which makes this extremely flexible. This lookup does come with a performance penalty though, but implementations often apply some kind of caching to mitigate this.
Multi dispatch
The above is a 'single dispatch' because the dispatching is based on a single parameter, the person class.
Multi dispatch can dispatch on multiple parameters. Let's extend the example a bit to show this:
(defgeneric say-hello (person time-of-day))

(defmethod say-hello ((person teacher) (time-of-day (eql :morning)))
  (format t "Good morning, I'm a teacher."))

(defmethod say-hello ((person teacher) (time-of-day (eql :evening)))
  (format t "Good evening, I'm a teacher."))

(defmethod say-hello ((person pupil) (time-of-day (eql :noon)))
  (format t "Good appetite, I'm a pupil."))

(defmethod say-hello ((person student) (time-of-day (eql :evening)))
  (format t "Good evening, I'm a student."))
Now we have a second parameter time-of-day which doesn't represent a time, but whether it is morning, noon or evening (or some other time of the day). Since time-of-day is not a class we have to use the eql specializer for the dispatching, but it could also be another class.
CL-USER> (say-hello (make-instance 'teacher) :evening)
Good evening, I'm a teacher.

CL-USER> (say-hello (make-instance 'teacher) :morning)
Good morning, I'm a teacher.

CL-USER> (say-hello (make-instance 'pupil) :noon)
Good appetite, I'm a pupil.
So looks like that the dispatching works, by taking both parameters into consideration. Of course this works also with more than two parameters.
The generic functions in Common Lisp have a lot more features than those simple examples. For instance, with method specializers :before, :after or :around it is possible to implement aspect oriented programming. However, this is not the topic of this post.
Conclusion
Multimethods and separating data from behaviour allows more decoupled code and a more data-driven programming paradigm. When the data is immutable we are closer in the realm of functional programming. Functional programming and data-driven programming have pros and cons which should be named and weighted when starting a new project.
]]><![CDATA[ Global Day of CodeRetreat - recap ]]>2022-11-07T01:00:00+01:00http://retro-style.software-by-mabe.com/blog/Global+Day+of+CodeRetreat+-+recapLast weekend was GDCR (Global Day of CodeRetreat).
This was my first physical visit since three years. I was looking forward to it.
It was a smaller event compared to my last visits, but not less interesting. On the contrary. With ~50 or maybe less people it felt more familial. Thank you for hosting.
To give a quick intro of what GDCR is: it is a day of learning. On this day, which is happening across the globe, you practice Test-Driven Development. Usually there are 4 or 5 session with each 45 minutes followed by a retro session. Every year, and in all sessions you implement Conway's Game of Life. You might think, how boring is that. In fact this thought also crosses my mind each time. But each time I realize that it is all but boring. Why is it not boring? A few things: for each session you pair with someone else. Each session you may use a different set of technologies (the visitor has to prep a laptop with ready tooling). This leads to different discussions in each session. Also, each session has slightly different constrains.
Let me tell a bit more about those really great 4 sessions I had:
To find pairs for the first session the strategy normally is to have all people stand in a row and let them sort themselves for the amount of years of experience in TDD. With 6-7 years I was more on the experienced side. Sometimes there are people doing this far longer, like this time there was one guy doing TDD since 2005. Then this line of people is folded in the middle so that for the first pair more experienced go together with less experienced.
The first
What a coincidence. Two Lispers got together on the first pair. :)
I think of all those ~50 people there were exactly two Lispers and those two got together for the first session. How is that.
So we were able to choose from Common Lisp, Lisp Flavoured Erlang, Emacs Lisp and Clojure. Since all of those variants are best coded in Emacs and I haven't seen too much of Emacs Lisp yet we settled on Emacs Lisp. That allowed a simple setup: just Emacs.
The guy I paired with didn't do too much TDD. Lisps usually have extremely interactive REPLs (Common Lisp is hard to beat here) that allow a very interactive and incremental development of code in the REPL which is then just copy to a source file. So the guy had experience with that. While this is nice, and I do it as well to try some code, it is problematic for the following reasons.
First, the code produced this way doesn't necessarily result in automated tests. Second, it's very hard to get the coverage right when writing tests after. In that regard, it's difficult to recreate the mind set and the context at the time of writing the production code. All the thoughts are lost which otherwise could be captured in tests as specs and documentation.
Lessons learned: tests provide spec and documentation. ert is a nice little test framework for Emacs.
The second
The second pairing was with someone who was more experienced in TDD. We did Scala with ScalaTest and the AnyFunSpec style where you do describe blocks with it children for each test. I had to realize that on the day to day work I got a bit lazy. In this session I was reminded that the strictness of TDD, to properly categorize and describe the tests is incredibly valuable.
The funny part of this session was: we were incrementally implementing the Game of Life rules. The handout contained four rules written down. After implementing those and doing the refactorings we had production code that was 2 lines long (compared to x times the test code). After creating a few more edge-case tests all tests remained green. We were looking at each other like: how is this possible? It can't be that simple code. Then the session was over. Later we realized that we indeed had forgotten a rule. However, we figured it was not part of the spec written on the handout, so all good. :)
Lessons learned: if there are no well described tests that capture the context and the specs it may be close to impossible to extract the spec and context from just the production code later, even with properly named function and variable names.
Lunch time
We had all great Pizza and talks over lunch... :)
The third
The third session was with someone who was an experienced developer who doesn't do TDD too much at work. Mostly he creates tests after. This was also a very interesting session. We did again Scala on my box. There was another constrained for this session: don't talk. (But we ignored it. :) With a language that at least one doesn't know it gets difficult and it's likely you don't get too much out of the session.)
What one was able to recognize is that in this session the tendency was to think too big. We were thinking too many steps ahead instead of just satisfying the test at hand. This happens to me as well sometimes even with TDD that you get stuck in writing production code for many many minutes. When that happens it is likely that you get lost in details. But this is much more likely to happen when you don't have a fast test cycle.
Lessons learned: try to make small increments. That's what TDD is for. Focus on the small thing at hand. This helps to reduce the complexity. Your brain has only so much capacity.
The fourth
I have to say the fourth session was one of the most interesting ones. The constraint was Object Calisthenics. So we should not use primitives like numbers, strings, etc., only one level of indentation, no else keywords, etc.
If you haven't seen it yet you might think: what? how else would I do programming if not with ints, longs, strings and such. Well, it's possible. You wrap them in types, and you make comparisons on types. A language with pattern matching is handy here. But let's get a little bit more concrete:
In Game of Life rules you have to make comparisons based on the number of living neighbour cells of a cell. 'Normally' you'd have comparisons like:
// the true/false defines the new state of the cell.
// does it live or die
if (livingNeighbours < 2) return false
if (livingNeighbours == 3) return true
...
Now, with the given constrains we can't do that. Instead we have looked at the input data and tried to categorize it. The categorization actually is:
case class NeighbourCategory(neighbourRange: (Int, Int))
object NeighbourCategory {
  // i.e. < 2 neighbours is under population.
  val UnderPopulation = NeighbourCategory((0, 1))
  // 2 or 3 neighbours is survival
  val Survival = NeighbourCategory((2, 3))
  // > 4 is over population
  val OverPopulation = NeighbourCategory((4, 9))
  // exactly 3 is resurection
  val Resurection = NeighbourCategory((3, 3))
}
Those categories as Scala types define the value sets of living neighbours for the comparison we have to make.
Additionally we defined the information whether a cell is alive, or dead like this:
case class CellState(value: Boolean)
object CallState {
  val Alive = CellState(true)
  val Dead = CellState(false)
}
Now, this allowed us to do the comparison just on those types, no numbers involved:
neighbourCategory match {
  case UnderPopulation => Dead
  case Survival => Alive
  ...
}
What benefits could this have?
We didn't actually touch too much the other restrictions because we just didn't get that far. Much of the value of those sessions is actually the approach and discussions of the approach.
Lessons learned: not using primitive types allows a better understanding of the domain. The domain is clearly written, it gets explicit. A reader of the code can more easily understand what this is about.
]]><![CDATA[ House automation tooling - Part 4 - Finalized ]]>2022-11-01T01:00:00+01:00http://retro-style.software-by-mabe.com/blog/House+automation+tooling+-+Part+4+-+FinalizedUpdate (5.2.2024):
The project around house automation has further taken shape and manifested in [Chipi].
Things went not as planned. But that's what plans are for, right? To change them.
I've planned to do small blog entries for the micro steps taken in development. I've created tags for many those steps in Git. But unfortunately due to private and business matters I couldn't find the time to do what and how I wanted.
But, I finished the tooling, and it is in production in my home doing its job, running 24/7 since a few months successfully. To recall, this tool captures temperatur/sensor data from a wood chip boiler and reports it to an openHAB system.
I've added a few additions to the original spec, i.e. I found it important to calculate averages of the captured values and report them additionally at specified time intervalls. See below for more info.
So, I'd like to finalize this blog series by writing about some best practices that I used as well as some obstacles I had to solve.
Sento (cl-gserver) works. Let's use more of actors
This was basically the first real world project that uses Sento.
There was one change I had to make to satisfy proper testing capability of the actor in use. That change required to ensure that the actor-system is fully shutdown and all actors stopped at the end of a test (as the last part of a test fixture). Actors not fully closed at the end of a test can interfere with the next test and can produce weird test results that are hard to debug.
Aside of that Sento works well. The tool uses one actor that exposes the complete public functions interface. While internally code is structured in multiple modules all functions are driven by messaging the actor. From opening the serial, reading and writing from/to serial, generating averages to reporting those values to openHAB.
The testing also works well. Even though Sento has no sophisticated test support like i.e. Akka has (TestKit) I think that this is not necessary. Sento is simple enough to allow exhaustive testing. Of course, since actors are (or can be) asynchronous, one has to probe for responses or state repeatedly.
Switching serial library
If you read the first blog post of the series I've settled on a serial library cl-libserialport. As it turned out, this library had a serious memory leak. After 1-3 days things stopped working and I had to restart the REPL. I've reported the issue to the maintainer (but unfortunately I wasn't able to test the fix). With some minor adaptions I could switch to cserial-port. This since works well.
Fix cl-mock with multi-threading support
If you look at the tests where I do Outside-In TDD a lot, I used mocking extensively. However, cl-mock didn't work well in multi-threaded environments. Function invocations were not properly captures when executed in a different threat than the test runner threat. But I was able to fix this issue and cl-mock now has multi-threading support. I think it's the only CL mocking library that has that.
Integration test using easy-routes
Eventually I was eager to add proper integration tests that can test also the HTTP reporting to openHAB. So I set up easy-routes, a REST routing framework based on Hunchentoot server. This library is easy and has a nice DSL. See the integ/acceptance test.
Additional features - generate and report average values
Instead of relying on openHAB to generate averages I thought why not do this here. This thing is running all the time, all values are passing though it. So why not capture or generate average data and submit those at specifed times. So this was an additional feature which already runs successfully in production. I've used cl-cron, a simple cron library to specify when and in which intervals average values are to be reported. This can be daily, weekly or so.
Testing
Of course the project was implemented using TDD and partially Outside-In TDD. Without having run a coverage tooling I'd say that the coverage should be very high. Testing asynchronous operations is not as straight forward as normal function/method calls. But it's not only that. The actor in my case did a fair bit of side-effects where a result can't be captured as message response. Even if some parts of the program were straight modules/packages with just pure functions, they were called as a side-effect from the higher-level business logic implemented as actor. In this case you can only verify and control what the business-logic does by setting up mocks that capture how the business-logic module 'drives' the subordinate modules. Sometimes people tend to confuse this with testing implementation detail. But this is not the case. It just verifies and controls the in- and output of the unit under test.
]]><![CDATA[ House automation tooling - Part 3 - London-School and Double-Loop ]]>2022-07-02T02:00:00+02:00http://retro-style.software-by-mabe.com/blog/House+automation+tooling+-+Part+3+-+London-School+and+Double-LoopLast post was more research and about prototyping some code related to how the serial communication can work using actors.
In this post we start the project with a first use-case. We'll do this using a methodology called "Outside-in TDD" but with a double test loop.
Outside-in TDD (London School)
There are a few variants of TDD. The classic one, which usually does inside-out, is called Classic TDD also known as "Detroit School", because that's where TDD was invented roughly 20 years ago. When you have a use-case to be developed, sometimes this is a vertical slice through the system maybe touching multiple layers, then Classic TDD starts developing at the inner layers providing the modules for the above layers.
Outside-in TDD also known as "London School" (because it was invented in London) goes the opposite direction. It touches the system from the outside and develops the modules starting at the outside or system boundary layers towards the inside layers. If the structures don't yet exist they are created by imagining how they should be and the immediate inner layer modules are mocked in a test. The test helps define and probe those structures as a first "user". Outside-in is known to go well together with YAGNI (You Ain't Gonna Need It) because it creates exactly the structures and modules as needed for each use-case, and not more. Of course outside-in TDD is still TDD.
Double loop TDD
Here we use outside-in TDD with a double test loop, also known as Double Loop TDD.
Double Loop TDD creates acceptance tests on the outer test loop. This usually happens on a use-case basis. The created acceptance test fails until the use-case was fully developed. Doing this has multiple advantages. The acceptance test can verify the integration of components, acting as integration test. It can also check against regression because the acceptance criteria are high-level and define how the system should work, or what outcome is expected. If that fails, something has gone wrong. This kind of test can be developed in collaboration with QA or product people.
Double Loop TDD was first explained in detail by the authors of the book Growing Object-Oriented Software, Guided by Tests. This book got so well-known in the TDD practicing community that it is just known as "GOOS".
Let's start with this outer test
Our understanding of the first use-case is that we send a certain command to the boiler which will instruct the boiler to send sensor data on a regular basis, like every 30 seconds. The exact details of how this command is sent, or even how this command looks like is not yet relevant. So far we just need a high-level understanding of how the boiler interface works. An expected result of sending this command is that after a few seconds an HTTP REST request goes out to the openHAB system. As a first start we just assume that there is a boundary module that does send the REST request. So we'll just mock that one. Later we might wanna remove all mocking from the acceptance test and setup a full web server that simulates the openHAB web server. It is likely that the acceptance test also goes over multiple iterations until it represents what we want and doesn't use any inner module structures directly.
(defvar *path-prefix* "/rest/items/")

(test send-record-package--success--one-item
  "Sends the record ETA interface package
that will result in receiving sensor data packages."
  (with-mocks ()
    (answer (openhab:do-post url data)
      (progn
        (assert (uiop:string-prefix-p "http://" url))
        (assert (uiop:string-suffix-p
                 (format nil "~a/HeatingETAOperatingHours" *path-prefix*)
                 url))
        (assert (floatp data))
        t))

    (is (eq :ok (eta:send-record-package)))
    (is (= 1 (length (invocations 'openhab:do-post))))))
So we're still at Common Lisp (non Lispers don't worry, Lisp is easy to read). Throughout the code examples we use fiveam test framework and cl-mock for mocking.
with-mocks sets up a code block where we can use mocks. The package openhab will be used for the openhab connectivity. So, however the internals work, eventually we expect the function do-post (in package openhab, denoted as openhab:do-post) to be called with an URL to the REST resource and the data to be sent. As our first iteration this might be OK. This expectation can be expressed with answer. answer takes two arguments. The first is the function that we expect to be called. We don't know yet who calls this and when, or where. It's just clear that this has to be called.
Effectively this is what we have to implement in the inner test loops. When this function is expressed like here (openhab:do-post url data) then cl-mock does pattern matching on the function arguments and it allows the arguments to be captured as variables url and data. This enables us to do some verification of those parameters in the second argument of answer, which represents the return value of do-post. So yes, we also define what this function should return here and now in this context. The return value of do-post here is t (which is like a boolean 'true' in other languages) as the last expression in the progn (progn is just a means to wrap multiple forms where only one is expected. The last expression of progn is returned). The assertions inside the progn do verify that the URL looks like we want it to look and that the data is a float value. Perhaps those things will later slightly change as we understand more of the system.
Sending data to openHAB is the expected side-effect of this use-case. The action that triggers this is: (eta:send-record-package). This defines that we want to have a package eta which represents what the user "sees" and interacts with (the UI of this utility will just be the REPL). So we call send-record-package and it should return :ok.
At last we can verify that do-post got called by checking the recorded invocations of cl-mock.
And of course this test will fail.
It is important that we go in small steps. We could try to code all perfect the first time, but that doesn't work out. Things will be too complex to get right first time. There will be more iterations and it is OK to change things when appropriate and when more things are better understood.
What's next
Next time we'll dive into the inner loops to satisfy those constrains we have setup here.
]]><![CDATA[ Modern Programming ]]>2022-05-14T02:00:00+02:00http://retro-style.software-by-mabe.com/blog/Modern+ProgrammingModern programming
Modern Programming is programming that is guided by tests and executed in small/micro steps, incremental and reversible by checking in (VC) each successful test. No production code is produced without a test. With small steps is not meant the small (once/twice a day) steps used for Continuous Integration but really steps that are in the range of a few minutes, with a lot of THINKing between them and maybe pairing with a peer to bounce ideas.
This stems from decades and years of experience in the agile and craftsman ship movement and communities.
It makes optimal use of tests as a tool where the tests guide the creation and structuring of code while providing immediate feedback, raising the quality bar for maintainable code and highly reduces the defect rate. Concentrating on small steps reduces the immediate mental load. And as a side-effect the tests provide a high test coverage.
Tests done right also act as documentation and example for how to use the created code.
However, wielding this tool in this way is not easy. There are many intricasies that are important to successfully apply this (which may take years to fully master). It requires control of your workflow. Who doesn't know how easy it is to get carried away and do too many changes at once (when you lost control). It requires knowledge of what good design is to refactor the design when the test code gives indications of bad design.
When this is modern, what is not modern then?
Everything else. There is no standard but many variants.
I would go through a few examples of experienced variants. This should be the norm in most companies in slight variations.
When I started working at my first employer during studies around the year 2000 and beyond automated tests in any incarnation effectively did not exist. I've written code and then tested all 'by hand' either alone or in the team until 'it worked'. Since I did work on micro controllers these days this was very time consuming. At that time I didn't know how to abstract and design code in a way to allow most of it to be unit tested and reduce manual testing even on hardware to a minimum.
This way of coding continued for 5 or 6 years also on various other platforms like macOS (Mac OSX at that time), Windows .NET, Java. After that I've experienced a variant where I thought that it might be good to at least partially write a few tests for code areas that would be good to know they work, because testing those manually was extremely inconvenient and time consuming and QA too often came back with findings that could have been caught. Those tests were not part of an automated suite. They were just run on demand. The tests did their work and I was impressed by their effectiveness. But still there was a lot of manual testing.
The next variant was in a phase where code quality and tests were more important. But tests were still an aftermath. I was working at a banking enterprise at that time. Tests were considered important, but were done after the fact and were not enforced. So you were developing code for 3 days and then writing tests for 3 days to back that code that you did write earlier. Quite unsatisfactory for my taste, and again, quite a waste of time because many parts probably have been manually tested already during development. Yes, those tests still have their advantage. Yet, it is likely that while writing those tests it turned out that they are hard to write and the code needs to be refactored partially to make it better testable.
When production code is written without the immediate feedback of a test it is very likely that the code ends up being difficult to test. Code that is difficult to test is difficult to maintain. The tests have this advantage to give a feedback if code is too coupled, uses too many collaborators, uses different levels of abstraction, etc. But it requires some skill and experience to listen to this feedback and use it for the better.
Returning to the light...
Another variant, that I did experience (and am still on my way to mastery on this) in the last 5 to 7 years, is that of the TDD world. I think Kent Beck isn't so lucky with naming his inventions (XP (eXtreme Programming) could be more popular if it had a different name, he said this himself some time ago). I think a better expression of what TDD is could be: "Development Guided by Tests" (thanks Allan Holub for coming up with this). The tight workflow of TDD is something Kent Beck invented. When done right (and that takes a bit of practice) it can unfold all those attributes that I mentioned in the first paragraphs.
The craftspeople all adopted this way of working to raise the quality bar of software.
During the last few years some additions to classic TDD were invented. I.e. there is the "London school" of TDD which advocates outside-in development. There is also ATDD (Acceptance TDD) which is similar to the double test loop TDD (that I blogged about).
Today all of those variants of programming are still in use. Companies of all sizes do one or the other variant, or a mixture. Often it's up to the developer.
Having said that, this mostly applies to (business) application development. For system development other optimized workflows may apply.
]]><![CDATA[ House automation tooling - Part 2 - Getting Serial ]]>2022-03-21T01:00:00+01:00http://retro-style.software-by-mabe.com/blog/House+automation+tooling+-+Part+2+-+Getting+SerialThe war in Ukraine is ongoing.
Stop the war and generally any violence against humans and animals and Gods creation.
Getting Serial
Last post I prepared Clozure CL on an iBook with MacOS X 10.4 (Tiger) including getting quicklisp ready. quicklisp is not absolutely necessary, but it helps. Otherwise all libraries that you want to use you have to download and load manually in the REPL.
In this post I'd want to check feasability and prepare the serial communication.
We'll do some CL coding and use the actor pattern for this prove of concept.
The adapter
This iBook as well as more modern computers don't have a Sub-D serial port adapter anymore. However, the device (the boiler) this software should communicate with has a 9 pin Sub-D connector. So we need a USB to serial adapter. There are a number of them available. But we also need drivers for this version of Mac OS. This one, a Keyspan (USA19HS) works with this version of Mac OSX and drivers are available.
Development peer
OK, in order to 'simulate' the boiler we use an Amiga 1200, which still has a serial port and a nice software called 'Term' which allows to act as a serial peer for development. The application 'Term' has an Amiga Rexx (ARexx) scripting interface which allows to script behavior in Term. In the end this could be handy to create a half-automated test environment for system tests.
However, for now we only do feasability work to figure out if and how the serial library works in order to plan a bit ahead what has to be done in the serial interface module of the automation tool. This should be the only (sort of) manual testing. From there we structure the code in a way to abstract the serial interface in order to fake or mock the serial communication which allows an easier and faster feedback loop for development.
(Since the Amiga has a 25 pin Sub-D interface but the Keyspan adapter has a 9 pin interface I had to build a 25<->9 pin converter. Of course I could have bought it but I like doing some soldering work from time to time.)
The Common Lisp serial interface library
There are two CL libraries based on FFI (Foreign Function Interface) that would work. I've experimented with both.
In my opinion cl-libserialport offers a few more features and I'd settle on it. I.e. it allows to specify a termination character for the read operation where when received the read will automatically return.
The disadvantage, cl-libserialport requires an additional C shared library (libserialport) to exist in the system which has to be installed first. cserial-port also uses FFI but works with existing POSIX/Windows library calls. cl-libserialport is actually a CL layer on top of libserialport.
On my development machine I can just install this library via Homebrew. On the target machine (the iBook) I had to download and compile the library. But it is straight forward and not more than: autogen.sh && make && make install.
cl-libserialport is not on quicklisp, so in order to still load it in the REPL via quicklisp we have to clone it to ~/quicklisp/local-projects, then quicklisp will find it and load it from there. Btw: this is a nice way to override versions from the quicklisp distribution.
With all the additional work for cl-libserialport (which is actually not that much and a one-time effort) I hope it pays off by being easier to work with.
Prototyping some code
The boiler serial protocol will require to send commands to the boiler, and receive sensor data. One of the commands is a 'start-record' command which instructs the boiler to start sending data repeatedly every x seconds until it received a 'stop-record' command. Since it is not possible to send and receive on the serial device at the same time we have to somehow serialize the send and receive of data. One way to do this is to use a queue. We enqueue send and read commands and when dequeued the command is executed. Now, this cries for an actor. Fortunately there is a good actor library for Common Lisp called cl-gserver which we can utilize for this and hack together some prove of concept. (Though if I read correctly then libserialport internally uses semaphores to manage concurrent access to the device resource. Nontheless I'd like to use an actor.)
For this we have to implement to initialize the serial interface, set the right baud value and such. Then we want to write/send and read/receive data.
The initialization, opening the serial device can look like this:
The opened serial device will be stored in *serport*. The baud rate we need is 19200 and there should be no flow control and such. Just plain serial communication.
The read function utilizes the termination character because I know already that the boiler data uses start and end characters { and }. The timeout is used to terminate the read command in case there is no data available to read. When we queue the commands and there is a write after a read we have a delay for the write not longer than 2 seconds. This might be acceptable in production because sending new commands doesn't need to be immediate.
Now let's see how the actor can look like in a simple way that can work for this example:
(defun receive (actor msg state)
  (case (car msg)
    (:init
     (open-serial))
    (:read
     (progn
       (let ((read-bytes (read-serial)))
         (when (> (length read-bytes) 0)
           (format t "read: ~a~%" read-bytes)
           (format t "read string: ~a~%" (babel:octets-to-string read-bytes))))
       (tell actor msg)))
    (:write
     (write-serial (cdr msg))))
  (cons nil state))

(defvar *asys* (asys:make-actor-system))
(defparameter *serial-act* (ac:actor-of
                            *asys*
                            :receive (lambda (a b c) (receive a b c))))
The last part creates the actor-system and a *serial-act* actor. Messages sent to the actor should be pairs of a key: :init, :read and :write, and something else. This something else is only used for :write to transport the string to be written and can be nil otherwise.
For the :receive key argument to the actor-of function we could just use #'receive, but then we couldn't make adjustments to the receive function and have it applied immediately when evaluated. The #'receive, which is actually (function receive), seems to pass a function symbol that is static which then doesn't take changes to the receive function into account.
To initialize the serial device we do:
(tell *serial-act* '(:init . nil))
To write to the serial device we do:
(tell *serial-act* '(:write . "Hello World"))
Having done that we see in the 'Term' application the string "Hello World". So this works.
The read has a speciality: sending '(:read . nil) will not only read from the device but also enqueue again the same command, because we want to test receiving data continuously but mixing in write, or other commands in between. This should reflect the reality pretty well.
When I type something in the 'Term' program the REPL will print the read data:
SERIAL> (tell *serial-act* '(:write . "Hello World"))
T
SERIAL> (tell *serial-act* '(:read . nil))
T
SERIAL>
read: #(13)
read string:
read: #(104 101 108)
read string: hel
read: #(108 111 32 102 114 111 109 32 116 101 114 109)
read string: lo from term
read: #(105 110 97 108)
read string: inal
read: #(125)
read string: }
; No values
SERIAL> (tell *serial-act* '(:write . "Hello World2"))
T
SERIAL>
read: #(102)
read string: f
read: #(111 111 125)
read string: oo}
; No values
So this seems to work. I need to think about the next step now. Since I'd like to develop outside-in with a double test loop the next thing to do is figure out a use-case and create a test for it that basically sets the bounds of what should be developed in smaller increments.
]]><![CDATA[ House automation tooling - Part 1 - CL on MacOSX Tiger ]]>2022-03-07T01:00:00+01:00http://retro-style.software-by-mabe.com/blog/House+automation+tooling+-+Part+1+-+CL+on+MacOSX+TigerIn light of the current events in the world - I mean the war in Ukraine, this article is totally not important.
Please stop this war and all wars in this world. Let's live together in peace. Let's be kind to one another.
The project
The goal of this project is to create a tool that can read sensor data from my ETA wood chip boiler (main heating) and push this data to my openHAB system. I use openHAB as a hub for various other data. It has database integrations and can do visualization from the stored data.
This ETA boiler has a serial interface where one can communicate with the boiler, retrieve temperatur and other data. It also allows to control the boiler, to a certain degree, by sending commands to it.
For the hardware I'd want to utilize an old PowerPC iBook I still have lying here. So, Common Lisp should run on this old version of Mac OSX 10.4 (Tiger), including a library that can use the serial port. The data will eventually be sent via HTTP to a REST interface of openHAB. For that we probably use drakma.
Does the tool need a GUI? I thought so, maybe to show the current sensor data, and to have buttons for sending commands. However, it turned out that a GUI is not that easy. I did look into TK (via LTK Common Lisp bindings), but that didn't work out-of-the-box on the pre-installed TCL/TK 8.4 version. Since I use CCL we probably could use the Cocoa bindings it provides. So maybe I'll do that as a last step. For now we just use the REPL. That should be fully sufficient as a UI.
In this first part of the project I'd want to choose the Common Lisp implementation and spend some time to get quicklisp and ASDF working in order to download and work with additional libraries that we may need in a convenient way.
TDD and the 'double loop'
Once this initial research and prove of concept (with CL on this hardware and the serial port) is done we'll continue with developing this tool guided by tests (TDD). Similarly as in this blog article we'll also try to do an outer acceptance test loop.
Finding the Common Lisp implementation
I've settled on CCL (Clozure Common Lisp). I did briefly look at an older version of SBCL but that went nowhere. CCL version 1.4 works nicely on this version of Mac OSX. Those older CCL versions can be downloaded here.
quicklisp and ASDF
Now, in order to have some convenience I'd want to have quicklisp work on this version of CCL. It doesn't work out-of-the box because of the outdated ASDF version.
When we go through the standard quicklisp installation procedure (quicklisp-quickstart:install) the installation attempt bails out at this error:
Read error between positions 173577 and 179054 in
/Users/manfred/quicklisp/asdf.lisp.
> Error: Could not load ASDF "3.0" or newer
> While executing: ENSURE-ASDF-LOADED, in process listener(1).
> Type :POP to abort, :R for a list of available restarts.
> Type :? for other options.
There is no restart available that could overcome this. At this point, however, we already have an unfinished quicklisp installation at ~/quicklisp.
We are thrown into the debugger because it seems that this version of CCL does not have an exported function delete-directory. But we have a restart available (2) that allows us to 'Create and use the internal symbol CCL::DELETE-DIRECTORY'. Choosing this restart we can overcome the missing function error. It is possible though that this will limit the functionality of quicklisp, or ASDF.
> Error: Reader error: No external symbol named "DELETE-DIRECTORY"
> in package #<Package "CCL"> .
> While executing: CCL::%PARSE-TOKEN, in process listener(1).
> Type :GO to continue, :POP to abort, :R for a list of available restarts.
> If continued: Create and use the internal symbol CCL::DELETE-DIRECTORY
> Type :? for other options.
? :R
>   Type (:C <n>) to invoke one of the following restarts:
0. Return to break level 1.
1. #<RESTART CCL:ABORT-BREAK #x294556>
2. Create and use the internal symbol CCL::DELETE-DIRECTORY
3. Retry loading #P"/Users/manfred/quicklisp/asdf.lisp"
4. Skip loading #P"/Users/manfred/quicklisp/asdf.lisp"
5. Load other file instead of #P"/Users/manfred/quicklisp/asdf.lisp"
6. Return to toplevel.
7. #<RESTART CCL:ABORT-BREAK #x294C0E>
8. Reset this thread
9. Kill this thread

:C 2
From here the compilation of ASDF can resume. When done we have a binary file right next to the lisp source file. We'll see shortly how to use it.
Now we have to finish our quicklisp installation by:
Ones this is through we can instruct quicklisp to create an init file for CCL and add initialization code for quicklisp to it. This init file is loaded by CCL on every startup. We can do this by calling:
(ql:add-to-init-file)
When this is done we can close the repl and modify the created ~/.ccl-init.lisp init file by adding:
#-asdf (load #P"~/quicklisp/asdf")
to the top of the file. This instruction will load the compiled binary of asdf (notice we use 'asdf' here instead of 'asdf.lisp' for the load function). The #- is a lisp reader instruction that basically says: if asdf is not part of *features* evaluate the following expression.
When the repl is fully loaded we can check *features*:
The library was fully loaded and compiled proper. Ready for use.
Next stop is getting the serial port working.
]]><![CDATA[ Common Lisp - Oldie but goldie ]]>2021-12-18T01:00:00+01:00http://retro-style.software-by-mabe.com/blog/Common+Lisp+-+Oldie+but+goldieThis article should be a brief introduction to Common Lisp. Brief, because Common Lisp is a rather large and complex system. It has many features. I will try to concentrate on the basics and some exceptional features that stand out for me. I started writing it for myself in order to understand certain concept better, like symbols. But it might be useful for others as well.
How did I come to Common Lisp
I have been working with various languages and runtimes since the start of my career 22 years ago. Beginning of 2019 I wanted to find something else to closely look into that is not JVM based (which I'm mostly been working with since close to 20 years starting with Java 1.1).
For some reason, which I can't recall, I haven't really been introduced to Lisps, ever. I also can't recall why 2019 I thought that I should take a look at Lisps. So I took a look at Clojure first. Clojure is a great language but it was again on the JVM. I wanted something native, or at least some other runtime. After some excursions to Erlang, Elixir and LFE (Lisp Flavoured Erlang, which all three are extremely interesting as well) and Scheme I finally found Common Lisp and didn't regret it.
Brief history
First drafts of Common Lisp appeared 1981/82. While mostly a successor of Maclisp it tried to unify and standardize Maclisp and the various other successors of Maclisp. In 1994 Common Lisp was an ANSI standard.
Age advantages
Since then the standard hasn't changed. That can of course be seen as a bad thing, when things don't change. But actually I believe it is a good thing. Common Lisp is even today surprisingly 'modern' and has many features of todays languages, partially even more features than 'modern' languages. And what it doesn't have can be added in form of libraries so that it feels as being part of the language.
Common Lisp is a quite large and complex package. After this long time there are of course some dusty corners. But all in all it is still very attractive and has an active community.
Because the standard didn't change since 1994 any code written since then should still be compile and runable on newer compilers and runtime implementations (where there are a few, see below) which were written in a portable way.
Let me run through some of the basic features of Common Lisp. Those basic features are likely also available in other languages. Common Lisp has some unique features that I'll be talking about later.
Lists
Since the name 'Lisp' is an abbreviation for List Processing we should have a quick look at lists. Lists are the corner stone of the Lisp language because every Lisp construct/form is a list, also called s-expression. A list is bounded by parentheses ( and ). So '(1 2 3 4) is a list of the numbers 1, 2, 3 and 4. This list represents data. Lists representing data are usually quoted. Quoted means that this list, or the list elements, are not evaluated. The ' in front of the first parenthesis denotes a quoted list. But (myfunction "abc") is also a list representing code, which is evaluated. By convention the first list entry must either be a function name, a macro operator, a lambda expression or a special operator. if for example is a special operator. The other list elements are usually function, or operator arguments. Lists can be nested. In most cases Lisp programs are trees of lists.
Functions
Functions are nothing special. Every language knows them. A simple function definition (which does nothing) looks like this:
(defun my-fun ())
(my-fun)
+RESULTS:
: NIL
A function in Common Lisp always returns something, even if not explicitly. This simple function just returns NIL, which in Common Lisp has two meanings. a) it has a boolean meaning of false and b) it means the empty list equal to '().
Common Lisp provides a very sophisticated set of features to structure function arguments.
Mandatory arguments
Mandatory arguments are simply added to the list construct following the function name. This list construct that represents the arguments is commonly known as lambda list. In the following example arg1 and arg2 are mandatory arguments.
+RESULTS:
| foo | NIL | buzz    | NIL |
| foo | bar | buzz    | NIL |
| foo | bar | my-buzz | T   |
The first optional opt1 does not have a default value, so if undefined it'll be NIL. The second optional opt2 when undefined is populated with the given default value "buzz". The optional opt2-p predicate indicates whether the opt2 parameter has been given or not. Sometimes this is useful in succeeding code.
Key arguments
key arguments are similar as named arguments in other languages. The ordering of key arguments is not important and is not enforced. They are defined with a the &key keyword:
+RESULTS:
| NIL | Foo  | NIL |
| Bar | Foo  | NIL |
| Bar | Buzz | T   |
key arguments are optional. Similarly as &optional arguments a default value can be configured and a predicate that indicates whether the parameter was provided or not. Defining key2-p is optional.
Rest arguments
rest arguments are arguments that have not already been captured by mandatory, optional, or key. So they form a rest. This rest is available in the body as a list. In the example below defined by rest keyword. rest arguments are sometimes useful to pass them on to APPLY function.
As you can see it is possible to mix optional, key and rest arguments. However, some care must be taken with mixing optional and key because the key of the key argument could be taken as an optional argument. Similarly with rest and key arguments as can be seen in the examples above. In most use-cases you'd either have optional or key together with mandatory arguments.
Lambdas
Lambdas are anonymous functions created at runtime. Other than that they are similar to defuns, regular/named functions. They can be used in place of a function name like this:
((lambda (x) x) "foo") ;; returns "foo"
+RESULTS:
: foo
In which case the lambda is immediately evaluated. The function 'is applied' on the value "foo", represented as the argument x. The function then returns x.
In other cases, i.e. when a lambda is bound to a variable one need to invoke the lambda using funcall:
This is in contrast to Scheme, or other Lisp-1s, where also my-fun can be used in place of the function name and would just be evaluated as a function.
Common Lisp is a Lisp-2, which means that there are separate environments for variables and functions. In the above example my-fun is a variable. In order to evaluate it as a function one has to use FUNCALL.
Lambdas are first-class objects in Lisp which means they can be created at runtime, bound to variables and passed around as function arguments or function results:
The "Lambda-calculus" (Alonzo Church, 1930) is a mathematical formal system based on variables, function abstractions (lambda expressions) and applying those using substitution. This can be used for any kind of computation and is Turing machine equivalent (or can be used to simulate a Turing machine).
So if one would stack/nest lambda expression in lambda expression in lambda expression and so on, where a lambda expression is bound to a variable and the computation of this again substitutes a variable, you could have such a lambda-calculus.
This is of course not so practical and hard to read but this alone would be enough to calculate anything that is calculatable.
Macros
Macros are an essential part in Common Lisp. One should not confuse Lisp macros with C macros which just do textual replacement. Common Lisp macros are extremely powerful.
In short, macros are constructs that generate and/or manipulate code. Lisp macros still stand out in contrast to other languages because Lisp macros just generate and manipulate ordinary Lisp code whereas other languages use an AST (Abstract Syntax Tree) representation of the code and hence the macros must deal with the AST. In Lisp, Lisp is the AST. Lisp is homoiconic.
Macros are not easy to distinguish from functions. In programs one can not see the difference. Many functions could be replaced by macros. But functions can usually not replace macros. There is a fundamental difference between the two.
The arguments to macros are passed in a quoted form, meaning they are not evaluated (remember the lists as data above). Whereas parameters to functions are first evaluated and the result passed to the function. The output of macros is also quoted code. For example let's recreate the when macro:
The macro expands the expr and body arguments. Macros always (should) generate quoted Lisp code, that's why the result of a macro should be a quoted expression. Quoted expressions are not evaluated, they are just plain data (a list), so the macro expression can be replaced with the macro body wherever the macro is used.
We can expand the macro (using MACROEXPAND) to see what it would be replaced with. Let's have a look at this:
So we see that my-when is replaced with an if special form. As we said, a quoted expression is not evaluated, so would we use the expr argument in the quoted expression we would just get (IF EXPR ...), but we want expr to be expanded here so that the right if form is created with what the user defined as the if test expression. The , 'escapes' the quoted expression and will expand the following form. ,expr is thus expanded to ( 1 1)= and ,@body to (print "Foo"). The @ is special as it unwraps (splices) a list of expressions. Since the body of a macro can denote many forms they are wrapped into a list for the &body argument and hence have to be unwrapped again on expansion. I.e.:
(my-when t
(print "Foo")
(print "Bar"))
Here the two print forms represent the body of the macro and are wrapped into a list for the &body argument like:
((print "Foo")
(print "Bar"))
The @ will remove the outer list structure.
when are macros expanded?
Macros are expanded during the 'macro expansion' phase. This phase happens before compilation. So the Lisp compiler already only sees the macro expanded code.
Packages
Packages are constructs, or namespaces, to separate and structure data and code similar as in other languages. DEFPACKAGE declares a new package. IN-PACKAGE makes the named package the current package. Any function, macro or variable definitions are then first of all local to that package where they are defined in. Function, macro or variable definitions can be exported, which means that they are then visible for/from other packages. A typical example of a package with some definitions would be:
A package is kind of a lookup table where function names, variable names, etc., represented as symbols (later more on symbols) refer to an object which represents the function, variable, etc. The function MY-FUN would be referred to using a package qualified name foo:my-fun. The exported 'symbols' are the public interface of the package. Using a double colon one can also refer to internal symbols, like: foo::my-internal-fun but that should be done with care as it means accessing implementation details.
It is also possible to import specific package symbols (functions, variables, etc.) by using the IMPORT or IMPORT-FROM functions. Any package added as parameter of :use will be inherited by the defined package and so all exported symbols of the packages mentioned at :use will be known and can be used without using the package qualified name.
Symbols
Symbols in Common Lisp are almost everywhere. They reference data and are data themselves. They reference variables or functions. When used as data we can use them as identifiers or as something like enums.
We can create symbols by just saying 'foo in the REPL. This will create a symbol with the name "FOO". Notice the uppercase. We also create symbols by using the function INTERN.
Let's have a look at the structure of symbols. We create a symbol from a string by using the INTERN function.
Unbound symbols
(intern "foo")
+RESULTS:
: |foo|
This symbol foo was created in the current package (*PACKAGE*). We can have a look at *PACKAGE* (in Emacs by just evaluating *PACKAGE* and clicking on the result):
#<PACKAGE #x30004000001D>
--------------------
Name: "COMMON-LISP-USER"
Nick names: "CL-USER"
Use list: CCL, COMMON-LISP
Used by list:
2 present symbols.
0 external symbols.
2 internal symbols.
1739 inherited symbols.
0 shadowed symbols.
We'll see that there are 2 internal symbols. One of them is our newly created symbol foo. Let's drill further down to the internal symbols.
#<%PACKAGE-SYMBOLS-CONTAINER #x3020014B3FCD>
--------------------
All internal symbols of package "COMMON-LISP-USER"
A symbol is considered internal of a package if it's
present and not external---that is if the package is
the home package of the symbol, or if the symbol has
been explicitly imported into the package.
Notice that inherited symbols will thus not be listed,
which deliberately deviates from the CLHS glossary
entry of `internal' because it's assumed to be more
useful this way.
[Group by classification]
Symbols: Flags:
----------------------- --------
foo --------
So foo is listed as symbol. Let's look at foo in detail (in Emacs we can click on foo).
#<SYMBOL #x3020012F958E>
--------------------
Its name is: "foo"
It is unbound.
It has no function value.
It is internal to the package: COMMON-LISP-USER [export] [unintern]
Property list: NIL
Here we see the attributes of symbol foo. Symbols can be bound to variables, or they can have a function value (Common Lisp is a Lisp-2, which means it separates variables from function names. In a Lisp-1, like Scheme, one cannot have the same name for a variable and function), in which case they refer to a variable or function. Our symbol is neither, it's just a plain symbol.
We can get the name of the symbol by:
(symbol-name (intern "foo"))
+RESULTS:
: foo
Bound symbols
Whenever we define a variable (not lexical variables (let)), or function we bind a symbol to a variable or function. Let's do this:
;; create a variable definition in the current package
(defvar *X* "foo")
When we look again in the current package *PACKAGE* we see an additional symbol:
And it is flagged with "b", meaning it is bound, see below.
#<SYMBOL #x30200145E2EE>
--------------------
Its name is: "*X*"
It is a global variable bound to: "foo" [unbind]
It has no function value.
It is internal to the package: COMMON-LISP-USER [export] [unintern]
Property list: NIL
The same can be done with functions. Defining a function with DEFUN will create a symbol in the current package whose function object is the function. Let's create a function: (defun foo-fun ()) and look at the symbol:
#<%PACKAGE-SYMBOLS-CONTAINER #x3020015C0E8D>
--------------------
Symbols:                Flags:
----------------------- --------
FOO-FUN                 -f------

#<SYMBOL #x3020014D1C4E>
--------------------
Its name is: "FOO-FUN"
It is unbound.
It is a function: #<Compiled-function FOO-FUN #x3020014D0A8F> [unbind]
The Lisp reader
When a Lisp file is read, or some input from the REPL, it is first of all just a sequence of characters. What the reader reads it turns into objects, symbols, and stores those (using INTERN) into the current package. It also applies some rules for how the character sequence is converted to the symbol name. Usually those rules include turning all characters to uppercase. So i.e. a function name "foo" creates a symbol with the name FOO.
It is possible to have symbol names with literals. We have seen that when we defined the symbol |foo| above. The reader puts vertical bars around "foo" which means the symbol name is literally "foo". This is because we have not applied the conversion rules when using INTERN. If we had defined the symbol as (intern "FOO") we wouldn't see the vertical bars.
Let's make an example with a function. Say, we are in a package MY-P and we define a function:
(defun my-fun () "fun")
+RESULTS:
: MY-FUN
The REPL responds with MY-FUN. This is the returned symbol from the function definition that was added to the package. When we now want to execute the function we write: (my-fun). When the reader reads "my-fun", it uses INTERN to either create or retrieve the symbol (INTERN retrieves the symbol if it already exists). It is retrieved if previously the function was defined with DEFUN which implicitly, through the reader, creates the symbol and 'attaches' a function object to it. The attached function object can then be executed.
Types
Even though Common Lisp is not statically typed it has types. In fact everything in Common Lisp has a type.
There are different ways to create new types. One is to just create a new structure, or class. New structure types can be created with DEFSTRUCT. DEFCLASS will create a new class type.
The :type specified in DEFSTRUCT is optional but when provided the type is checked on creating a new structure. DEFCLASS can be used instead of DEFSTRUCT. If you build object-oriented software and want to work with inheritance then use DEFCLASS, because a struct can't do it. Classes also have the feature of updating the its structure at runtime which structs can't do.
deftype allows to create new types as a combination of existing types. Let's create a new type that represents the numbers from 11 to 50.
(defun 10-50-number-p (n)
  (and (numberp n)
       (> n 10)
       (<= n 50)))
(deftype 10-50-number ()
  `(satisfies 10-50-number-p))
This snipped creates a predicate function that ensures the number argument is within 10 and 50 (excluding 10 and including 50). The type definition then uses SATISFIES with the given predicate function to check the type. So we can then say:
The results show that the middle two satisfy this type, the other two not.
Check for types
Types can be checked on runtime, or also (partially) on compile time (SBCL has some static type check capability). Checking types usually makes sense for function parameters but can be done anywhere.
check-type
CHECK-TYPE is used to do this. It can be used as follows, considering the 10-50-number type from above:
This declares the input and output types of the function ADD-10-50-nums. However, this will not do type checks at runtime, and whether it will be checked at compile time depends on the Common Lisp implementation. SBCL will check it, CCL doesn't, in which case it will be useable as documentation only.
It's not nicely readable though. The library Serapeum adds some syntactic sugar to make this more nice. I.e. the DECLAIM from above can be written as:
Common Lisp has some unique error handling properties. The "Restarts". We will see later some examples. Let's first check what conditions are.
Conditions
Conditions are objects of a type condition. The CLHS says: "an object which represents a situation". So conditions are far more than errors. Any condition/situation can be transported by conditions. Now while a condition itself can represent a situation like an error, there are multiple ways to raise a condition and multiple ways to handle a condition depending on the need. For example: an error condition can be just signaled (using SIGNAL) in which case nothing much will happen if the condition is not handled at all. SIGNAL will just return NIL in that case. However, when an error condition is raised using ERROR, then it must be handled, otherwise the runtime will bring up the debugger. There is also WARN, which will print a warning message if the condition is not handled.
unwind-protect
UNWIND-PROTECT is similar as a try-finally in other languages, Java for example. It protects the stack from unwinding further and allows to call a clean-up form.
HANDLER-CASE is a bit more sophisticated than UNWIND-PROTECT, it allows to differenciate on the raised condition and do a different handling. This is comparable to a try-catch-finally (i.e. in Java or elsewhere). This is nothing special really, so let's move on to Restarts.
Restarts / Handle condition without stack unwind
Restarts is a unique feature of Common Lisp that I have not seen elsewhere (though that doesn't necessarily have to mean much). It allows to handle conditions without unwinding the stack. If not handled by a handler the runtime will drop you into the debugger with restart options where the user can choose an available way to continue. Let's make a very simple example to show how it works:
In the example HIGHER calls LOWER. LOWER immediately raises a condition with ERROR. You'd normally of course have some other code here that would raise the conditions instead. To setup restarts one uses RESTART-CASE everywhere where there is potentially a way to get out of a situation without loosing the context. The RESTART-CASE actually looks very similar to a HANDLER-CASE. The restart cases can take arguments that can be passed in from a calling module. In our case here the restarts cases just dump a string to stdout.
The magic in HIGHER to actually 'invoke' the restart targets is achieved with HANDLER-BIND. It is possible to automatically invoke restarts by differenciating on the condition. The restart cases are invoked with INVOKE-RESTART. This allows to also pass the argument to the restart case handler that could create the basis for resuming the computation. If a condition handler is not bound the condition will bubble further up the call chain. So it's possible to bind condition handlers on different levels where on a higher level one possibly has more oversight to decide which restart to use.
Executing HIGHER will give the following output:
This output is from calling LOWER function with condition types MY-ERR1, MY-ERR2 and MY-ERR3. When we now call LOWER with MY-ERR4 we will be dropped into the debugger, because there is no condition handler for MY-ERR4. But in this case that's exactly what we want. The debugger now offers the three restarts we have set up (plus some standard ones). So we see:
We could now choose one of our restarts manually to have the program continue in a controlled way by maybe retrying some operation with a different set of parameters.
CLOS and object-oriented programming
CLOS (Common Lisp Object System) is an object oriented class system (or framework) in Common Lisp. It has a separate name, but it is part of the Common Lisp standard and part of every Common Lisp runtime. In very basic terms it allows to define classes using DEFCLASS. CLOS supports multi-inheritance. The behavior of classes (if something like that exists in Common Lisp - I'd say it doesn't) are structures keeping state but don't have behavior as such (and that's a good thing). The behavior to classes is added with generic functions. There is some default behavior, like INITIALIZE-INSTANCE, or PRINT-OBJECT, etc. which is behavior defined as generic functions. This default behavior of classes is defined by meta-classes, classes that define classes. A pretty powerful thing. This would allow me to create my own base class behavior. Comparing this to Java one could very remotely say that this is like creating a new Object class that behaves different than the default Object class.
Generic functions allow to be overridden. This is driven by providing method (DEFMETHOD) definitions which define certain concrete object types as parameters which are subclasses of some class. Say I have a class Person and have a method definition that works on that object. To override this method I'd have to define a method that works on, say Employee object type, a subclass ob Person. Then it's possible to also call the implementation of the super class using CALL-NEXT-METHOD (see chapter 'Multi dispatch'; float is a subtype of number). Though overriding behavior like that is something that one should try to avoid these days. Composition over inheritance is popular. Not without reason. Those very deep inheritance graphs are considered problematic for a few reasons. One is that it's harder to reason about the methods and what they do. The other problem is that inheritance has higher coupling than composition.
Multi dispatch
Multi, or dynamic dispatch is not something that all languages have (some do) but it's quite handy. In Common Lisp it's tied to generic functions. Let's have a look:
Isn't this cool? This works with objects of classes defined with DEFCLASS, or structures defined with DEFSTRUCT, even conditions. Well, actually with objects of any, including built-in types. There is just an implicit type-check happening on the argument. But there is a certain performance downside. The runtime has to check which function to call by comparing the types on runtime.
Debugging
As a TDD'er (Test-Driven Development) I don't much use the debugging facilities in general, also not in other languages. Because the TDD increments are so small and the feedback is so immediate that I have used a debugger very rarely in the last years.
However, there are two facilities which I'd like to mention. One I use sometimes: TRACE. Trace allows to trace specific functions with its inputs and outputs. Say we have a function FOO:
(defun foo (arg)
  (format nil "hello ~a" arg))
We can now enable the tracing of it by saying (trace foo).
When we now call FOO we'll see:
Another thing which I'd like to mention is BREAK. BREAK enters the debugger when placed in the source code. When we have the function:
(defun foo (arg)
  (break))
and call FOO the debugger will open and we can get a glimpse at the stack trace and can inspect the variables.
Break
   [Condition of type SIMPLE-CONDITION]

Restarts:
 0: [CONTINUE] Return from BREAK.
 1: [RETRY] Retry SLY mREPL evaluation request.
 2: [*ABORT] Return to SLY's top level.
 3: [ABORT-BREAK] Reset this thread
 4: [ABORT] Kill this thread

Backtrace:
 0: (FOO "world")
 1: ((CCL::TRACED FOO) "world")
 2: (CCL::CALL-CHECK-REGS FOO "world")
 3: (CCL::CHEAP-EVAL (FOO "world"))
 4: ((:INTERNAL SLYNK-MREPL::MREPL-EVAL-1))
 --more--
In Sly/Slime the Backtrace elements can be opened and further inspected. This is quite handy sometimes.
Library management with Quicklisp
Library (dependency) management was quite late in Common Lisp. Apache Maven in the Java world existed since 2004 and was probably one of the first of its kind. Quicklisp exists since 2010 (as far as I could research). Nowadays remote and local library version management is common and supports even GitHub (or Git) repositories directly as resource URLs. However Quicklisp is still different. While others let you choose arbitrary versions Quicklisp is distribution based. This can be remotely compared with the package management of Linux distributions. It has pros and cons. The pro side is that it's consistent. A library that has other dependencies are all resolved from the distribution. While in Java many speak of the jar-hell. This comes from the fact that you may end up with different dependent versions in your classpath (the first one found by the class-loader wins) when you specify a direct dependency of a library in your project, but some other direct dependency has one of your direct dependencies also as direct dependencies but a different version of it. This cannot happen in Quicklisp. Well, actually it can. There are two ways: a) Qlot, which allows to lock certain versions for a project, or b) it's possible within Quicklisp to clone single projects into Quicklisps 'local-projects' folder. Projects cloned in there take precedence over what the distributions offers. So this allows to use updated (or downgraded) versions still without getting into the jar-hell.
One other nice thing about Quicklisp is that you can load libraries directly in the REPL and just use them. So once Quicklisp is installed and made available when the REPL starts you can say: (ql:quickload :cl-gserver) and it will load the library into the image and it's ready to use. This is a big plus. It makes things extremely simple to just try out some code in the REPL.
Common Lisp is available in quite a few different implementations which all have different features. Historically there were many implementations. Many of them started at universities. Some were and are are open-source implementations, some were commercial implementation but have been open-sourced and some remain commercial. Some are still being maintained, some are not and will only work on older systems.
The current most popular one I would say is SBCL. SBCL is a fork of CMUCL. SBCL is fast and can do statical type checks (see above). I use SBCL myself for production. For development I use CCL. CCL is not as strict as SBCL, developing with is a bit smoother IMO but can also lead to weird effects sometimes. The compiler is said to be faster than SBCL, which I think it true. But the produced code is by far not as fast as SBCLs. CCL comes from a commercial product MCL (Macintosh Common Lisp). In fact I still have a version of MCL on my old PowerMac with MacOS 9 which still runs fine. But CCL is not limited to Apple. It works on Windows and Linux, too. ECL for Embeddable Common Lisp probably has the largest supported hardware and OS base. There aren't many systems where ECL is not available. Due to the nature of ECL and what it is geared for, namely to be easily embedded in applications, it doesn't work with images (see 'Image based'). It is also quite slow. But it is actively maintained and certainly has it's use-cases. Clasp is relatively new. I believe it uses some of ECL but is otherwise different and uses the LLVM backend with the goal to use any LLVM available libraries easily (like C++ libraries). Clasp, as I followed the project, is useable since a good while. But you have to compile it yourself (which isn't difficult). More work is being done on performance optimizations. ABCL started out as scripting engine for a Java editor application. Today it has come a long way and is a full featured Common Lisp that runs on the JVM. It even implements JSR-223 (the Java scripting API) and has nice but not as good Java interop as Clojure. It is not super fast, but is very robust due to the battle-proven Java runtime system.
There are more not so much maintained implementations of Common Lisp, like Clisp, or GCL.
Then there are the commercial products Allegro CL and LispWorks. Both come with sophisticated IDEs and many features but are not cheap. Check them out. There are limited, but free editions available.
Image based
Common Lisp is (usually) an image based system. The only other image based system that I know is Smalltalk. I haven't seen that in younger languages and runtimes. What is it? When you start a Common Lisp system, usually the REPL, then everything you do, like creating variables and functions, etc. is creating or manipulating state in the runtime memory. So far this is not different to other runtimes. What you do during your REPL session is just manipulating data in some memory area. The difference is that Common Lisp allows to create a snapshot (an image) of that runtime memory with all its state and can store it to disk. Then it's possible to run the REPL and load that image and all state is recovered, you could even reconnect to servers and reopen files and so on. The REPL allows to load multiple applications, because all is just variables and functions structured in packages. So you can make ready images to have a head start when starting to work. Usually all Common Lisps that support images actually start with an image when running the REPL. It's just an empty, or default, image.
image snapshot
To give this a quick run, create a variable like this: (defparameter *foo* "Hello World"). Now save the image like this in CCL (ccl:save-application filename) (may be different on other implementations).
load from image
To load the image you start CCL with -I, like ccl -I foo-ccl.image.
Then dump your variable *foo* and you'll see "Hello World".
Functional programming
If you are interested in functional programming with Common Lisp then I'd want to redirect you to my blog post on it.
Resources
Much of the information in here is either from my own experience or mentioned and linked web pages but also books like:
]]><![CDATA[ Functional Programming in (Common) Lisp ]]>2021-05-29T02:00:00+02:00http://retro-style.software-by-mabe.com/blog/Functional+Programming+in+(Common)+LispIntro
Functional programming (FP) has again been getting popular in recent years. Why again? Because the paradigm of FP is very old. Early languages like Lisp, APL from the 1950/60s were already functional. Later, imperative languages like C, Pascal, etc., replaced functional languages to some degree. Now, for some years functional languages have again become more popular.
This article will describe some key concepts of functional programming. While many pure functional programming languages exist (like ML, Erlang, Haskell, Clojure), which lock you in into a pure functional style of programming, this article will describe some techniques to allow functional programming with multi-paradigm languages. The language of choice for this article is Common Lisp, a well-established industry standard that, despite its age, provides a broad range of modern language features. The techniques apply to any language that provides lambdas and functions as objects (like Java, Python, C#, Scala, etc.), which is a key feature for functional programming.
What is the difference between the two styles?
Functional programming
As the name suggests, FP is all about functions. About composing functions and about applying those functions to data to transform the data. Functions can be anonymous functions created at runtime or named functions. FP is declarative. It is more important to say what should be done than how. For instance, FP languages have higher-order functions that operate on lists. You tell this function what transformation you want to have for each list element by supplying a function that is called with each list element and transforms it, rather than manually writing a loop construct (while, for, etc.) that iterates over a list and implicitly does the transformation as part of the loop construct.
Pure functions are a key element of FP. Pure functions are referencially transparent which means that they always produce the same output for the same input and, therefore, this function could be replaced with just the value of the function output (wiki). This means that functions that have side-effects are not referencially transparent. Referential transparency then also implies that the parameters supplied to the function (the input set) are not changed. A pure function produces new data, but doesn't change the old data that was used to produce the new data. Functions that don't alter the input set are not destructive.
Additionally, this implies that there exists some immutability of data structures, whether the data structures are immutable by design or functions just don't mutate the input data structures (the latter requires a lot of discipline from the programmer). Those characteristics are often also mentioned together with data-driven development. Pure functions, as you can imagine, are thread-safe and can, therefore, be easily used in multi-threaded environments.
Aside from the practical benefits of the above, like: it's a lot easier to reason on pure functions and they tend to be easier to maintain (especially in multi-core and multi-threaded environments) and a (subjective) nicer way to code. Though it's, of course, still possible to write crap code that no one understands and is hard to maintain, the skill of the programmer to write readable and maintainable code is still imperative.
There are also disadvantages: FP is more memory consuming and requires more CPU cycles. Because, practically, due to the immutability of the objects and functions producing new data structures rather than modifying existing ones, more data is produced. This means more memory allocations are necessary and more memory must be cleaned up, which costs garbage collector time. However, with current multi-core hardware, those disadvantages are neglectable. Developer time and a maintainable code base that is easy to reason on are much more valuable for a business.
For people interested in mathmatics, FP involves quite a bit of it with category theory, morphisms, functors, etc. But this is not something that is part of this article.
Design considerations
From a software design perspective, FP programms usually have a purity core where only data transformations are taking place in the form of pure functions (a 'functional core'). But even FP programms have to deal with side-effects and, of course, there is state. Languages deal differently with this. Haskell, for example, knows 'monads' to deal with side-effects and state. Erlang/Elixir have efficient user-space processes where state is locked in. Side-effects, state, as well as threading should happen on the system's boundaries. The hexagonal architecture is an architectural style that can nicely fit to FP. It can be used with an 'imperative shell' and a 'functional core'.
Assignments
Due to the immutability, pure FP languages allow assignments to variables only once. Erlang/Elixir for example have a = operator, but it's not an assignment operator as in languages like C or Java. It is a match operator, similar as in mathmatics where you can say x = y which means that x is equal to y. Let's have a quick look at Erlang:
4> X = 1.
1
5> Y = 2.
2
6> X = Y.
** exception error: no match of right hand side value 2
The X and Y variables here take the corresponding values of 1 and 2 because at this point, they are unset. Since they are unset, the = matches and assigns X with 1.
But when both variables are set and = is used, the match fails because 1 is not equal to 2.
Elixir is a little less strict on the last part:
iex(1)> x = 1
1
iex(2)> y = 2
2
iex(3)> x = y
2
As you can see, the last part works in Elixir. But there is still an important difference to a normal assignment. The new x has a different memory location than the previous x, which means the value in the old memory location is not altered.
Immutability
Immutability is also a key characteristic in FP languages. FP languages provide immutable datatypes like tuples, lists, arrays, maps, trees, etc.
The provided functions that operate on the datatypes are pure functions. For example, removing or adding items to a list do create a new list.
This behavior is built into FP languages (ML, Haskell, Erlang/Elixir, just to name but a few). So, using those languages, your are operating in an immutability bubble. To maintain immutability inside the immutable bubble, a 'shallow' copy of the data is usually sufficient. This is much more efficient for the runtime system and means that functions operating on datatypes create a copy of the datatype but share the instances that the datatype holds. For instance, adding a new head to a list (cons) will create a new list that is constructed from the given head element and the given input list as the tail.
What is not built-in are deep copies that are necessary when one leaves the immutable bubble, i.e., to do I/O.
Design patterns (GoF)
Just a few words on this. Some of the design patterns of object-oriented programming, as captured in the Gang of Four book, also apply for FP, but their implementation is, in many cases, much simpler, i.e., a strategy pattern in FP is just a higher-order function. A visitor pattern in a simple form could just be a reduce function.
Imperative programming
Imperative programming (IP), on the other hand, is more about mutating the state of a machine with every instruction/statement. I would tend to say that also Object-Oriented Programming (OOP) is also imperative. The difference being that OOP allows you to give more structure to the programm. From a memory and CPU perspective, the paradigm of IP is more efficient. And I've read somewhere (can't remember where, but it makes sense to me) that IP did replace FP in the latter half of the last century because memory was expensive and CPUs were not fast, and IP clearly has an advantage there when the value of a memory location is just changed instead of a new memory location being allocated and the old one having to be cleaned up.
But in today's multi-core and multi-threaded computing world, state is a problem. It's not possible without state, but how it is dealt with is important and different in FP.
Functional style in multi-paradigm language, Common Lisp
Common Lisp is a Lisp (obviously). Lisps have always had functions as first-class elements of the language. Functions can be anonymous (lambdas), or can have a name, they can be created at runtime and they can be passed around in the same way as strings or other objects can. Every function returns something, even if is it's just nil (for an empty function).
Common Lisp allows you to program in multiple paradigms. Historically, it had to capture, consolidate and modernize all the Lisp implementations flowing around at the time. So, it has a rather large but well-balanced feature spec and it allows both OOP (with CLOS) and FP. Common Lisp doesn't have the very strict functional characteristics, like the above-mentioned assignments. Functions in Common Lisp can have side effects and Common Lisp has assignments in the form of set, setq and setf. For FP, this means that the programmer has to be more disciplined in how they programm and which elements of the language they use. But it's, of course, possible. This applies in a similar way to Java, Scala, C#, etc.
When we look at the important characteristics of FP, they are:
first-class functions
pure functions
non-destructive functions
immutable data structures
Then, we have to be a bit careful which of all the things available in Common Lisp we use. All built-in data structures in Lisp are mutable. Lists are a bit of an exception because they are usually used in a non-destructive way. Like the function cons (construct) creates a new list by prepending a new element to the head of a list, in which case, the old list is not modified or destroyed but a new list is created. But delete-if (in contrast to remove-if) is destructive because it modifies the input list. The array/vector and hashmap data structures and their functions are destructive and shouldn't be used when doing FP. So, when developing pure and non-destructive functions (i.e. for a functional core), you need to make sure you use the right higher-order functions for operating on lists or other data structures. Depending on which data structure it is, it could also mean manually making deep copies of the input parameters, operating on the copy and returning the copy. modf can help with this, see later info.
Immutable data structures - FSet
The immutable data structures library, FSet should be a good fit when doing FP in Common Lisp. FSet defines a large set of functions for all sorts of operations.
There are more alternatives offering this functionality. See, for example, Sycamore.
Other languages, like Java and Scala, offer a range of immutable data structures out of the box.
Custom immutable types
Immutable maps are commonly used in FP instead of classes or structure types. They have one disadvantage. They don't create a specific type. In some FP languages, like Erlang/Elixir, it's possible to dispatch a function based on destructuring of the function arguments, like a map or list. But Elixir also allows you to define a type for a map structure, which then can be used for dispatching on a function level.
In Common Lisp, it would also be cool to use generic functions also for FP because it allows dynamic/multi-dispatch and is generally a nice feature. But it can't destructure lists or maps on function arguments. It can only check on a type or equality of objects using eql. Both won't work well when using FSet with just maps, or sets.
So, in addition to the data structures available in FSet the standard structure type in Common Lisp (defstruct) could still be usable. It defines a new type, so, we can use it with generic functions, we can check equality on the slots/instance vars with equalp, and we can set the slots/instance vars to :read-only which prevents from changing the slot/variable values. defstruct automatically generates a 'copier' function that copies the structure. This copy is just a flat copy and it doesn't allow you to change values while copying. Let's have a quick look at some of the structure items:
CL-USER> (defstruct foo (bar "" :read-only t))
FOO
CL-USER> (defstruct bar (foo "" :read-only t))
BAR
The option :read-only has the effect that defstruct doesn't generate 'setter' functions to change the slot. (Though it is still possible to change the slot values using lower-level API, i.e., the slot-value function, but the public interface does disallows it.)
The next snippet shows how the dynamic dispatch works with the created new structure types.
The above shows the dynamic dispatch on the different structure types 'foo and 'bar. This works quite well. To use the structure type in FP, we'd 'just' have to come up with a copy function that allows changing the values when copying the object.
In Scala, this works quite nicely with case classes where a copy of an immutable object can be performed like this:
case class MyObject(arg1: String, arg2: Int)

val myObj1 = MyObject("foo", 1)

val myObj2 = myObj1.copy(arg1 = "bar", arg2 = 2)
Modf to the rescue
The Modf library does exactly that for Common Lisp. modf has to be used instead of setf. But it works in the same way as setf, except that it creates a new instance of the structure instead of modifying the existing structure. Let's see this in action:
Following this little example, we can see that modf doesn't touch the original *foo* instance but creates a new one with x = 5. This is pretty cool. It's getting better. This also works for standard CLOS objects:
We can see from the memory reference that a new instance was created: #x302002101F8D vs. #x302002250CFD.
So now we basically have our immutable custom types. The only important thing to remember, which again requires discipline, is to use modf instead of setf.
Even though modf also works on the built-in data structures like lists, arrays and hashmaps I would probably still tend to use a library like FSet.
One thing to mention here is that modf only makes a 'shallow' copy of the data, which means that only a new instance of the 'container' is created while the internal objects (if they are references) are shared.
More things that help doing FP
Function composition
Common Lisp does not have a construct to compose functions other than just wrapping function calls like: (f(g(h())). But that is not pleasant to read and it actually turns around the logical order of function calls. The defacto standard Common Lisp library alexandria has a function for that that can ben used, like (compose h g f):
This generates a composition function of the three functions 1+ like: (1+ (1+ (1+ 1))) which then can be called using funcall or provided as a higher-order function. The call order is still from right to left.
There is another alternative way of composing functions which comes from Clojure. It's actually rather a piping than a composition. Elixir also knows this as the |> operator. In Clojure it's called 'threading'. In Common Lisp exist 3 third-party libraries that implement this. The one used here is binding-arrows. There are a few more operators (macros) available for threading with slightly different features than the used ->. I like this a lot and use it often.
The normal 'thread' arrow -> passes the previous value as the first argument to the next function. There is also a ->> arrow operator which passes the value as the last argument.
Pattern matching
Pattern matching is kind of standard for languages that have FP features. In Common Lisp, pattern matching is not part of the standard language features. But the Trivia library fills that gap. Trivia has an amazing feature set. It can match (and capture) on all native Common Lisp data structures, including structure and class slots. There are extensions for pattern matching on regular expressions and also for the before-mentioned FSet library. It can be relatively easily expanded with new patterns. The documentation is OK but could be more and better structured.
Here a simple example:
;; matching on an FSet map
(match (map (:x 5) (:y 10))
   ((fset-map :x x :y y)
    (list x y)))
=> (5 10)

;; matching on a list with capturing the tail
(match '(1 2 3)
   ((list* 1 tail)
    tail))
=> (2 3)
Currying
Currying is something you see in most FP languages. It is a way to decompose one function with multiple arguments into a sequence of functions with fewer arguments. In practical terms, it reduces the dimension of available inputs to a function. For example, say you have the function coords that takes two arguments and produces a coordinate in an x-y coordinate system. With currying, we can lock one dimension, x or y.
Say we have the function:
CL-USER> (defun coords (x y)
           (cons x y))
COORDS
Now, I want to lock the x coordinate to a value, say 1:
(* denotes the last, ** the second-from-last result in the REPL.)
So, currying destructured the coord function call into two function calls. But the curried function can be stored and reused. It represents only a single dimention from the original two-dimentional set.
Common Lisp also doesn't have currying built-in. But it's easy to create. The following function performed the trick above:
Though there is no need to create this. This is also part of the Alexandria library. Which in addition to this, also provides rcurry to curry from the right.
Conclusion
It is possible to do functional programming in languages that are not made for pure FP. It is important to separate the areas where side-effects may happen ('imperative-shell') and where not ('functional-core'). Functions in the 'functional core' should be pure functions that don't modify input parameters. Using immutable data structures is a big help in doing that. But immutable data structures are not always available. In that case you have to manually copy mutable data structures and operate on the copies. This requires discipline. In multi-threaded environments, it might still be worth the effort for the gain of simplicity and reasonability.
]]><![CDATA[ Patterns - Builder-make our own ]]>2021-03-13T01:00:00+01:00http://retro-style.software-by-mabe.com/blog/Patterns+-+Builder-make+our+ownAdd-on to the post about the Builder pattern.
In this post we'll create our own simple Common Lisp builder DSL using macros.
Macros are a crucial component of Common Lisp, making the language so enormously extendable. The term 'macro' is a bit convoluted. Because many things are called 'macro' but have little do to with Lisp macros. The C macros for example are just a simple textual replacements. Today other languages have macros as well. The difference with Lisp macros is that Lisp macros are just Lisp code while other languages have a different AST (Abstract Syntax Tree) representation of the code. This is much more complicated to deal with. Lisp has no AST.
And yet, it's not all that easy. There is a fundamental difference between normal functions and macros. This difference and the consequence of it can take a while to grasp. The difference is that macros are executed at compile time (or macro-expansion time) and the parameters of macros are not evaluated while functions are executed on runtime and parameters of functions are evaluated before they are applied on the function. I'm still trying to wrap my head around it. I can create simple macros but I'm not an expert.
Let's have a look.
I want to use the builder like this:
(build 'person p
  (set-name p "Manfred")
  (set-lastname p "Bergmann")
  (set-age p 27)
  (set-gender p "m"))
The return of this is a new instance of person with the parameters set on the instance. So this build thing has to create an instance of the class 'person which is represented by the variable p, evaluate all those set-xyz thingies and at last return the instance p.
We can easily come up with a simple macro that does this:
The parameters clazz is the class to create (here 'person), var is the variable name we want to use for the instance, and body are all expressions inside build (set-name, etc.). What the macro creates is a 'quoted' (quasi-quote) expression. Quoted expressions are not evaluated. Effectively they are just data, a list. When we use the build macro then what the compiler does is to replace build and everything inside it with the quoted expression. After the compiler expanded the macro it looks like this:
(let ((p (make-instance 'person)))
  (set-name p "Manfred")
  (set-lastname p "Bergmann")
  (set-age p 27)
  (set-gender p "m")
  p)
When we look again at the macro and compare the two then we see that the compiler actually used the macro arguments and replaced ,clazz, ,var and ,@body with those. So this is what the , does in combination with the back-tick called quasi-quote. The , tells the compiler that it has to interpolate 'person in place of ,clazz, p in place of ,var and the list of body expessions given to build macro in place of ,@body. The @ sign here means 'splice' and is needed because the body expressions are a list, like: ((expr1) (expr2) (expr3)), but we don't want the list but just the expressions inside the list. So 'splice' removes the outer list.
Now, this is all good and nice. But it doesn't work. The setters set-name, etc. are not known to Lisp. They are no regular functions or macros. Slot access functions are auto-generated on classes. But using them in the builder macro doesn't look nice and is too much typing. What would already work with the macro as is:
(build 'person p
  (setf (slot-value p 'name) "Manfred")
  (setf (slot-value p 'lastname) "Bergmann")
  (setf (slot-value p 'age) 27)
  (setf (slot-value p 'gender) "m"))
So we'll have to create those setter functions ourselves. A bit More DSL to create.
It would be cool if those setters (and also getters) could be auto-generated whenever we define a new class. So we want to define a class, that automatically generates setter and getters like this:
(defbeanclass person () (name lastname age gender))
defbeanclass doesn't exist. The rest of the syntax is equal to defclass. So we'll create a macro that can do this:
This macro basically just wraps the default defclass macro. generate-beans is another macro that generates the setters and getters. We'll look shortly at this. Then finally find-class is responsible to return the generated class. (There might be a better way to do this.)
generate-beans (you might remember Java) looks like this:
This adds something new. Macros can have code that is evaluated at compile time (or macro expansion time) and code that is generated by the macro. The 'quote' makes the difference. Let's see shortly what this macro generates. The unquoted code in there, in particular the loop, is executed at compile time and generates a list of quoted defbean expressions, one for each slot (name, age, gender, etc.).
(if someone knows a way to remove the (cons 'progn, please ping me.)
Cool. So generate-beans creates beans for each slot. But defbean is yet another macro. It does the real work of creating the setter and getter functions for a slot definition.
This macro has again some code that must execute on macro expansion. We have to define the getter and setter names and 'intern' them to the Lisp environment so that they are known. If we wouldn't do this, but just expand the defuns we would get errors at runtime that the functions are not known. The 'interning' makes the connection between the function name (as used in defun) and the 'interned' symbol of the function name in the Lisp environment. After all this macro expands to (example for name getter/setter):
Looking more closely this generates exactly the setf slot access we had above which we wanted to replace.
So we can now define classes that auto-generate getters and setters the way we want to use them in the builder.
We see that what the macro generates is just ordinary Lisp code. And yet on the top we have extended the language with new functionality.
Cheers
]]><![CDATA[ Patterns - Builder ]]>2021-02-24T01:00:00+01:00http://retro-style.software-by-mabe.com/blog/Patterns+-+BuilderThe last blog post was about the Abstract-Factory pattern. We have seen that in Common Lisp there is hardly a pattern visible.
One could say patterns are code constructs that are repetetive. Almost like a language in a language. Paul Graham once asked: "Are Patterns a language smell?".
Builder
Today we look at the Builder pattern. Similarly as the Abstract-Factory pattern is the Builder a creator pattern. It can help creating instances of objects. The difference to Abstract-Factory is that the Builder is tightly coupled to the class it creates. Yet, it allows to hide details of the class that only the Builder has access to while being in the same package. There can be different Builders that create instances of the same class but with a different configuration. If we wanted to do this with the classes directly we'd have to open them up. A Builder can also hide complexities when creating objects while providing a more simple interface to the user.
Example in Scala
First, we will look at some Scala code.
We want to create an object (a dungeon) like this:
val dungeon = new CastleDungeonBuilder()
  .setDifficulty(VeryDifficult)
  .addMonsters(15)
  .addSpecialItems(5)
  .get()
First we create a Builder. It is a special kind of Builder that builds a castle dungeon. We set a difficulty, add monsters and some special items that the dungeon object should place somewhere.
The CastleDungeonBuilder looks like this:
class CastleDungeonBuilder extends IDungeonBuilder {
  override protected val theDungeon = new Dungeon(CastleDungeonKind)

  def addMonsters(n: Int): IDungeonBuilder = {
    // add nice monsters
    val filteredMonsters = Monsters.filter(m => m.creepyFactor < 5)
    theDungeon.monsters = (0 until n)
      .map(filteredMonsters(new Random().nextInt(filteredMonsters.size)))
    this
  }
}
As part of creating the Builder instance it creates a Dungeon instance. This CastleDungeonBuilder has a speciality, the monsters it adds are nice monsters that have a low 'creepy factor'. There is also a CellarDungeonBuilder that adds monsters with a 'creepy factor' >= 5 (on a scale from 0 to 10). The right monsters for a cellar.
The method addMonsters also hides some complexity from the user. It just allows to say how many monsters to add, but to the dungeon instance the Builder sets a collection of pre-configured monsters instances.
The abstract Builder (where CastleDungeonBuilder and CellarDungeonBilder inherit from) actually only does some generic configuration. It looks like this:
trait IDungeonBuilder {
  protected val theDungeon: Dungeon

  def setDifficulty(difficulty: Difficulty): IDungeonBuilder = {
    theDungeon.difficulty = difficulty
    this
  }
  def addMonsters(n: Int): IDungeonBuilder = {
    theDungeon.monsters =
      for(i <- 0 until n)
      yield Monster(new Random().nextInt(3), new Random().nextInt(10))
    this
  }
  def addSpecialItems(n: Int): IDungeonBuilder = {
    theDungeon.specialItems =
      for(i <- 0 until n)
      yield SpecialItem(new Random().nextInt(7))
    this
  }
  def get: Dungeon = theDungeon
}
This is the Dungeon class itself:
class Dungeon(private _kind: DungeonKind) {
  private var _difficulty: Difficulty = Difficulty.NotDifficultAtAll
  private var _monsters: List[Monster] = Nil
  private var _specialItems: List[SpecialItem] = Nil

  def difficulty: Difficulty = _difficulty
  private[dungeon]
  def difficulty_=(d: Difficulty): Unit = _difficulty = d

  def monsters: List[Monster] = _monsters.copy
  private[dungeon]
  def monsters_=(list: List[Monster]): Unit = _monsters = list.copy

  def specialItems: List[SpecialItem] = _specialItems.copy
  private[dungeon]
  def specialItems_=(list: List[SpecialItems]): Unit = _specialItems = list.copy
}
While it allows to query the properties. It doesn't allow to set them except from within the same package. So the Builder must be defined in the same package as the dungeon class is.
The poor-man's Builder
Scala allows named and optional parameters in functions and constructors. A poor-man's Builder pattern in Scala could simply be to use those features on object creation together with auxiliary constructors. Though this doesn't allow the abstraction of a Builder and the encapsulation of the object properties but could be sufficient in some cases.
Example in Common Lisp
In Common Lisp we could certainly build a similar structure for Builders with separate classes and so on. But that's not needed. It is possible to allow the same features, the same level of abstraction and encapsulation by using multi-methods.
Let's also start with how we want the object to be created. I'd like to use the 'threading' (->) operator known from Clojure. I find it quite nice, but it is just some syntactic sugar around a let:
(let ((dungeon (-> (make-dungeon :type 'cellar)
                   (set-difficulty 'very-difficult)
                   (add-monsters 15)
                   (add-special-items 5))))
  ;; do something with dungeon
  )
This first creates a dungeon object of 'cellar type, then sets difficulty, adds monsters and special-items. Here are two different things at play. make-dungeon is a simple factory function. set-* and add-* functions are generic functions that we use to form a builder protocol. Each returns the dungeon object so that the 'threading' (or piping) can be done:
Similarly as the Builders we created in Scala those generic function definitions should be in the same package as the dungeon class and the factory function is. If we want to apply a different set of monsters for different dungeon types we have to do two things. First we need to define sub-classes for those dungeon types. And second, we have to provide different implementation of the add-monsters builder protocol. Let's have a look at the classes and the factory function:
The specialization of the add-monsters generic function on the class type does the trick:
;; specialized for 'castle-dungeon
(defmethod add-monsters ((obj castle-dungeon) amount)
  (with-slots (monsters) obj
    ;; set a bunch of nice looking monsters
    (setf monsters
          (filter-monsters-by-creepy-factor 5 #'< amount *monsters*)))
  obj)

;; specialized for 'cellar-dungeon
(defmethod add-monsters ((obj cellar-dungeon) amount)
  (with-slots (monsters) obj
    ;; set a bunch of creepy monsters
    (setf monsters
          (filter-monsters-by-creepy-factor 5 #'>= amount *monsters*)))
  obj)
Common Lisp automatically does a match on the first function parameter for the class type. This is called multi-dispatch or multi-methods. So a different add-monsters implementation is called depending on whether the dungeon is created with type 'castle or 'cellar.
There is otherwise not really a lot more to it. All we did here is use the language features.
Summary
The Builder pattern in many object-oriented languages requires separate builder classes around a class they should create. This is used for abstraction and data encapsulation which would not be easily possible without the Builder.
In Common Lisp dedicated Builder classes are not needed. But dedicated classes are required to allow the multi-methods to do their work. This structure of this can also be recognized as a pattern, but it is simpler.
]]><![CDATA[ Patterns - Abstract-Factory ]]>2021-02-07T01:00:00+01:00http://retro-style.software-by-mabe.com/blog/Patterns+-+Abstract-FactoryPeter Norvig (one of the main people behind Common Lisp at the time) claimed that many design patterns are either not needed or much simpler in Lisp or dynamic languages generally. See this PDF.
In this series of blog posts I'd like to go through some of the well known design patterns and make a comparison between the implementation in Scala and Common Lisp. Scala is a statically typed, multi-paradigm language running on the Java Virtual Machine. Common Lisp is a dynamically typed, multi-paradigm language running natively on many platforms.
Abstract Factory
Abstract Factory is a common creation pattern where details of object creation are abstracted and hidden behind a creation 'facade'. A factory generally allows to hide the details of object creation. For example when creating the object is complex the user of a factory is and should not be aware of those details. The factory hides those details.
Another important feature is that a factory can hide the concrete class implementation of the object it creates. The created object just has to comply to an interface/protocol. This has the benefit of less coupling. It is also possible to separate the source code dependenies so that a module that uses a factory does not need to have a source code dependency on the class implementation but only on the interface/protocol.
An Abstract Factory goes a step further in that it handles a set of factories, or put differently, it is an abstraction of a set of factories. For example, you have a GUI framework, this framework allows to create buttons. It should work in the same way no matter which toolkit is the backend. The Abstract Factory is usually configured at startup of the application with the right concrete factory implementation. This also allows to configure a mock or fake factory in a test environment.
An Abstract Factory is in a way Open-Closed. New button types and button factories can be added without affecting the existing buttons and factories.
In a static language like Scala usually two parallel class hierarchies are needed, one for the GUI button implementation and one for the factory that creates the button.
Example in Scala
trait IButton
class AbstractButton extends IButton

class GtkButton extends AbstractButton
class QtButton extends AbstractButton
A user will now only use ButtonFactory.makeButton() to create buttons. It implements the same protocol as the concrete factories but it doesn't create a button itself, rather it delegates the creation to a concrete factory that has been configured.
Example in Common Lisp
In Common Lisp something similar could be easily created using CLOS (Common Lisp Object System). But there is a more simple way. Is it not necessary to maintain two parallel hierarchies. Just the buttons are needed.
In Common Lisp classes are designated by a symbol. For instance a class "foo" is designated by the symbol 'foo.
(defclass foo () ())

(make-instance 'foo)
But the class definition does not need to be known when creating an instance. find-class can find the class on run-time (assuming the class exists in the environment).
So, the factory, which creates the button instance also does not need a source dependency on the concrete implementation of the button class. This gives us the separation, and we can define a default button class at run-time somewhere on startup which could be configured from a configuration file.
Then it is fully sufficient to create a simple button factory function which creates an instance of the button:
(package :my-button-factory)

;; could be `(find-class 'qt-button)`, configured by startup code.
(defparameter *button-class* nil)

(defun make-button ()
  (make-instance *button-class*))
In a test we can easily set a mock or fake class for *button-class*.
New button implementations can easily be added without affecting existing buttons or the factory.
Summary
The parallel factory hierarchy is not necessary in Common Lisp. Neither is there really a pattern here that would be worth describing. It is so simple.
To be fair, to some degree a similar approach is also possible for Scala/Java using reflection where it is possible to create new instances of classes from the class object. For example an instance of a class can be created with:
But the handling of this is quite combersome and by far not as convenient as with Common Lisp. In particular if there are different constructors. Also this approach leaves the type safe area that Scala provides. What newInstance() creates is just an Object which requires a manual cast.
]]><![CDATA[ Lazy-sequences - part 2 ]]>2021-01-13T01:00:00+01:00http://retro-style.software-by-mabe.com/blog/Lazy-sequences+-+part+2Lazy (evaluated) sequences - part 2.
In the last blog post I've talked about lazy sequences that are generated by a generator. The generator needs state to remember what number (or thing) it has generated before in order to generate the next. A consumer simply asks the generator about the next 'thing'.
This way of implementing lazy evaluated sequences has two negative consequences (thanks for pointing this out, Rainer). 1) there is not really a list or sequence data structure (not even a 'lazy' one :). The consumer generates a result data structure (a list) by repeatedly asking the generator for the requested number of items. 2) it is not possible to re-use a lexically scoped generator like below. Because it keeps state it will continue counting.
(let ((generator (range)))
         (print (take 3 generator))
         (print (take 2 generator)))
(0 1 2)
(3 4)
;; where we would expect:
(0 1 2)
(0 1)
So we will look at proper lazy sequences. What I'm writing about is fully handled in the book "Structure and Interpretation of Computer Programs" chapter 3.5. I have changed the names of functions slightly in order to be better comparable to the naming scheme in the last blog post.
Primitives
As you might know, a cons cell is the basis for lists. A cons is constructed of two cells. In Lisp the left part is called car and the right part is called cdr (those two names still refer to (maybe obsolete) implementation details as 'address register' and 'decrement register'). With combining conses it is possible to generate linked lists when the cdr is again a cons. The car also represents the head of the list and the cdr the tail.
Now, in lazy sequences the computation of the cdr part is deferred until needed like this. (I've called this cons wrapper just lazy-cons):
(defmacro lazy-cons (a b)
  `(cons ,a (delay ,b)))
This generates a normal cons from two values only that the second, the cdr, is not evaluated yet. The delay is simply just b wrapped into a lambda like this:
(defmacro delay (exp)
  `(lambda () ,exp))
So if we would macroexpand this we would get just this:
(cons a
      (lambda () b))
But it is good to create a new layer of meaning so I want to create a few primitives to hide the details of this and to make working with lazy sequences more natural similar to a normal cons.
Both of the definitions above have to be macros because otherwise both delay and b when passed into lazy-cons would be evaluated immediately. But that should be delayed until wanted.
In order to access car and cdr of the lazy-cons we introduce two more primitives, lazy-car and lazy-cdr:
lazy-car just calls car. We could certainly just use car directly, but to be consistent and to create a new metaphor to be used for this lazy sequence we'll add both.
lazy-cdr does somthing additional. This is a key element. When accessing the cdr of the list we now enforce the computation of it. force is very simple. Where delay wrapped the expression into a lambda we now have to unwrap it by funcalling this lambda to compute the expression. So force looks like this:
(defun force (delayed-object)
  (funcall delayed-object))
Those 5 things are the base primitives to construct lazy sequences. Now let's create a new range function - which now is not a generator anymore.
Generate
(defun range (&key (from 0))
  (lazy-cons
   from
   (range :from (1+ from))))
This range implementation doesn't need state. It simply constructs and returns a lazy-cons. The special feature is that the cdr is again a call to range with an incremented from parameter. In effect, calling force on the lazy-cons will construct the next lazy-cons and so on.
If we mentally go through a call chain to construct the values 0, 1, 2, 3 we'd have to:
call (range :from 0)
=> (cons 0 <delayed range call>)
=> lazy-car = 0

force lazy-cdr which calls range :from 1
=> (cons 1 <delayed range call>)
=> lazy-car = 1

force lazy-cdr which calls range :from 2
=> (cons 2 <delayed range call>)
=> lazy-car = 2

force lazy-cdr which calls range :from 3
=> (cons 3 <delayed range call>)
=> lazy-car = 3
And so on. So a consumer, like take would have to iteratively or recursively go through this call chain to construct lazily computed values.
Consume
take generates a list, so it must collect all lazily computed values. How does it do that? By recursively creating conses.
(defun take (n lazy-seq)
  (if (= n 0)
      nil
      (cons (lazy-car lazy-seq)
            (take (1- n) (lazy-cdr lazy-seq)))))
So take creates conses from lazy-car (the head) and a recursive call to take with the next delayed cdr (the tail) which then constructs the result list we're after.
(take 5 (range))
(0 1 2 3 4)
That was pretty simple so far. A library (or language) that supports lazy sequences usually provides more functionality, like filtering or mapping.
Filtering
Filtering is a pretty nice and important part in this. It allows to create specialized lazy sequences. For example we could create a lazy sequence where take collects just even numbers.
This lazy-filter function is very flexible by allowing arbitrary filter functions (just like a filter function on normal lists). The implementation of lazy-filter must again create lazy-cons to be completely transparent to the consumer functions. This also allows the composition of filter functions.
(defun lazy-filter (pred lazy-seq)
  (cond
    ((null lazy-seq)
     nil)
    ((funcall pred (lazy-car lazy-seq))
     (lazy-cons (lazy-car lazy-seq)
                (lazy-filter pred (lazy-cdr lazy-seq))))
    (t
     (lazy-filter pred (lazy-cdr lazy-seq)))))
When the passed in lazy-seq parameter (which is a lazy-cons) is empty, just return nil (the empty list). When applying the predicate to lazy-car is true (t) then return a new lazy-cons with lazy-car as head and delayed call to lazy-filter with the 'forced' tail. When none of the above is true. Which means that this result has to be filtered out. Then call again lazy-filter with the next 'forced' tail.
A similar thing can be done for mapping. But I'll leave that for you to read up on in SICP.
]]><![CDATA[ Lazy-sequences ]]>2021-01-07T01:00:00+01:00http://retro-style.software-by-mabe.com/blog/Lazy-sequencesLazy (evaluated) sequences are sequences whose elements are generated on demand. Many languages have them built in or available as libraries.
If you don't know what this is then here is an example:
(take 5 (range :from 100))
(100 101 102 103 104)
take takes the first 5 elements from the a generator range which starts counting at 100. Each 'take' makes the range generator compute a new value rather then computing 5 elements up-front.
That's why it is called 'lazy'. The elements of the sequence are computed when needed. In a very simple form lazy evaluated sequences can be implemented using a generator that we call range and a set of consumers, like take. The generator can be implemented in a stateful way using a 'let over lambda', like this:
(defun range (&key (from 0))
  (let ((n from))
    (lambda () (prog1
              n
            (incf n)))))
The range function returns a lambda which has bound the n variable (this is also called 'closure'). When we now call the the lambda function it will return n and increment as a last step. (The prog1 form returns the first element and continues to evaluate the rest)
So we can formulate a take function like this:
(defun take (n gen)
  (loop :repeat n
        :collect (funcall gen)))
take has two arguments, the number of elements to 'take' and the generator, which is our lambda from range. This is a very simple example but effectively this is how it works.
If you are looking for good libraries for Common Lisp then I can recommend the following two:
]]><![CDATA[ Thoughts about agile software development ]]>2020-11-17T01:00:00+01:00http://retro-style.software-by-mabe.com/blog/Thoughts+about+agile+software+developmentThoughts about agile software development (agility).
Some time ago I had a discussion with someone on Twitter about "Agile" (notice spelled with a capital "A" as for a proper noun).
I'm not sure how it came to it, there was a bit of back and forth, but I explained that there is no magic in doing agile software development or in agility in general. It's not a secret. It's actually very simple. It's mostly common sense and many people apply this (without knowing) every day in their lifes.
At the core of agility is feedback. Very frequent feedback. And this is the major difference to waterfall or other processes. So you have to see that you place feedback loops at places where you want to adjust decisions and make changes. From the very low levels, like the feedback loop of test-driven development to higher levels like the feedback of frequent continous integration/delivery and deployment and of course the primary feedback loop with a client/customer that tries out a newly integrated story (this client can also be the product owner of your company).
This feedback implicitly allows you to make 'Working software' frequently. The feedback is also at the core of the relationships with your customers towards 'Customer collaboration' and is the source of 'Responding to change'. But that's not all. Feedback from your fellow collegues in QA or the dev team also allows you to change quickly and is at the heart of 'Individuals and interactions'.
So, this guy then said I would be 'out of reality' (not very nice). Because I suggested something so simple and pragmatic. Weird. But we came to a conclusion eventually.
As Dave Thomas puts it: 'agile' is an adjective. You can't sell adjectives. But you can sell nouns.
A whole "Agile" industry has grown after the "Manifesto for Agile Software Development" was written and many people and consulting companies make a lot of money explaining clients how "Agile" works. So of course "Agile" must be something magic, something inexplicable that must be explained to companies by consultants for a lot of money.
But after all it's as simple as (again from Dave Thomas, not literally):
- see where you are
- make a small step in the direction you want to go
- see how that went (feedback)
- review and adjust
- repeat
Do that towards your clients/customers when collaborating on a product, or a feature.
Do that in the dev team by applying TDD, and generally by requesting and providing feedback for code changes, features, etc.
Do that when interacting dev <-> QA team.
etc.
So far so good. Here comes the challenge.
Doing this in practice it not easy. Because there are possibly more people having to see the value in this and most of the people have to pull in the same direction and spend effort to apply this.
Effectively it requires imposing discipline for how you work on yourself. That is not easy either.
]]><![CDATA[ Test-driven Web application development with Common Lisp ]]>2020-10-04T02:00:00+02:00http://retro-style.software-by-mabe.com/blog/Test-driven+Web+application+development+with+Common+LispThe intention of this article is to:
give a tutorial for the workflow of developing outside-in (or top-down) with tests-first
give an introduction to creating web applications in Common Lisp including some of the available libraries and frameworks
explain a bit about test-driven development in general
Outside-in with tests-first
Outside-in (or top-down) nor tests-first is something new. Outside-in approach has been done for probably as long as there are computer languages. Similarly for tests-first. This all has been done for a very long time. The Smalltalk community in the 80's, did tests-first. Kent Beck then developed the workflow and discipline of test-driven development (TDD) a little bit later.
Combining the two makes sense. The idea is that you have two test cycles. An outer test loop which represents an integration or acceptance test, where new test cases (which represent features or parts of a feature) are added incrementally, but only when a previous test case passes. The outer test case fails until the feature was completely integrated and all components were added. And inner test loops that represent all the unit test that are developed in a TDD style for the components to be added.
Adding features incrementally in the context of outside-in means that a feature is developed as a vertical slice of the application rather than building layer by layer horizontally.
This is what we will go though in this article for a single feature of a web application developed from scratch.
At this point I'd like to recommend the book "Growing Object-Oriented Software, Guided by Tests" which talks at length about this topic.
The application here will be developed also incrementally and iteratively. Following the guidelines you should be getting a working application. The iterations shown here don't represent TDD iterations. TDD iterations are much smaller steps but this is hard to really show in writing. For this article it made little sense to really do this. The important thing is to transport the general workflow.
Common Lisp
I wished I had found the Common Lisp world (or the Lisp world in general) earlier. So, I just found Common Lisp somewhen in early 2019. I'm otherwise mostly working in the Java/Scala ecosystem, for almost 20 years. Of course I looked at many other languages and runtimes.
There are many 'new' computer languages these days that have in fact nothing new and are insignificant iterations of something that existed before. In fact nothing new in computer languages came up in the last 40 years or so.
The other thing is, if you want to learn something about programming languages there is no way around having a deeper look at Lisp. The Lisp language is brilliantly simple and expressive. A really practical and productive variant is Common Lisp.
Common Lisp is a representative of the Lisp family that has pretty much every language feature you could think of. It's not statically typed in a way like Haskell or OCaml (ML family) is (I don't wanna get into the dynamic vs. static types thingy now). But what I can say is that both variants have existed for more than 40 years and each has it's pros and cons.
Content overview
As already said, we will go through the development in a test-driven outside-in approach where we will slice vertically through the application and implement a feature with a full integration test and inner unit tests. We will have a look at the following things:
I had the opportunity to work with a few web frameworks in the Java world. From pure markup extension frameworks like JSP over MVC frameworks like Play or Grails to component based server frameworks like Vaadin and Tapestry until I finally have settled with Wicket, which I now work with since 2008.
The frameworks I worked with are usually based on the Java Servlet technology specification (this more or less represents and is an abstraction to the HTTP server and some session handling), which they pretty much all have in common. On top of the Java Servlets are the web frameworks which all enforce certain workflows, patterns and principles. The listed frameworks are a mixture of pure view frameworks and frameworks that also provide data persistence. They provide a routing mechanism and everything needed to make the user interface (UI). Some do explicit separation according to MVC with appropriate folder structures on 'views', 'controllers', 'models' while others do this less explicit. Of course many of those frameworks are opinionated to some degree. But since they usually have many contributors and maintainers the opinions are flattened and less expressive.
The Common Lisp ecosystem regarding web applications is very diverse. There are many framework approaches considering the relatively small community of Common Lisp. The server abstraction exists in form of a self-made opinionated abstraction layer called Clack which allows to use a set of available HTTP servers.
Those are the frameworks I have had a look at: Weblocks, Lucerne, Radiance, Caveman2.
The listed frameworks either base on Clack or directly on the defacto standard HTTP server Hunchentoot. Pretty much all frameworks allow to define REST styled and static routes.
I am not aware of a framework that adds or enforces MVC ('model', 'view', 'controllers'). So if you want MVC you'll have to come up with something yourself (which we'll do here in a very simple form).
The HTML generation is either based on a Django clone called Djulia or is done using one of the brilliant HTML generation libraries for Common Lisp cl-who (for HTML 4) and Spinneret (for HTML 5). Those libraries are HTML DSLs that allow you to code 'HTML' as Lisp code and hence it is compiled, can be type checked and debugged (if needed). Very powerful.
I think the only framework that enforces the use of Djulia is Lucerne. The others don't lock you in on something.
All frameworks also do some convenience wrapping of the request/response for easier access to parameters.
The only one that creates some 'model' abstractions for views is Weblocks. The only one that adds data persistence is Caveman2. But this is just some glue code that you get as convenience. The same libraries can be used in other frameworks.
The most complete one for me seemed to be Caveman2. It also sets up configuration, and creates test and production environments. But the documentation situation is not so good for Caveman2 (and/or Ningle which Caveman2 is based on). I really had a hard time finding things. The other framework documentations are better. However, since the frameworks for a large part glue together libraries it is possible to look at the documentation for those libraries directly. The documantation for Hunchentoot server, cl-who, Spinneret, etc. are sufficiently complete.
The web application we will be developing during this article is based on an old web page design of mine that I'd like to revive. The web application will primarily be about a 'blog' feature that allows blog posts be written in HTML or Markdown and stored as files. The application will pick them up and convert them on the fly (in case of Markdown).
The web application is based on the following libraries (web application relevant only):
Snooze REST routing library. This library is implemented with plain CLOS and hence can be easily unit tested. We'll see later how this works. I didn't find this easily possible with any other routing definitions of the other frameworks.
cl-who for HTML generation, because this old web page is heavy on HTML 4. Otherwise I had used Spinneret.
The project is hosted on GitHub. So you can checkout the sources yourself. The life web page is available here.
Project start
Since this was my first web project with Common Lisp I had to do some research for how to integrate and run the server and add routes, etc. This is where the scaffolding that frameworks like Caveman2 produce are appeciated.
But, once you know how that works you can start a project from scratch. Along the way you can create a template for future projects. (This can also be in combination with one of the mentioned frameworks.)
That means we don't have a lot of setup to start with. We create a project folder and a src and tests folder therein. That's it. We'll add an ASDF based project/system definition as we go along.
To get started and since we use a test-driven approach we'll start with adding an integration (or acceptance) test for the blog feature.
In order to add tests that are part of a full test suite we'll start creating an overall 'all-tests' test suite. Create a new Lisp buffer/file and add the following code and save it as tests/all-tests.lisp:
This is an empty fiveam test package that just defines an empty test suite. It will help us later when creating the ASDF test system as we can point it to this 'all-tests' suite and it'll automatically run all tests of the application.
Adding the blog feature
We will excercise the integration test cycle with the blog page. There are a few use cases for the blog page where we take one that we will go through. The tests need to make sure that all components involved with serving this page are properly integrated and are operational.
The outer test loop
As already said, we have two test cycles. An outer and inner cycle. The outer test cycle represent the integration or acceptance tests while the inner the unit tests. While working on the unit tests it is possible to go back to the outer test for verifications. But the goal is to have the outer test fail until all the inner work is done so that the outer test can act as a guide and a safety net. The outer test cases are added incementally, feature by feature (or maybe also parts of a feature). While all code is developed and refined iteratively in the TDD workflow.
The blog index page is shown when a request goes to the path /blog. On this path the last available blog post is to be selected and displayed.
Let's start with the integration test and create a new Lisp buffer/file, save it as tests/it-routing.lisp and add the following code:
Let's go through it. It creates a new test package and a new test suite. The :in cl-swbymabeweb.tests:test-suite adds this test suite to the all-tests test suite that we've created before.
The test handle-blog-index-route is a full cycle integration test that uses dexador HTTP client to run a request against the server and expect a certain page title which must be part of the result HTML. Of course, more assertions should be added to make this a proper acceptance test. The intention of the test, and of the feature should be fully clear at this stage. For simplicity reasons we'll more or less just test the routing and the overall integration of components. This test though doesn't create any hint about the architecture of the application or about the inner components. The architecture is carved out step by step by following the flow of calls or data (outside-in).
Since fiveam does not support before or after setup/cleanup functionality we have to workaround this using a fixture that is defined by def-fixture. The fixture will start and stop the HTTP server and in between run code that is the body of with-fixture. We also want to wrap all calls in unwind-protect in order to force shutting down the server as cleanup procedure even if the &body raises an error which would otherwise unwind the stack and the HTTP server would keep running which had consequences on the next test we run.
Now, as part of adding this test we define a few things that don't exist yet. For example do we define a package called cl-swbymabeweb where we import start and stop from. Those start and stop functions obviously do start and stop the web server, so the package cl-swbymabeweb should be an application entry package that does those things.
This is part of what tests-first and TDD does, it acts as the first user of the production code and so defines how the interface should look like from an API user perspective.
When evaluating this buffer/file (I use sly-eval-buffer in Sly, or C-c C-k when the file was saved) we realize (from error messages) that there are some missing packages. So in order to at least get this compiled we have to load the dependencies using quicklisp. Here this would be :dexador, :fiveam and :str (string library).
We also have to create the defined package cl-swbymabeweb and add stubs (for now) for the startand stop functions. That's what we do now. Create a new buffer/file, add the following code as the minimum code to make the integration test compile, evaluate and save it under src/main.lisp.
We can now go into the test package in the REPL by doing (in-package :cl-swbymabeweb-test) and run the test where we will see the following output:
CL-SWBYMABEWEB-TEST> (run! 'handle-blog-index-route)

Running test HANDLE-BLOG-INDEX-ROUTE X
 Did 1 check.
    Pass: 0 ( 0%)
    Skip: 0 ( 0%)
    Fail: 1 (100%)

 Failure Details:
 --------------------------------
 HANDLE-BLOG-INDEX-ROUTE in IT-ROUTING [Test integration of blog - index.]:
      Unexpected Error: #<USOCKET:CONNECTION-REFUSED-ERROR #x30200389ACBD>
Error #<USOCKET:CONNECTION-REFUSED-ERROR #x30200389ACBD>.
 --------------------------------
So, of course. Dexador is trying to connect to the server, but there is no server running. The start/stop functions are only stubs. This is OK. It is expected.
Start the server, for real
In order for the integration test to do it's job and test the full integration we still have a bit more work to do here before we move on. The HTTP server should be working at least. Let's do that now:
Add the following to src/main.lisp on top of the start function:
(defvar *server* nil)
For the start function we'll change the signature like this in order to be able to also specify a different port: &key (port 5000) (address "0.0.0.0"). Finally we'll now start the server like so in start:
After 'quickloading' log4cl and hunchentoot and running the test again we will see the following output instead:
CL-SWBYMABEWEB-TEST> (run! 'handle-blog-index-route)

Running test HANDLE-BLOG-INDEX-ROUTE
 <INFO> [21:35:21] cl-swbymabeweb (start) - Starting server.
::1 - [2020-09-07 21:35:22] "GET /blog HTTP/1.1" 404 339 "-"
"Dexador/0.9.14 (Clozure Common Lisp Version 1.12  DarwinX8664); Darwin; 19.6.0"
X
 <INFO> [21:35:22] cl-swbymabeweb (stop) - Stopping server.
 Did 1 check.
    Pass: 0 ( 0%)
    Skip: 0 ( 0%)
    Fail: 1 (100%)

 Failure Details:
 --------------------------------
 HANDLE-BLOG-INDEX-ROUTE in IT-ROUTING [Test integration of blog - index.]:
      Unexpected Error: #<DEXADOR.ERROR:HTTP-REQUEST-NOT-FOUND #x3020032527FD>
An HTTP request to "http://localhost:5000/blog" returned 404 not found.

<html><head><title>404 Not Found</title></head><body><h1>Not Found</h1>
The requested URL /blog was not found on this server.<p><hr><address>
<a href='http://weitz.de/hunchentoot/'>Hunchentoot 1.3.0</a>
<a href='http://openmcl.clozure.com/'>
(Clozure Common Lisp Version 1.12  DarwinX8664)</a>
at localhost:5000</address></p></body></html>.
 --------------------------------
This looks a lot better. The test still fails, which is good and expected. But the server works and responds with 404 for a request to http://localhost:5000/blog.
The test will fail until the server responds with some HTML that contains the expected page title. In order to have the right page title we'll still have some work to do. So now is the time to move towards the inner test loops and develop the inner components in a TDD style. The inner unit tests should of course all pass.
But before we do that, and since we still can remember what files and libraries we added to make this all work we should setup an ASDF system that we'll expand as we go along.
For a quick recall, ASDF is the de-facto standard to define Common Lisp systems (or projects if you want). It allows to define library dependencies, source dependencies, tests, and a lot of other metadata.
So create a new buffer/file, save it as cl-swbymabeweb.asd in the root folder of the project and add the following:
This defines the necessary ASDF system and test system to fully load the project to the system so far. When the project is in a folder where asdf can find it (like ~/common-lisp) then it can be loaded into the image by:
;; load (and compile if necessary) the production code
(asdf:load-system "cl-swbymabeweb")

;; load (and compile if necessary) the test code
(asdf:load-system "cl-swbymabeweb/tests")

;; run the tests
(asdf:test-system "cl-swbymabeweb/tests")
Notice test-system vs. load-system. Since Common Lisp (CL) is image based, ASDF is a facility that can load a full project into the CL image. Keeping the system definition up-to-date is a bit combersome because loading the system must be performed on a clean image to really see if it works or not and if all dependencies are named proper. This is something that must be tried manually on a clean image. I usually do this by issuing sly-restart-inferior-lisp with loading the system, test system and finally testing the test system. When that works it is quite easy to continue working on a project which is merely just:
open Emacs
run Sly/Slime REPL
load-system (also the test system if tests should be run) of the project to work on.
Until here we have a ditrectory structure like this:
I need to mention that the ASDF systems we defined explicitely name the source files and dependencies. ASDF can also work in a different mode where it can determine source dependencies according to the :use directive in the defined packages that are spread in files (I tend to use one package per file). This mode then just requires the root source file definition and it can sort out the rest. Look in the ASDF documentation for package-inferred-system if you are interessted.
The inner test loops
Now we will move on to the inner components. The first component that is hit by a request is the routing. We have to define which requests, request paths are handled by what and how. As mentioned earlier most frameworks come with a routing mechnism that allows defining routes. We will use Snooze for this. The difference between Snooze and other URL router frameworks is more or less that routes are defined using plain Lisp functions in Snooze and HTTP conditions are just Common Lisp conditions. The author says: "Since you stay inside Lisp, if you know how to make a function, you know how to make a route. There are no regular expressions to write or extra route-defining syntax to learn.". The other good thing is that the routing can be easily unit tested.
URL routing / introducing the MVC controller
Of course we will start with a test for the routing. There will also be a new architectural component in the play, the MVC controller. The URL routing is still a component heavily tied to system boundary as it has to deal with HTTP inputs and outputs and reponse codes. In order to apply separation of concerns and single responsibility (SRP) we make the routing responsible for collecting all relevant input from the HTTP request and pass it on to the controller. At this stage we have to establish a contract between the router and the controller. So we define the input, expected output of the controller as we see fit from our level of perspective in the router. The output also includes the errors the controller may raise. All this is primarily carved out during developing the routing tests.
So let's put together the first routing test. Create a new buffer/file, save it as tests/routes-test.lisp and put the following in:
(defpackage :cl-swbymabeweb.routes-test
  (:use :cl :fiveam :cl-mock :cl-swbymabeweb.routes)
  (:export #:run!
           #:all-tests
           #:nil))
(in-package :cl-swbymabeweb.routes-test)

(def-suite routes-tests
    :description "Routes unit tests"
    :in cl-swbymabeweb.tests:test-suite)

(in-suite routes-tests)

(test blog-route-index
  "Tests the blog index route.")
This just defines an empty test. But we require a new library called cl-mock. It is a mocking framework.
Why do we need mocking here? Well, we want to use a collaborating component, the controller. But we'd want to defer the implementation of the controller until it is necessary. That is not now. The mock allows us to define the interface to the controller without having to implement it. This also allows us to stay focused on the routing and the controller interface definition. We don't need to be distracted with any controller implementation details.
In order to get the test package compiled we have to quickload two things, that is snooze and cl-mock. We also have to create the 'package-under-test' package. This can for now simply look like so (save as src/routes.lisp):
Once the test code compiles and we can actually run the empty test (use in-package and run! as above) we can move on to implementing more of the test.
One thing to remember is to update the ASDF system definition with the new files we added and library dependencies. However, in order to not interrupt the workflow I'd like to defer that until we can make a clear head again. The best time might be when we are done with the unit tests for the routes.
Now, let's add the following to the test function blog-route-index:
with-mocks is a macro that comes with cl-mock. Any mocking code must be wrapped inside it. To actually mock a function call we use the answer macro which is also part of cl-mock. The use of answer in our test code basically means: answer a call to the function (controller.blog:index) with the result (cons :ok ""). Since the controller does not yet exist we did define the interface for it here and now. This is how we want the controller to work. We did define that there should be a dedicated controller for the blog family of pages. We also defined that if there is no query parameter we want to use the index function of the controller to deliver an appropriate result. The result should be a cons consisting of an atom (_car) and a string (_cdr). The car indicates success or failure result (the exact failure atoms we don't know yet). The cdr contains a string for either the generated HTML content or a failure description. answer doesn't call the function, it just records what has to happen when the function is called.
Let's move on: the with-request macro (below) is copied from the snooze sources. It takes a request path and fills the code parameter with the result of the route handler. In the body of the with-request macro we can verify the code with an expected code. Also we want to verify that the request handler actually called the controller index function by checking the number of invocations that cl-mock recorded.
Now to compile and run the test there are a few things missing. First of all the with-request macro. Copy the following to routes-test.lisp:
(defmacro with-request ((uri
                         &rest morekeys
                         &key &allow-other-keys) args
                        &body body)
  (let ((result-sym (gensym)))
    `(let* ((snooze:*catch-errors* nil)
            (snooze:*catch-http-conditions* t)
            (,result-sym
              (multiple-value-list
               (snooze:handle-request
                ,uri
                ,@morekeys)))
            ,@(loop for arg in args
                    for i from 0
                    when arg
                      collect `(,arg (nth ,i ,result-sym))))
       ,@body)))
Also we need a stub of the controller. Create a new buffer/file, save it as src/controllers/blog.lisp and add the following:
The test and the overall code should now compile. When running the test we see that the HTTP result code is 404 instead of the expected 200. We also see that
evaluated to 0. Which means that the controller index function was not called.
This is good, because there is no route defined in src/routes.lisp. In contrast to the outer loop tests, which we shouldn't solve immediatele, we should of course solve this one. So let's add a route now to make the test 'green'. Add this to routes.lisp:
(defroute blog (:get :text/html)
  (controller.blog:index))
This defines a route with a root path of /blog. It defines that it must be a GET request and that the output has a content-type of text/html.
When we now evaluate the new route and run the test again we have both is assertions passing.
At this point we should add a failure case as well. What could be a failure for the index route? The index is supposed to take the last available blog entry and deliver it. Having no blog entry is not an error I would say, rather the HTML content that the controller delivers should be empty, or should contain a simple string saying "there are no blog entries". So the only error that could be returned here is some kind of internal error that was raised somewhere which bubbles up through the controller to the route handler.
Let's add an additional test:
(test blog-route-index--err
  "Tests the blog index route. internal error"
  (with-mocks ()
    (answer (controller.blog:index) (cons :internal-error "Foo"))

    (with-request ("/blog") (code)
      (is (= 500 code))
      (is (= 1 (length (invocations 'controller.blog:index)))))))
Running the test has one assertion failing. The code is actually 200, but we expect it to be 500. In order to fix it we have to add some error handling and differentiate between :ok and :internal-error results from the controller. Let's do this, change the route definition to this:
This will make all existing tests green. But I'd like to add another test for a scenario where the controller result is undefined, or at least not what the router expects. I'd like to prepare for any unforseen that might happen on this route handler so that the response can be a defined proper error code. So add this test:
(test blog-route-index--err-undefined-controller-result
"Tests the blog index route.
internal error when controller result is undefined."
(with-mocks ()
(answer (controller.blog:index) nil)
(with-request ("/blog") (code)
(is (= 500 code))
(is (= 1 (length (invocations 'controller.blog:index)))))))
When executing this test the response code is a 204, which represents 'no content'. And indeed, this is correct. When the controller result is nil the router handler will also return nil because there is no case that handles this controller result, so the function runs through without having defined an explicit return, which then makes the function return nil. So we have to change the router code a bit to handle this and more cases. Change the route definition to:
The outer handler-case catches any error that may happen and produces a proper code 500. Additionally it logs the error text. The case has been enhanced with a 'otherwise' handler which actually produces an error condition that is caught in the outer handler-case.
When running the tests again we should be fine.
The tests of the router don't actually test the string content (_cdr_) of the controller result because it's irrelevant to the router. It's important to only test the responsibilities of the unit-under-test. Any tests that go beyond the responsibilities, or the public interface of the unit-under-test leads to more rigidity and the potential is much higher that tests fail and must be fixed when changes are made to production code elsewhere.
We are now done with this feature slice in the router. It is now a good time to bring the ASDF system definition up to date. Add the new library dependencies: snooze, cl-mock. Also change the :components section to look like this:
This adds the 'controllers' sub-folder as a sub component that can name additional source files under it. When done, restart the REPL, load both systems and also run test-system. At this point this should look like this:
The only expected failing test is the integration test. Though the fail reason is still 404 'Not Found'. This is because we have not yet registered the route with the HTTP server. But I'd like to postpone this for when we have implemented the controller.
The blog controller
Before we go to implement the tests for the controller and the code for the controller itself we have to think a bit about the position of this component in relation to the other components and what the responsibilies of the blog controller are. In the MVC pattern it has the role of controlling the view. It also has the responsibility to generate the data, the model, that the view needs to do its job. The view is responsible to produce a representation in a desired output format. The model usually consist of a) the data to present to the user and b) the attributes to control the view components for visibility (enabled/disabled, etc.).
In our case we want the view to create a HTML page representation that contains the text and images of a blog entry, the blog navigation, and all the rest of the page. So the model must contain everything that the view needs in order to generate all this.
Let's have a look at this diagram:
The blog controller should not have to deal with loading the blog entry data from file. This is the responsibility of the blog repository. Stripping out this functionality into a separate component has a few advantages. It keeps the controller code small and clean maintaining single responsibility. This is reflected in the tests, they will be simple and clean as well. The blog-repo will have to be mocked for the tests. The interface to the blog-repo will also be defined when implementing the tests for the blog controller on a use-case basis. The blog-repo as being in a separate area of the application will have its own model that can carry the data of the blog entries. The controller s job will be to map all relevant data from the blog-repo model to the view model. A model separation is important here for orthogonality. Both parts, the blog-repo and the controller / view combo should be able to move and develop separately and in their own pace. Of course the controller, as user of the blog-repo has to adapt to changes of the blog-repo interface and model. But this should only be necessary in one direction.
The purpose of blog-repo-factory is to be able to switch the kind of blog-repo implementation for different environments. It allows us to make the controller use a different blog-repo for test and production environment. The controller will only access the blog-repo through the blog-repo-facade which is a simplified interface to the blog-repo that hides away all the inner workings of the blog repository. So the controller will only use two things: the blog-repo-facade and the blog repo model. This simplified interface to the blog repository will also be simple to mock in the controller tests as we will see shortly.
The arrows in this diagram mark the direction of dependencies. The router has an inward dependency on the controller. The controller in turn has a dependency on the view and model because it must create both. The controller also has a dependency on the blog-repo-facade and on the model of the blog-repo. But none of this should have a dependency on the controller. Nor should the controller know about anything happening in the router or deal with HTTP codes directly. This is the responsibility of the router.
MVC - a quick detour
The MVC pattern at first wasn't actually a pattern, or at least not officially known as a pattern. It was added to Smalltalk as a way to program UIs in the late 70's and only later MVC was adopted by other languages and frameworks. It allows a decoupling and a separation of concerns. Different teams can work on view, controller and model code. It also allows better testability and a higher reusability of the code. Use-cases grouped as MVC have a high cohesion and a lower coupling.
It's interesting, the 70's to 90's were amazing times. Pretty much all technological advancements of programming languages and patterns of computer science come from this time frame. Structured programming, object-oriented programming, functional programming, statically typed languages (Standard ML) and type inference (Hindley-Milner) were invented then. It was a time of open-minded exploration and ideas.
-- detour end
Again, we start with test code, the plain blog controller test package. Save this as tests/blog-controller-test.lisp:
The first test is already a bummer. It is slightly more complex than anything we had so far. But it won't get a lot more complex. It's not trivial to write how this slowly develops applying TDD using the red-green-refactor phases. So I'm just pasting the complete test with all additional needed data. But of course this was developed in the classic TDD style.
(defparameter *expected-page-title-blog*
"Manfred Bergmann | Software Development | Blog")
(defparameter *blog-model* nil)
(test blog-controller-index-no-blog-entry
"Test blog controller index when there is no blog entry available"
(setf *blog-model*
(make-instance 'blog-view-model
:blog-post nil))
(with-mocks ()
(answer (blog-repo:repo-get-latest) (cons :ok nil))
(answer (blog-repo:repo-get-all) (cons :ok nil))
(answer (view.blog:render *blog-model*) *expected-page-title-blog*)
(is (string= (cdr (controller.blog:index)) *expected-page-title-blog*))
(is (= 1 (length (invocations 'view.blog:render))))
(is (= 1 (length (invocations 'blog-repo:repo-get-all))))
(is (= 1 (length (invocations 'blog-repo:repo-get-latest))))))
The first, simpler test assumes that no blog entry exists. Let's go through it:
We have now two things that come into play. It's 1) the blog-repo-facade here represented as blog-repo package and 2) the blog view package view.blog. The blog views s render function will produce HTML output. We will mock the view generation and will answer with the pre-defined *expected-page-title-blog*. The blog view will also need a model, represented as *blog-model* parameter.
Again we need to setup mocks using with-mocks macro. The answer calls represent the interfaces and function calls the controller should do to the blog-repo in order to a) retrieve all blog entries (blog-get-all) which is internally triggered through the call blog-get-latest. So the way the blog-repo works is that in order to retrieve the latest entry all entries must be available which must be collected before. Again we define an output interface of the blog-repo to be a cons with an atom as car and a result as the cdr. The two blog-repo facade calls both return with :ok but contain an empty result. This is not an error. The view has to render appropriately, which is not tested here. Also again, the controller tests do only test the expected behavior of the controller which is more or less: generate the model for the view, pass it to the view and take a response from the view.
The view.blog:render function takes as parameter the blog model and should return some HTML which contains the expected page title. The *blog-model* is a class structure which is here initialized kind of empty (nil represents empty).
The assertions make sure that a call to controller.blog:index actually returns the expected page title as cdr and also that all expected functions have been called.
In order for this to compile we have to add a few things. Create a new buffer/file and add the following code for the stub of the blog-repo-facade and save it as src/blog-repo.lisp:
(defpackage :cl-swbymabeweb.blog-repo
(:use :cl)
(:nicknames :blog-repo)
(:export ;; facade for repo access
#:repo-get-latest
#:repo-get-all))
(in-package :cl-swbymabeweb.blog-repo)
(defun repo-get-latest ()
"Retrieves the latest entry of the blog.")
(defun repo-get-all ()
"Retrieves all available blog posts.")
Also we have to add the view stub. Create a new buffer/file, save it as src/views/blog.lisp and add the following:
This package also defines the model class. The blog-view-model is the aggregated model that is passed in from the controller. The blog-post and all-blog-posts slots model up the 'to-be-displayed' blog entry and all available blog entries which is relevant for the navigation view component. To have a separation from the blog-repo model data (orthogonality) we will add separate model classes that are used only for the view. We will do this shortly.
Considering the dependencies we have two options of where to define the model. It's either right here (this works if we have a simple model class), or we define it in a separate package. In case we have more model classes and more complex ones this would be the better approach.
There is one addition we have to add to the test package. Add the following to right below the :export:
(:import-from #:view.blog
#:blog-view-model)
We explicitly import only the things we really need. This is the minimal code to get all compiled but the tests should still fail. So we have to implement some logic to the index function of the controller.
In order for the blog controller code in src/controllers/blog.lisp to know the view functions we should import the :view.blog package and then we have to implement some code to make the tests pass.
TDD - a quick detour
We just have to look at the test expectations and implement them. An aspect of TDD I haven't talked about is the faking and cheating one can do in order to get the tests green (pass) as quickly as possible. When the tests pass we can refactor and replace the cheating with some 'real' code. Until now I have presented you full implemententations of the production code that fit to the test expectations. But a TDD cycle moves in fast paced iterations with only small changes from red to green, then refactor, then from green to red for a new test case to restart the cycle. The cycle from red to green can contain cheating. This is because we want feedback as quickly as possible about what we did is either good or no good. When we cheat, this 'good' means just that we meet the current test expectation. Iteration for iteration we add new expectations that at some point can't be cheated anymore. This workflow that switches between test code and production code very rapidly and the immediate feedback we get puts us kind of into a symbiosis between the test code and the production code. The realization and the feeling of the code building up this way is enormously satisfying. The fact that you can just concentrate on small fractions of code but know that there is a outer protection (outer test loop) is a big relief.
-- detour end
The cheating
So now I'll introduce a bit of cheating that just makes the one existing test case and all assertions pass. As I said this actually builds up in much smaller steps. And eventually of course we need to get rid of the cheating.
So, replace the index function with the following implementation and also add the other small functions.
(defun index ()
(let ((lookup-result (blog-repo:repo-get-latest))
(all-posts-result (blog-repo:repo-get-all)))
(make-controller-result
:ok
(view.blog:render
(make-view-model (cdr lookup-result) (cdr all-posts-result))))))
(defun make-controller-result (first second)
"Convenience function to create a new controller result.
But also used for visibility of where the result is created."
(cons first second))
(defun make-view-model (the-blog-entry all-posts)
(make-instance 'blog-view-model
:blog-post nil
:all-blog-posts nil))
This is partly cheated insofar as the view model is generated with hardcoded nil values just as the tests expect it. When we compile this we're getting warnings shown for unused variables the-blog-post and all-posts. Those warnings should be treated seriously. We'll fix them shortly.
To better reveil the intention of how the controller works, and the output it generates we add a function make-controller-result that can generate the result (which after all is just a cons).
When we run the tests they will all pass:
Running test BLOG-CONTROLLER-INDEX-NO-BLOG-ENTRY ....
Did 4 checks.
Pass: 4 (100%)
Skip: 0 ( 0%)
Fail: 0 ( 0%)
When we now add another test case we will have no other choice as to remove the cheating in order to make the tests pass. We will see now. For the new test case we will need quite a bit additional production code, even if it's just stubs (more or less) but we need to get things compiled in order to even only run the new test. Add the following test case:
The parameter *blog-entry* is set up with the model from the blog-repo, which we have to define still. Otherwise it is similar to the previous test case. The difference is that we expect the blog-repo now to actually get us blog entries which are mapped to the view model and passed on to the view to generate the display. We also use a new functionality of the answer macro. It can do pattern matching on the provided function parameter and so we can validate the date and nav-date formatting (we will add the model for this shortly). We also pre-define a timestamp with the *the-blog-entry-date* parameter which we require to be stable for the test case.
Now let's add the missing code to get this compiled. Stay close as we have to modify a few files.
To src/blog-repo.lisp add the following class which represents the blog model:
(defclass blog-entry ()
((name :initform ""
:type string
:initarg :name
:reader blog-entry-name
:documentation "the blog name, the filename minus the date.")
(date :initform nil
:type fixnum
:initarg :date
:reader blog-entry-date
:documentation "universal timestamp")
(text :initform ""
:type string
:initarg :text
:reader blog-entry-text
:documentation "The HTML representation of the blog text.")))
(defun make-blog-entry (name date text)
(make-instance 'blog-entry :name name :date date :text text))
The make-blog-entry is a convenience function to more easily create a blog-entry instance. This class structure has three slots. The name represents the name of the blog entry. The date is the date (timestamp, type fixnum) of the last update of the blog entry. And text is the HTML representation of the blog entry text. We don't go into detail about the blog text. The blog-repo takes care of this detail. What is important is that it delivers the text in a representational format that is immediately usable. There may be different strategies at play in the blog-repo that are able to convert from different sources to HTML. As initially pointed out the goal should be to allow plain HTML and Markdown texts. So at this point blog-repo is a black box for us. We use the data as is.
Then we'll have to add some additional exports in this package so that the class itself and the reader accessors can be used from importing packages.
In src/controllers/blog.lisp we need the following additions:
(defun blog-entry-to-blog-post (blog-entry)
"Converts `blog-entry' to `blog-post'.
This function makes a mapping from the repository
blog entry to the view model blog entry."
(log:debug "Converting post: " blog-entry)
(when blog-entry
(make-instance 'blog-post-model
:name (blog-entry-name blog-entry)
:date (format-timestring nil
(universal-to-timestamp
(blog-entry-date blog-entry))
:format
'((:day 2) #\Space
:long-month #\Space
(:year 4)))
:nav-date (format-timestring nil
(universal-to-timestamp
(blog-entry-date blog-entry))
:format
'((:day 2) #\-
(:month 2) #\-
(:year 4)))
:text (blog-entry-text blog-entry))))
I'll explain in a bit what this does. Suffice to say for now that this is the function that maps the data from a blog-entry data structure to the blog-post-model data structure (which we'll define next) as used in the blog-view-model.
This function uses date-time formatting, so we need an import for the functions format-timestring and universal-to-timestamp. Those are date-time conversion functions that allows the Common Lisp get-universal-time timestamp to be converted to a string using a defined format. Import and quickload the package local-time for that. Additionally we need the controller to import :blog-repo so that is has access to the blog-entry and the readers accessors.
We also need to define another view model class that represents the blog entry to be displayed. Add the following to src/views/blog.lisp:
This class is relatively close to the blog-repo class blog-entry. The controller function blog-entry-to-blog-post makes the mapping from one to the other. The view has a different responsibility than the blog-repo has. For example has the blog-post-model an additional slot, the nav-date. It is used in the 'recents' navigation and must present the blog post create/update date in a different string format than is shown in the full blog post display. Generally we use a string type for the date and nav-date slots here because the instance that controls how something is displayed is the controller.
So blog-entry-to-blog-post makes a full mapping from a blog-entry to a blog-post-model with all that is actually needed for the view. With this we make the view a relatively dump component that just shows what the controller wants. The controller test also defines the date formats to be used. Those formats and date strings as displayed by the view are validated in the answer call. Let's have a look at this in more detail:
The answer macro captures the function call arguments, so we can give the argument a name and check on its values. In our case we want to assert that the date strings are of the correct format, which are two different formats. The nav-date for example has to be a bit more condensed than the standard date format. After all answer has to still return something so we use progn which returns the last expression. Since we did not export the slots of blog-view-model and blog-post-model we use the double colon :: to access them. We didn't export those symbols because no one except the view itself needs to access them. This is a bit of a grey area because we tap into a private area of the model data structures. On the other hand it would be good to control and verify the format of the date string. So we choose to accept to live with possible test failures when the structure of the model changes.
With the last addition the code compiles now. So we can run the new test. The test of course fails with:
BLOG-CONTROLLER-INDEX in BLOG-CONTROLLER-TESTS
[Test blog controller for index which shows the latest blog entry]:
Unexpected Error: #<SIMPLE-ERROR #x3020039689ED>
NIL has no slot named CL-SWBYMABEWEB.VIEW.BLOG::DATE..
This is logical. Because we still have our cheating in place that creates a view model with hard coded nil values. So the mocks don't have any effect due to this.
To make the tests pass we have to add the proper implementation of the make-view-model function in the controller code (see above). Replace the function with this:
This will now pass the blog-repo blog entry through the mapping function for the single blog-post slot as well as for all available blog posts generated by mapcar for all-blog-posts. Compiling this will now also remove the warnings we have had with this previously as the two function arguments are now used. Running the tests again now will give us a nice:
Running test BLOG-CONTROLLER-INDEX ....
Did 4 checks.
Pass: 4 (100%)
Skip: 0 ( 0%)
Fail: 0 ( 0%)
Taking a step back and reflect
The MVC blog controller is a relatively complex and central piece in this application. Let's take a step back for a moment and recapture what we have done and how we should continue.
The controller is using two collaborators to do its work. Those two are the blog-repo and the view. Both are not part of the controller unit and hence must be tested reparately. The controller as the driver of the functionality wants to control how to talk to the two collaborators. So the controller tests define the interface which is then implemented in the controller code and in both the blog-repo and the view. For now the collaborators are only implemented with stubs so that the mocking can be applied. Since the controller is the only 'user' of the two collaborating components it can more or less freely define the interface as it requires it. Would there be more 'users' there would be a bit more of 'pulling' from each 'user' so that eventually the interface would be more of a compromise or just had more functionality. We have also decided that the controller controls what and how the view displays the data. This was done for the date formats that are being displayed in the view.
Before we move on to working on the view we should recheck the outer loop test to verify that it still fails. Also now is a good time to register the routing on the HTTP server.
Revisit the outer test loop
The registration of the routes on the HTTP server is a missing piece in the full integration. The error the test provokes should get more accurate the closer we get to the end. So we're closing that gap now. To recall, the integration test raises a 404 'Not Found' error on the /blog route. That can be 'fixed' because we have implemented the route.
Extend the src/routes.lisp with the following function:
(defun make-routes ()
(make-hunchentoot-app))
This function must also be exported: (:export #:make-routes).
Then in src/main.lisp import this function:
The make-routes function will create route definitions that can be applied on Hunchentoot HTTP server *dispatch-table*. This is a feature of snooze. It can do this for other servers as well.
Running the integration test now will give a different result.
<ERROR> [13:20:51] cl-swbymabeweb.routes routes.lisp (blog get text/html) -
Route error: CL-SWBYMABEWEB.ROUTES::ERROR-TEXT:
"The value \"Retrieves the latest entry of the blog.\"
is not of the expected type LIST."
This is a bit odd. What's going on?
When looking at it more closely it makes sense. This is in fact great. It shows us that many parts are still missing for a full integration of all components. The text 'Retrieves the latest entry of the blog.' is returned by the function repo-get-latest of the blog-repo facade. Since it defines no explicit return it will implicitly return the only element in the function, which here is the docstring. But later, in the controller, the return of the repo-get-latest is expected to be a cons (the error says LIST, but a list is a list of cons elements) but apparently it is no cons. So when trying to access elements of the cons with car or cdr we will see this error.
This tells us that there is still quite a bit of work left. We will later fix the integration test without fully implementing the blog-repo.
Updating the ASDF system
Also a good time to bring the ASDF system up-to-date. Add all the new files and library dependencies. Add the src/views/blog.lisp component similarly as we added the controller component. Also add src/blog-repo.lisp. It should be defined before the view and the controller definitions due to the direction of dependency. Also add local-time library dependency.
To check if the system definitions work you can always do those four steps:
restart the inferior lisp process.
load the default system (asdf:load-system) and fix missing components if it doesn't compile.
load the test system. Fix missing components if necessary.
test the test system (asdf:test-system).
The blog view
We are free to generate the view representation as we like. We can use any library we like to. We could even mix those. What the controller expects the view to deliver is HTML as a string. This is the only contract we have. What are our options to generate HTML? We could use:
a templating library. Templating libraries are based on template files which represent pages or smaller page components. A page template is usually composed of smaller component templates. Templates also allow inheritance. Templating libraries usually provide 'language' constructs that allow 'structured programming' (to some extend) in the template, like for loops, if/else, etc. The template library then evaluates the template and expands the language constructs to HTML code:
Djulia: This one is close to Pythons Django and provides a custom template language.
cl-emb: This is a templating library that allows using Common Lisp code in the template. It's use-case is not limited to HTML.
a DSL that allows to write Lisp code which looks close to HTML constructs. There are a few libraries in Common Lisp that do this. Generally DSLs are relatively easy to create in Common Lisp using macros:
cl-who: This library has a long history. It is very mature. However, it is limited to HTML 4.
spinneret: This is a younger library that concentrates on HTML 5.
There are a few more options for both variants. If you are curious you can have a look at awesome-cl.
We are choosing cl-who for this project mainly because I like the expressivness of Lisp code. When I can write HTML this way, the better. In addition, since it is Lisp code I get an almost immediate feedback about the validity of the code in the editor when compiling a code snippet. For larger projects however the templating variant may be a better choice because of the separation between the HTML and the backing code it provides, even though the template language weakens this separation. But yet it might be easier to non-coders to work with the HTML template files.
Testing the view
If we recall, we had created a package for the view where we just created a stub of the render function, and also we did define the view model classes that the controller instantiates and fills with data. But we had not created tests for this because the render function of the view was mocked in the controller test.
Now, when resuming here we first create a test. Testing the view is a bit tricky. In the most simple form you can only make string comparisons of what is expected to be in the generated HTML. Some frameworks come with sophisticated test functionality that goes far beyond just testing in the HTML string representation (Apache Wicket is such a candidate). A stop gap solution to allow more convenient testing is to use some form of HTML parser utility wrapped behind a framework facade. But we're not developing a framework here (this could be a nice project). Neither does any existing Common Lisp web framework has such a functionality. So we're stuck with just doing some string comparisons.
Let's start with a test package for the view. Create a new buffer/file, add the following and save it as tests/blog-view-test.lisp:
This is nothing new. Now let's create a first test. To keep things simple we start with a test that expects a certain bit of HTML to be generated, like the header page title. But we have to supply an instanciated model object to the render function. So there is a bit of test setup needed. This is how it looks:
(defparameter *expected-blog-page-title*
"Manfred Bergmann | Software Development | Blog")
(defparameter *blog-view-empty-model*
(make-instance 'blog-view-model
:blog-post nil
:all-blog-posts nil))
(test blog-view-nil-model-post
"Test blog view to show empty div when there is no blog post to show."
(let ((page-source (view.blog:render *blog-view-empty-model*)))
(is (str:containsp *expected-blog-page-title* page-source))))
This test for now has a single assertion. We only check for the existence of the header page title which is defined as a parameter *expected-blog-page-title*. The model passed in to the render function does not contain any blog entry and no list of blog entries for the navigation element.
A proper web framework should provide enough self-tests and building blocks that one can assume a HTML page is structurally correct. We don't do this kind of checking here to keep things simple. A library that could be facilitated for this is Plump, which is a HTML parser library.
When we run this test it of course fails, because for sure the page title is not included in the render output. In fact the render output is nil. Let's change that.
The following production code will make the test pass. One addition though, we have to :use the cl-who library in the blog-view package because we're going to use now the DSL this library provides. We also have to quickload this library first and of course add it to the .asd file eventually.
Adding this code will make the test pass. What does it do? First of all, the render function uses a self-made building block, the macro with-page. The macro allows to pass two things, 1) the page title and 2) it allows to nest additional code as body of the macro. Having a look at the macro we see the use of cl-who. The with-html-output-to-string macro allows embedding a body of DSL structures that are similar to HTML tags. The only difference is that instead of XML tags that enclose an element we use the Lisp syntax to do the same thing. So for example a :html macro can again nest other code in the body the same as a <html></html> XML tag does. Since this is then Lisp code it is compiled as any other Lisp code and hence can also be validated by the compiler, at least as far as the Lisp macro/function structure goes. The (:body ,@body) allows to add more components to the :body which represents the <body></body> HTML tag. The current use of the with-page macro could also look like this:
So cl-who in combination with Lisp macros it is easily possible to build pages, or smaller page components as reusable building blocks that can be nested and composed where needed. This is probably the reason why no, or only few Common Lisp libraries provide this kind of thing out of the box. Because it's so easy to create from scratch. And after all, depending on what you create and in which context, pre-defined macros and framework building blocks may not necessarily represent the domain language you want or need in your application.
Roundup
Actually I'd like to stop here. You've got a glimpse of how generating HTML components using cl-who and macros works and how the testing can be done. There is of course a lot more work to be done for this application. If you are curious the full project is at GitHub.
But we have one last thing missing before we can recapture. The integration test is still failing. The view code we just added should suffice to make it pass. But as said above at Revisit the outer test loop, the blog-repo in it's incomplete form returns something unusable. So we have to 'fix' that. Change the blog-repo facade functions to this:
(defun repo-get-latest ()
"Retrieves the latest entry of the blog."
(cons :ok nil))
(defun repo-get-all ()
"Retrieves all available blog posts."
(cons :ok nil))
This will make the integration test pass, but again, this is a fake.
It kind of suffices for an integration test, because the blog-repo is part of this integration. But of course when adding more integration tests we would have to come up with something else in which the blog-repo would be fully developed. Checkout the full code in the GitHub project.
With this integration test passing we finalized a full vertical slice of a feature implementation. All relevant components were integrated, even if only as much as needed for this feature (or part of a feature). Any more outer integration tests (which also represent feature integrations) will maybe extend or change the interface to the added components.
Some words on deployment
There are many ways of deploying a web application in Common Lisp. You could for example just open a REPL, load the project using ASDF, or Quicklisp (when it's in an appropriate local folder) and just run the server starter as we did in the integration test.
Another option is to make a simple wrapper script that could look like this:
(ql:quickload :cl-swbymabeweb) ;; requires this project to be in a local folder
;; findable by Quicklisp
(defpackage cl-swbymabeweb.app
(:use :cl :log4cl))
(in-package :cl-swbymabeweb.app)
(log:config :info :sane :daily "logs/app.log" :backup nil)
;; run server here
And just save this file as app.lisp in the root folder of the project.
Then just start your Common Lisp like this: sbcl --load app.lisp.
There are also ways to run a remote session using Slync or Swank where you can also do remote debugging, etc.
Conclusion
We've implemented part of a feature of a web application doing a full vertical slice of the application design using an outside-in test-driven approach. While doing that using Common Lisp we've used and looked at test libraries as well as other libraries that help making web applications easier.
But we also didn't talk about many things that are relevant for web applications. Like, how to configure logging in the web server. How to add static routes. How to use sessions and also localization of strings on a per session basis. How to use JavaScript using the awesome Parenscript package that allows writing JavaScript in Common Lisp. There are other references on the web to address those things. Maybe I will also blog about on of these sometime in the future.
So long, thanks for reading.
]]><![CDATA[ Wicket UI in the cluster - the alternative ]]>2020-07-09T02:00:00+02:00http://retro-style.software-by-mabe.com/blog/Wicket+UI+in+the+cluster+-+the+alternativeAfter the first and the second part.
The third part of clustering with Apache Wicket is about an alternative.
Let me list the following options when you want to run Wicket clustered:
1. Using a load-balancer that supports HTTP protocol or sticky sessions
With "sticky sessions" I mean that the load-balancer forwards the requests to the server that created the session on a session id basis. This requires that the request is decrypted at the load-balancer in order to look at the HTTP headers for the jsessionid. Then the request is either again encrypted when being sent to the server, or it is sent unencrypted. Performance technically the last one is preferred. Decryption at the LB can work if you have control over the certificates. For a multi-tenant application with a lot of domains or sub-domains this can be a deal-breaker as it's hardly managegable to deal with all certificates of all tenants on the load-balancer.
2. A stateful TCP load-balancer
This LB creates a session on a MAC or source IP address basis and forwards requests from the same source to the same server. There is no need to decrypt the request. The session on the TCP load-balancer usually has a timeout. That timeout should be in sync with the HTTP server session timeout. This variant requires a bit of maintenance on the LB side and the LB has to deal with state for the sessions which adds complexity to the load-balancer.
Both of those variants usually still require that the session is synchronised between the servers to prepare for the case that one server goes down either wanted or unwanted.
3. A stateless TCP load-balancer
This works when the session is stored in a common place like a database where each server has access to.
Each read and write of the session is being done on the database. As you can imagine, this is very slow. Caching the session on the server for performance reasons is problematic because with a stateless LB each request can theoretically hit a different server. But an only slightly different session can break the Wicket application.
Now the alternative
The alternative works with a stateless load-balancer. It involves a bit of additional coding. Also you need a session synchronisation mechanism. But it's a lot faster than the database variant.
The idea is that the server that created the session will handle all requests related to this session, except it goes down of course. With a stateless LB it is likely that a request is forwarded to a server that did not create the session. Even if the session is synchronised across the servers, the synchronisation might be too slow so that stale session data might be used. We can't rely on that. Instead, the server where the request hits first will proxy the request to the server that created the session. This of course requires inter-server communication on an HTTP port, preferrably unencrypted.
For that to work, the hostname of the server where the session was created must be stored in the session (or the actual session is wrapped in another object where the additional data is stored). Additionally, when a request hits the server it must check (in the synchronised session object) where the session was created. If 'here' then pass through the request (let me mention Servlet filter-chain), if not 'here', get the hostname from the session object and proxy the request.
The additional unencrypted proxying should be relatively unexpensive. The more servers there are the more likely a request must be proxied.
There are a few edge cases that need a bit of attention, like when immediately after creating the session a second request (within a second or so) goes to a different server, but the session object wasn't synchronised yet.
]]><![CDATA[ TDD - Mars Rover Kata Outside-in in Common Lisp ]]>2020-05-03T02:00:00+02:00http://retro-style.software-by-mabe.com/blog/TDD+-+Mars+Rover+Kata+Outside-in+in+Common+LispThis implementation of the Mars Rover Kata in Common Lisp gives an introduction to the Actor library cl-gserver.
So the Rover is implemented as an Actor, but the design is test-driven. I.e.: what collaborators do we have there and how are they associated?
We will finally have carved out a 'reporting' facility where the rover reports its state to.
]]><![CDATA[ MVC Web Application with Elixir ]]>2020-02-16T01:00:00+01:00http://retro-style.software-by-mabe.com/blog/MVC+Web+Application+with+Elixir
I did explore
Elixir
in the last half year.
It's a fantastic language. Relatively young but already mature. It runs on the solid and battle proven Erlang VM.
Now I thought it is time to have a look at the web framework
Phoenix
.
After reading a few things and trying my way through
Programming Phoenix
I didn't really understand what's going on underneath this abstraction that Phoenix has built. There seemed to be a lot of magic happening. So I wanted to understand that first.
Of course a lot of brilliant work has gone into Phoenix. However, for some key components like the web server, the request routing, the template library Phoenix more or less just does the glueing.
But for me it was important to understand how the web server is integrated, and how defining routes and handlers work.
So the result of this exploration was a simple MVC web framework.
It is actually quite easy to develop something simple from scratch. Of course this cannot compete with Phoenix and it should not.
However for simple web pages this might be fully sufficient and it doesn't require a large technology stack.
So I'd like to go though this step by step while crafting the code as we go. The web application will contain a simple form where I want to put in reader values of my house, like electricity or water. When those are submitted they are transmitted to my
openHAB
system. So you might see the name 'HouseStatUtil' more often. This is the name of the project.
Those are the components we will have a look at:
the web server
the request routing and how to define routes
how to add controllers and views and the model they use
the HTML rendering
string resource localisation
For reference, the complete project is on
Github
.
Project setup
You use the usual
mix
tooling to create a new project.
Then we'll need some dependencies (extract from
mix.exs
):
defp deps do
[
{:plug_cowboy, "~> 2.1.0"},
{:eml, git: "https://github.com/zambal/eml.git"},
{:gettext, "~> 0.17.1"},
{:mock, "~> 0.3.4", only: :test}
]
end
As you probably know, if you don't specify
git:
in particular
mix
will pull the dependencies from
hex
. But
mix
can also deal with github projects.
plug_cowboy
: so
Plug
is an Elixir library that makes building web applications easy. Plugs can be seen as plugins. And so is
plug_cowboy
a 'Plug' that bundles the Erlang web server
Cowboy
.
Eml
: is a library for generating HTML in form of Elixir language constructs, a DSL. But as we will later see, Elixir macros are very powerful (almost as Common Lisp macros). We we will build our own HTML DSL abstraction which should make it easy to use any backend library to generate HTML.
gettext
: is the default localization framework in Elixir. We will see later how that works.
mock
: since we do Test-Driven Development (TDD) of course we need a mocking framework. A library for unit tests is not necessary. This is part of the core Elixir.
The web server
Cowboy
is probably the most well known and used web server in the Erlang world. But we don't have to deal with the details that much.
We have to tell the Erlang runtime to start Cowboy as a separate 'application' in the VM. The term 'application' is a bit misleading. You should see this more as a module or component.
Since in Erlang most things are actor based, and you can have a hierarchy and eventually a tree of actors that are spawned in an 'application' (or component) you have to at least make sure that those components are up and running before you use them.
So we'll have to add this to
application.ex
which is the application entry point and should be inside the 'lib/' folder.
This is how it looks for my application:
require Logger
def start(_type, _args) do
children = [
Plug.Cowboy.child_spec(
scheme: :http,
plug: HouseStatUtil.Router,
options: [port: application_port()])
]
opts = [strategy: :one_for_one, name: HouseStatUtil.Supervisor]
pid = Supervisor.start_link(children, opts)
Logger.info("Server started")
pid
end
defp application_port do
System.get_env()
|> Map.get("PORT", "4001")
|> String.to_integer()
end
The first thing to note is that we use the Elixir
Logger
library. So we need to
require
it. (As a side note, usually you do use
import
or
alias
to import other modules. But
require
is needed when the component defines macros.)
The
start
function is called by the runtime. Now we have to define the 'children' processes we want to have started. Here we define the
Plug.Cowboy
as a child.
The line
plug: HouseStatUtil.Router
defines the request router. We'll have a look at this later.
Supervisor.start_link(children, opts)
will then start the children actors/processes.
Request routing and how to define routes
The
HouseStatUtil.Router
is the next step. We need to tell Cowboy how to deal with requests that come in. In most web applications you have to define some routing, or define page beans that are mapped to some request paths.
In Elixir this is pretty slick. The language allows to call functions without parentheses like so:
get "/" do
# do something
end
This could be written with parentheses as well:
get("/") do
Here is the complete router module:
defmodule HouseStatUtil.Router do
use Plug.Router
alias HouseStatUtil.ViewController.ReaderPageController
alias HouseStatUtil.ViewController.ReaderSubmitPageController
plug Plug.Logger
plug Plug.Parsers,
parsers: [:urlencoded],
pass: ["text/*"]
plug :match
plug :dispatch
get "/" do
{status, body} = ReaderPageController.get(conn.params)
send_resp(conn, status, body)
end
post "/submit_readers" do
IO.inspect conn.params
{status, body} = ReaderSubmitPageController.post(conn.params)
send_resp(conn, status, body)
end
match _ do
send_resp(conn, 404, "Destination not found!")
end
end
Let's go though it.
use Plug.Router
is the key element here. This will make this module a router. This also specifies the request types
get
,
post
and so on.
conn
is a connection structure which has all the data about the connection and the request, like the header and query parameters and so on.
conn.params
is a combination of payload and query parameters.
Each route definition must send a response to the client. This is done with
send_resp/3
. It does take three parameters, the connection structure, a status and a response body (which is the payload).
All the
plug
definitions are executed in a chain for each request. Which means every request is url encoded (the request path at least) and must have a content-type of 'text/*'.
plug :match
does the matching on the paths. The last
match _ do
is a 'catch all' match which here sends a 404 error back to the client.
As you can see we have two routes. Each route is handled by a view controller. The only thing we pass to the view controller are the connection parameters.
Serving static content
Most web sites need to serve static content like JavaScript, CSS or images. That is no problem. The
Plug.Static
does this. As with the other plugs you just define this, maybe before
plug :match
like so:
plug Plug.Static, from: "priv/static"
The 'priv' folder, in this relative form is in your project folder on the same level as the 'lib' and 'test' folders. You can then add sub folders to 'priv/static' for images, css and javascript and define the appropriate paths in your HTML. For an image this would then be:
<img src="images/foo.jpg" alt=""/>
Testing the router
Of course the router can be tested. The router can nicely act as an integration test.
Add one route test after another. It will fail until you have implemented and integrated the rest of the components (view controller and view). But it will act as a north star. When it passes you can be sure that all components are integrated properly.
Here is the test code of the router:
defmodule HouseStatUtil.RouterTest do
use ExUnit.Case, async: true
use Plug.Test
alias HouseStatUtil.Router
@opts HouseStatUtil.Router.init([])
test "get on '/'" do
conn = :get
|> conn("/")
|> Router.call(@opts)
assert conn.state == :sent
assert conn.status == 200
assert String.contains?(conn.resp_body, "Submit values to openHAB")
end
test "post on /submit_readers" do
conn = :post
|> conn("/submit_readers")
|> Router.call(@opts)
assert conn.state == :sent
assert conn.status == 200
end
end
There is a bit of magic that is being done by the
Plug.Test
. It allows you to specify the
:get
and
:post
requests as in the tests.
After the
Router.call(@opts)
has been made we can inspect the
conn
structure and assert on various things. For the
conn.resp_body
we only have a chance to assert on some existing string in the HTML output.
This can be done better. A good example is
Apache Wicket
, a Java based web framework that has excellent testing capabilities. But the situation is similar on most of the MVC based frameworks. Since they are not component based the testing capabilities are somewhat limited.
Nonetheless we'll try to make it as good as possible.
Next step are the view controllers.
How to define controllers and views and the model
The view controller
As you have seen above, each route uses its own view controller. I thought that a view controller can handle
get
or
post
requests on a route. So that handling more 'views' related to a path can be combined in a view controller. But you can do that as you wish. There is no rule.
As a first step I defined a
behaviour
for a view controller. It looks like this:
It defines two functions who's parameters are 'spec'ed as a map of strings -> anything (
binary()
is Erlang and is actually something stringlike. I could also use an Elixir
string
here). And those functions return a tuple of integer (the status) and again a string (the response body).
I thought that the controller should actually define the status since it has to deal with the logic to render the view and process the form parameters, maybe call some backend or collaborator. So if anything goes wrong there the controller knows it.
This is clearly a debatable design decision. We could argue that the controller should not necessarily know about HTTP status codes.
Here is the source for the controller:
defmodule HouseStatUtil.ViewController.ReaderPageController do
@behaviour HouseStatUtil.ViewController.Controller
alias HouseStatUtil.ViewController.Controller
alias HouseStatUtil.View.ReaderEntryUI
import HouseStatUtil.View.ReaderPageView
@default_readers [
%ReaderEntryUI{
tag: :elec,
display_name: "Electricity Reader"
},
%ReaderEntryUI{
tag: :water,
display_name: "Water Reader"
}
]
@impl Controller
def get(_params) do
render_result = render(
%{
:reader_inputs => @default_readers
}
)
cond do
{:ok, body} = render_result -> {200, body}
end
end
@impl Controller
def post(_params), do: {400, ""}
end
You see that this controller implements the
behaviour
specification in the
get
and
post
functions. This can optionally be marked with
@impl
to make it more visible that those are the implemented behaviours.
A
post
is not allowed for this controller and just returns error 400.
The
get
function is the important thing here. The response body for
get
is generated by the views
render/1
function. So we have a view definition here imported as
ReaderPageView
which specifies a
render/1
function.
The views
render/1
function takes a model (a map) where we here just specify some
:reader_input
definitions. Those are later rendered as a table with checkbox, label and textfield.
The
render/1
function returns a tuple of
{[ok|error], body}
. In case of
:ok
we return a success response (200) with the rendered body.
So we already have the model in the play here that is used by both controller and view. In this case the controller creates the model that should be used by the view to render.
Generating HTML in the controller
For simple responses it's not absolutely necessary to actually create a view. The controller can easily generate simple HTML (in the way we describe later) and just return it. However, it should stay simple and short to not clutter the controller source code. After all it's the views responsibility to do that.
A view controller with submit
To support a submit you certainly have to implement the
post
function. The
post
function in the controller will receive the form parameters as a map. This is how it looks like:
The keys of the map are the 'name' attributes of the form components.
Since we only want to send selected reader values to openHAB we have to filter the form parameter map for those that were selected, which here is only the electricity reader ('reader_value_elec').
Here is the source of the 'submit_readers'
post
controller handler:
def post(form_data) do
Logger.debug("Got form data: #{inspect form_data}")
post_results = form_data
|> form_data_to_reader_values()
|> post_reader_values()
Logger.debug("Have results: #{inspect post_results}")
post_send_status_tuple(post_results)
|> create_response
end
More sophisticated frameworks like Phoenix do some pre-processing and deliver the form parameters in pre-defined or standardised structure types.
We don't have that, so there might be a bit of manual parsing required. But we're developers, right?
Testing the controller
Since the controller is just a simple module it should be easy to test it. Of course it depends a bit on the dependencies of your controller if this is more or less easy. At least the controller depends on a view component where a
render/1
function is called with some model.
But the controller test shouldn't test the rendering of the view. We basically just test a bi-directional pass through here. One direction is the generated model to the views render function, and the other direction is the views render result that should be mapped to a controller result.
To avoid to really have the view render stuff in the controller test we can mock the views render function.
In my case here I have a trivial test for the
ReaderPageController
which just should render the form and doesn't require mocking (we do some mocking later).
defmodule HouseStatUtil.ViewController.ReaderPageControllerTest do
use ExUnit.Case
alias HouseStatUtil.ViewController.ReaderPageController
test "handle GET" do
assert {200, _} = ReaderPageController.get(%{})
end
test "handle POST returns error" do
assert {400, _} = ReaderPageController.post(%{})
end
end
The
get
test just delivers an empty model to the controller, which effectively means that no form components are rendered except the submit button.
The
post
is not supported on this controller and hence should return a 400 error.
Mocking out collaborators
The situation is a bit more difficult for the submit controller
ReaderSubmitPageController
. This controller actually sends the entered and parsed reader results to the openHAB system via a REST interface. So the submit controller has a collaborator called
OpenHab.RestInserter
. This component uses
HTTPoison
http client library to submit the values via REST.
I don't want to pull in those dependencies in the controller test, so this is a good case to mock the
RestInserter
module.
The first thing we have to do is
import Mock
to have the defined functions available in the controller test.
As an example I have a success test case and an error test case to show how the mocking works.
This defines submitted reader form data where reader values for water and electricity were entered and selected. So we expect that the
RestInserter
function is called with the
@expected_elec_reader_value
and
@expected_water_reader_value
.
A success case
test "handle POST - success - with reader selection" do
with_mock RestInserter,
[post: fn _reader -> {:ok, ""} end] do
assert {200, _} = ReaderSubmitPageController.post(@reader_data)
assert called RestInserter.post(@expected_elec_reader_value)
assert called RestInserter.post(@expected_water_reader_value)
end
end
The key part here is the
with_mock
. The module to be mocked is the
RestInserter
.
The line
[post: fn _reader -> {:ok, ""} end]
defines the function to be mocked, which here is the
post/1
function of
RestInserter
. We define the mocked function to return
{:ok, ""}
, which simulates a 'good' case. Within the
do end
we eventually call the controllers post function with the pre-defined submitted form data that normally would come in via the cowboy plug.
Then we want to assert that
RestInserter
s
post/1
function has been called twice with both the expected electricity reader value and the expected water reader value.
A failure case
test "handle POST - with reader selection - one error on submit" do
with_mock RestInserter,
[post: fn reader ->
case reader.id do
"ElecReaderStateInput" -> {:ok, ""}
"WaterReaderStateInput" -> {:error, "Error on submitting water reader!"}
end
end] do
{500, err_msg} = ReaderSubmitPageController.post(@reader_data)
assert String.contains?(err_msg, "Error on submitting water reader!")
assert called RestInserter.post(@expected_elec_reader_value)
assert called RestInserter.post(@expected_water_reader_value)
end
end
The failure test case is a bit more complex. Based on the reader value data that the
RestInserter
is called with we decide that the mock should return success for the electricity reader but should fail for the water reader.
Now, when calling the controllers post function we expect that to return an internal error (500) with the error message that we defined the
RestInserter
to return with.
And of course we also assert that the
RestInserter
was called twice.
Still pretty simple, isn't it?
The view
The view is responsible to render the HTML and convert that to a string to pass it back to the controller.
Similarly as for the controller we define a behaviour for this:
This behaviour defines the
render/1
function along with input and output types. Erlang and Elixir are not statically typed but you can define types which are verified with dialyzer as an after compile process.
So the input for the
render/1
function defines
assigns
which ia a map of string -> anything entries. This map represents the model to be rendered.
The result of
render/1
is a tuple of either
{:ok, string}
or
{:error, string}
where the 'string' is the rendered HTML.
This is the contract for the render function.
Testing the view
Testing the view is even more simple than the controller because it is less likely that some collaborator must be mocked or faked here.
As said earlier, classic MVC frameworks, also Phoenix, ASP MVC or
Play
mostly only allow to test rendered views for the existence of certain strings.
This is insofar different in
Wicket
that Wicket operates component based and keeps an abstract view representation in memory where it is possible to test the existence of components and certain model values rather than strings in the rendered output.
But any-who, here is an example of a simple test case that checks a heading in the rendered output:
test "has form header" do
{render_result, render_string} = render()
assert render_result == :ok
assert String.contains?(
render_string,
h2 do "Submit values to openHAB" end |> render_to_string()
)
end>
As you can see the
render/1
function is called without model. This will not render the form components but certain other things that I know should be part of the HTML string. So we can check for it using a
String.contains?
.
You might realise that I've used some constructs that I will explain in the next chapter. For the string compare I create a
h2
HTML tag the same way as the view creates it and I want it to be part of the rendered view.
Here is another test case that checks for the rendered empty form:
>test "Render form components, empty reader inputs" do
{render_result, render_string} = render()
assert String.contains?(
render_string,
form action: "/submit_readers", method: "post" do
input type: "submit", value: "Submit"
end |> render_to_string
)
end
The empty form which contains the submit button only is created in the test and expected to be part of the rendered view. Similarly we can certainly pass in a proper model so that we have some reader value entry text fields and all that being rendered.
Creating those HTML tags using Elixir language constructs is pretty slick, isn't it? I'll talk about this now.
How do to the HTML rendering
Let me start with this. I know Phoenix uses
EEx
, the default templating library of Elixir (EEx stands for 'Embedded Elixir'). But, I do prefer (for this little project at least) to create HTML content in Elixir source code as language constructs, a DSL.
Taking the form example from above I want to create HTML like this:
form action: "/submit_readers", method: "post" do
input type: "checkbox", name: "selected_" <> to_string(reader.tag)
input type: "submit", value: "Submit"
end
... and so forth. This is pretty cool and just Elixir language.
Using a HTML DSL to abstract HTML generation
No matter what backend generates the HTML I want to be flexible. With only a few macros we can create our own DSL that acts as a frontend that lets us use Elixir language constructs to write HTML code.
This made a blog post by itself. So read about how to create a HTML DSL with Elixir
here
.
Localisation
So the controller, view and HTML generation is quite different to how Phoenix does it. The localisation is again similar. Both just use the
gettext
module of Elixir.
The way this works is pretty simple. You just create a module in your sources that 'uses'
Gettext
.
defmodule HouseStatUtil.Gettext do
use Gettext, otp_app: :elixir_house_stat_util
end
This new module acts like a gettext wrapper module for your project. You should import it anywhere where you want to use one of the gettext functions:
gettext/1
,
ngettext/3
,
dgettext/2
for example
gettext("some key")
searches for a string key of "some key" in the localisation files.
The localisation files must be created using
mix
tool.
So the process is to use the gettext function in your code where needed and then call
mix gettext.extract
which then extracts the gettext keys used in the source code to localization resource files.
There is a lot more info on that on that gettext web page. Check it out.
Outlook and recap
Doing a simple web application framework from scratch is quite easy. If you want to do more by hand and want to have more control over how things work then that seems to be a viable way. However, the larger the web application gets the more you have to carve out concepts which could after all compete with Phoenix. And then, it might be worth using Phoenix right away. In a professional context I would use Phoenix anyway. Because this project has gone though the major headaches already and is battle proven.
Nonetheless this was a nice experience and exploration.
]]><![CDATA[ Creating a HTML domain language in Elixir with macros ]]>2020-02-15T01:00:00+01:00http://retro-style.software-by-mabe.com/blog/Creating+a+HTML+domain+language+in+Elixir+with+macrosIn this post we'll do a bit of exploration with Elixir macros and create our own little HTML DSL that will be part of a larger exploration project that develops a simple MVC based web framework.
This DSL should have a frontend and a backend that actually generates the HTML representation. For now it should use Eml to generate the HTML representation and the to_string conversion. However, it would be possible to also create an implementation that uses EEx as a backend. And we could switch the backend without having the API user change its code.
So here is what we have to do to create a HTML DSL.
First we need a collection of tags. I have hardcoded them into a list:
Then I want to allow to define tags in two styles. A one-liner style and a style with a multi-line body to be able to express multiple child elements.
# one-liner
span id: "1", class: "span-class", do: "my span text"
# multi-liner
div id: "1", class: "div-class" do
span do: "my span text"
span do: "my second text"
end
We need two macros for this. The do: in the one-liner is seen just as an attribute to the macro. So we have to strip out the do: attribute and use it as body. The macro for this looks like this:
defmacro tag(name, attrs \\ []) do
{inner, attrs} = Keyword.pop(attrs, :do)
quote do: HouseStatUtil.HTML.tag(unquote(name),
unquote(attrs), do: unquote(inner))
end
First we extract the value for the :do key in the attrs list and then pass the name, the remaining attrs and the extracted body as inner to the actual macro which looks like this and does the whole thing.
defmacro tag(name, attrs, do: inner) do
parsed_inner = parse_inner_content(inner)
quote do
%E{tag: unquote(name),
attrs: Enum.into(unquote(attrs), %{}),
content: unquote(parsed_inner)}
end
end
defp parse_inner_content({:__block__, _, items}), do: items
defp parse_inner_content(inner), do: inner
Here we get the first glimpse of Eml (the %E{} in there is an Eml structure type to create HTML tags). The helper function is to differentiate between having an AST as inner block or non-AST elements. But I don't want to go into more detail here. Instead I recommend reading the book Metaprogrammning Elixir by Chris McCord which deals a lot with macros and explains how it works.
But something is still missing. We now have a tag macro. With this macro we can create HTML tags like this:
tag "span", id: "1", class: "class", do: "foo"
But that's not yet what we want. One step is missing. We have to create macros for each of the defined HTML tags. Remember the list of tags from above. Now we take this list and create macros from the atoms in the list like so:
for tag <- @tags do
defmacro unquote(tag)(attrs, do: inner) do
tag = unquote(tag)
quote do: HouseStatUtil.HTML.tag(unquote(tag), unquote(attrs), do: unquote(inner))
end
defmacro unquote(tag)(attrs \\ []) do
tag = unquote(tag)
quote do: HouseStatUtil.HTML.tag(unquote(tag), unquote(attrs))
end
end
This creates three macros for each tag. I.e. for span it creates: span/0, span/1 and span/2. The first two are because the attrs are optional but Elixir creates two function signatures for it. The third is a version that has a do block.
With all this put together we can create HTML as Elixir language syntax. Checkout the full module source in the github repo.
Testing the DSL
Of course we test this. This is a test case for a one-liner tag:
test "single element with attributes" do
elem = input(id: "some-id", name: "some-name", value: "some-value")
|> render_to_string
IO.inspect elem
assert String.starts_with?(elem, "<input")
assert String.contains?(elem, ~s(id="some-id"))
assert String.contains?(elem, ~s(name="some-name"))
assert String.contains?(elem, ~s(value="some-value"))
assert String.ends_with?(elem, "/>")
end
This should be backend agnostic. So no matter which backend generated the HTML we want to see the test pass.
Here is a test case with inner tags:
test "multiple sub elements - container" do
html_elem = html class: "foo" do
head
body class: "bar"
end
|> render_to_string
IO.inspect html_elem
assert String.ends_with?(html_elem,
~s())
end
The source file has more tests, but that should suffice as examples.
That was it. Thanks for reading.
]]><![CDATA[ TDD - Game of Life in Common Lisp ]]>2019-07-01T02:00:00+02:00http://retro-style.software-by-mabe.com/blog/TDD+-+Game+of+Life+in+Common+LispThis time it's the Game of Life in Common Lisp.
Since I've tried out Clojure (see the episode on YouTube) I've discovered a whole new world. The world of Common Lisp. It's been around for so long and I really don't know why I haven't looked at this before.
In my attempt to bring TDD closer to developers (to build better designed software with less defects) I've made a TDD session in Outside-In style with Common Lisp. Outside-In can use a 'classicist' TDD or the 'London Style' TDD where more is done in the red phase of 'red-green-refactor', and also it uses mocking to carve out design.
Certainly you code Common Lisp using the awesome editor Emacs using the Sly integrated development environment.
Common Lisp geeks will certainly see some deficiencies in my use of the language. So any tipps are welcome. But the purpose is to show that this development style is certainly possible in Common Lisp because in CL it is possible to develop with a short feedback loop.
]]><![CDATA[ TDD - classicist vs. London Style ]]>2019-06-27T02:00:00+02:00http://retro-style.software-by-mabe.com/blog/TDD+-+classicist+vs.+London+StyleOK, I don't want/need to explain TDD.
As for 'Outside-in', it is a development approach where you start developing at the boundary of a system on a use-case basis. This can be a web service, a web page, a CLI interface or something else. You could say that it's a vertical slice through the system where you add the behavior for the use-case.
But you start your coding with an integration test which expects the right outcome, but since nothing is coded yet it will fail until the very end. The integration tests makes sure that all components are eventually properly wired together, and can produce the side-effect or direct outcome that is expected.
So what is 'classicist'?
With 'classicist' we mean the original TDD approach or red-green-refactor cycle and triangulation where the production code is developed in small steps. In between (in the refactor step) you want to do refactorings and carve out collaborators, find abstractions, etc., but your tests should not be changed once they were green. The refactorings you do are internal, not externally visible. Your tests implicitly test the behavior of helper classes like collaborators. You don't usually do a lot of mocking, in particular not of the collaborators.
'London style'
'London style' is different in that you explicitly think about any collaborations and helper classes while you write the test. So you do more during the 'red' step and therefore the yellow (refactor) step is shorter than in classicist. As a consequence you have to mock out those collaborators, because you know about them and want to control them. On a new system you can carve out a lot of the architecture and design this way.
So basically, while 'classicist' drives design passively and as a refactoring, 'London style' drives it actively through mocking.
Some say that this ('London style') actually tests internals, which you should avoid. But I think we have to look at this from a different perspective. As a tester and designer I would want to know which classes collaborate and use other classes. And this is satisfied by the mocking.
]]><![CDATA[ Wicket UI in the cluster - reflection ]]>2019-05-10T02:00:00+02:00http://retro-style.software-by-mabe.com/blog/Wicket+UI+in+the+cluster+-+reflectionIn the last blog post I've talked about the technicallies of running Wicket clustered.
But there are more things to consider.
The session handling of server based web applications is usually done by the web application server which in the Java world runs on top of a Servlet container. This might be Jetty, Tomcat or some comercial one.
The Servlet specification contains the session and cookie handling. Since Wicket runs on the application server, it doesn't itself has to deal with storing and loading sessions. This is all done by the application server. Wicket just 'uses' the session that the application server provides.
In a cluster environment it is also the responsibility of the application server to create an environment where it replicates the session.
As outlined in the previous article it is possible to follow certain best practices to help Wicket keep the session small, like using LoadableDetachableModel's.
But the application server relies on a certain level of reliability of session stickiness of the load-balancer. Looking at the technology stack there are just too many drawbacks when we have to assume a none-stickiness, or when this doesn’t work reliably.
There usually are a few scenarios how the session replication can work.
If the session is stored in a database that all cluster nodes can use at the same time it might be possible that the application works without LB session stickiness. But this is quite a performance hit since there is usually a long way to the database and the session data has to be serialized and deserialized. In this scenario you cannot really use the second-level cache of the application server because session data might differ slightly when switching from one cluster node to another in a rapid succession.
It is also possible to store the session in memory using a technology like Hazelcast, Apache Ignite or something like that. In this scenario the session is stored locally in a second-level cache and then replicated in the background to other cluster nodes. However the session replication might not be immediate. Which means that a non-stickiness will not properly work here. Because the session might not have replicated when the LB switches nodes during a request which will lead to unexpected behavior or page load errors.
So it is highly recommended to use the application servers second-level cache for performance reasons and use session stickiness of the load-balancer. To avoid SSL offloading load-balancers usually also can be configured to use certain nodes on an IP address or region basis.
]]><![CDATA[ Wicket UI in the Cluster - know how and lessons learned ]]>2019-04-29T02:00:00+02:00http://retro-style.software-by-mabe.com/blog/Wicket+UI+in+the+Cluster+-+know+how+and+lessons+learnedWhile working on a Wicket UI cluster support feature in the last weeks I covered quite a bit of new territory that I was only partly aware of, even after ~9 years of doing Wicket. And I had to do quite a bit of research to collect know-how from different sources.
In this post I’d like to share what I have learned and things I want to emphasize that should be applied.
(I’m doing coding in Scala. So some things are Scala related but should generally apply to Java as well.)
Model separation
If your application has the potential to get bigger with multiple layers you should separate your models (and not only your models). Honor separation of concerns (SoC) and single responsibility (SRP). Create dedicated models at an architectural, module or package boundary (where necessary) and map your models. Apply orthogonality.
If you don’t it’ll hit you in the face at some point. And you are lucky if it does only once.
You can imagine what the disadvantages are if you don’t use dedicated models: changes to the model affect every part of the application where it’s directly used which makes the application ridgid.
After all ’soft’ware implies being ‘soft’ as in flexible and easy to change.
In regards to Wicket or other ‘external interfaces’ the problem is that a loaded model is partly stored in instance variables of Wicket components. The domain model can contain a ton of data and you have no control over what gets serialized and what not without changing your domain model, which you shouldn’t do to satisfy the requirements of an external interface.
So because in a cluster environment those components now must be (de)serialized to be distributed across the cluster nodes and there is no cache anymore it is: a) a performance hit and b) uses up quite some network bandwidth when the session changes a few times per second.
The approach should be to create a dedicated model for a view, because most probably not all data of a domain model is visualized. Further, when the domain model is used directly, submitting form data goes straight back to the domain model. Instead a dedicated ‘submit form’ model can be created that only holds the data of the submit and can be merged back into the domain model on a higher level that can better control when, where and how this is done (i.e. applying additional validations, etc.) This certainly takes a bit more time but is worth the effort in the longer run.
Use LoadableDetachableModel
LoadableDetachableModels load the model when a request is made and ‘forget’ it after the response was generated, and before the state is saved to the session. Which means that model data is not stored to the session but reloaded from scratch more often. One has to keep in mind that the session can change multiple times per request/response cycle, in particular if JavaScript based components load their data lazily. In a cluster environment, without the Servlet container’s second-level cache (see below), it is better to load the data on a request basis instead of serializing and deserializing large amounts of data which have to be synchronized between cluster nodes. Usually the application has a general caching mechanism on a higher level which makes loading the data acceptable.
Preferably no model is stored in the components at all but only the state of the components as such. With this the session size can be contained at a few kBytes.
This is something the Wicket developer has to sensibly consider when developing a component.
In Wicket models can be chained. I like using CompoundPropertyModels. But you can still use a LoadableDetachableModel by chaining them together:
new CompountPropertyModel[Foo](new LoadableDetachableModel(myModelObject))
Extend from Serializable (or use Scala case classes) for any model classes that are UI model
This should be obvious. Any class that should be serializable requires inheriting from Serializable interface.
In Wicket you can also interit from IClusterable, which is just a marker trait inheriting from Serializable.
Add Serializable to abstract parent classes if there is a class hierarchy
I’ve had a few cases where serialized classes could not be deserialized. The reason was that when you have a class hierarchy the abstract base class must also inherit from Serializable.
The deserialization of the code below fails even though class Bar inherits from Serializable. Class Foo also must inherit from Serializable.:
@SerialVersionUID(1L)
abstract class Foo(var1, var2)
class Bar extends Foo with Serializable
Add @SerialVersionUID, always
Wicket components, including the model classes are serializable by default. But to keep compatibility across temporarily different versions of the app when updating a cluster node, add a SerialVersionUID annotation to your component classes (for Scala, in Java it is a static final field). Also add this to every model data class.
When ommiting this annotation the serial version is dynamically created by Java for each compilation process and hence is incompatible to each other even if no code changes were made. So add this annotation to specify a constant version.
Add this to your IDEs class template mechnism. Any class created should have this annotation. It doesn’t hurt when it’s there but not used.
By default Wicket uses a POST-REDIRECT-GET pattern implementation. This is to avoid the ‘double-submit’ problem.
However, in cluster environments it’s possible that the GET request goes to a different cluster node than the POST request and hence this could cause trouble.
So either you have to make certain that the cluster nodes got synchronized between POST and GET or you configure Wicket to the render strategy ONE_PASS_RENDER.
ONE_PASS_RENDER basically returns the page markup as part of the POST response.
By default Wicket uses a file based session page store where the serialized pages are written to. Wicket stores those to support the browser back button and to render older versions of the page when the back button is pressed.
In a cluster setup the serialized pages must be stored in the session so that the pages can be synchronized between the cluster nodes.
In Wicket version 8 you do it like this (in Application#init()):
setPageManagerProvider(new DefaultPageManagerProvider(this) {
override def newDataStore() = {
new HttpSessionDataStore(getPageManagerContext, new PageNumberEvictionStrategy(5))
}
})
The PageNumberEvictionStratety defines how many versions of one page are stored.
Disable the Servlet containers second-level cache
Jetty (or generally Servlet containers) usually uses a second-level cache (DefaultSessionCache) where session data, in form of the runtime objects, is stored for quick access without going through the (de)serialization.
In a cluster environment however this can cause issues because what the second-level cache contains is likely to be different on each cluster node and hence wrong states may be pulled out of it when the load-balancer is delegating to a different node for a request.
So it is better to not use a second-level cache. In Jetty you do this by setting up a NullSessionCache. To this NullSessionCache you also have to provide the backing SessionDataStore where the session data is written and read from.
You do this like this on a ServletContextHandler basis (Jetty 9.4):
val sessionHandler = new SessionHandler
handler.setSessionHandler(sessionHandler)
val sessionCache = new NullSessionCacheFactory().getSessionCache(handler.getSessionHandler)
val sessionStore = // set your `SessionDataStore` implementation here
sessionCache.setSessionDataStore(sessionStore)
sessionHandler.setSessionCache(sessionCache)
You have different options for the SessionDataStore implementation. Jetty provides a JDBCSessionDataStore which stores the session data into a database.
But there are also implementations for Memcached or Hazelcast, etc.
Serialization considerations
There are other options than the Java object serialization. I’d like to name two which are supported by Wicket:
Both provide more performance and flexibility on serialization than the default Java serializer and should be considered.
]]><![CDATA[ TDD - Mars Rover Kata classicist in Scala ]]>2019-04-23T02:00:00+02:00http://retro-style.software-by-mabe.com/blog/TDD+-+Mars+Rover+Kata+classicist+in+ScalaHey. So I've performed the Mars Rover Kata in a classicist TDD style outside-in.
Interested? Check it out on YouTube:
]]><![CDATA[ Burning your own Amiga ROMs (EPROMs) ]]>2019-01-26T01:00:00+01:00http://retro-style.software-by-mabe.com/blog/Burning+your+own+Amiga+ROMs+(EPROMs)With the release of the latest AmigaOS version (3.1.4) the package you could buy included ROM images to be used for either maprom (depending on your accelerator card tool support) or for burning it to a ROM.
Maprom is probably preferred, because it's more flexible, but not always possible. For instance the A3440 card can't do maprom. Or if you have no accelerator at all you can't do maprom either.
Which leaves only a few options. Either you can buy the ROM, have someone burn it or burn it yourself.
Here I want to show how it works to burn it yourself.
What you need:
- an EPROM programmer. I have chosen the low cost GQ-4x4 USB programmer.
- to program the EPROMs used in an Amiga you have to get a 16-Bit 40/42 pin ZIF adapter board for the burner: ADP-054 16 Bit EPROM 40/42 pin ZIF adapter
- an UV eraser, which can erase the EPROMs, in case something goes wrong.
- then you need EPROMs. The types used in A500/A600/A2000 are 27C400. I found the following to work which can be ordered in eBay: AMD27C400
- for burning ROMs for A1200/A4000 you need 27C800 / AMD27C800 roms, two of them to burn one ROM.
- and certainly a ROM image you want to burn.
Sometimes there are good offers at Amazon or eBay for a complete package (except the EPROMs). You shouldn't pay more than €150 for the GQ-4x4, the adapter board and the eraser.
Here is a picture of the device with attached adapter board with an EPROM inside.
Then you need to download the software for the burner. That is a) the burner software itself named "GQUSBprg". The latest version as of this writing is 7.21. And you need the USB driver 3.0.
When you connected the burner and installed the software we can start. Now open the burner software. Make sure that there is no EPROM put in.
1. first step is to select the device, or the EPROM to burn.
Make sure you choose either AM27C400 or 27C400.
2. Next we'll make a voltage check to see if the burner has all voltages in order to properly burn the EPROM.
I found that while you can attached a power supply on the burner it is not required. The USB provides enough power.
3. Load the ROM image into the buffer.
When you load the image make sure you choose .bin (binary).
!!! This is important, or otherwise the programmed ROM won't work. After you loaded the ROM image, you have to make sure to swap bytes. This can be done in the 'Command' menu of the software.
4. Now you have to put in your EPROM into the ZIF slot.
Make sure it sits tight and doesn't move anymore.
5. Make a blank check to see if the EPROM is empty.
6. When the EPROM is blank we can write it.
When the write process is finished it's done.
You can take out the EPROM and put it into the Amiga and it should work.
Some notes: Partly this whole process of writing the ROM was a real pain because the GQ burner would just stop writing at some address. And in fact I had to get the package replaced including the adapter board.
I had first tried it in a virtual machine (VMware Fusion on Mac) but this doesn't work for some reason as the GQ programmer detaches and re-attaches to the USB bus on some of the operations and that doesn't seem to be working reliably in a VM.
The Amiga 4000 can only use 512k EPROMs, hence only 27C400 will work. The Amiga 1200 can also use 27C800 (1MB). The byte-swap, if your ROM image is already byte-swapped, then you don't need to do this here. Some ROM images, which are ready to burn have this already. However, if you want to burn ROM images that are used in maprom or UAE, then you have to byte-swap.
]]><![CDATA[ TDD - Game of Life in Clojure and Emacs ]]>2019-01-05T01:00:00+01:00http://retro-style.software-by-mabe.com/blog/TDD+-+Game+of+Life+in+Clojure+and+EmacsCheck out the screencast about implenting the Game of Life in Clojure with TDD (Test-Driven Development) approach in Emacs editor with CIDER plugin.
P.S: Happy new Year!!!
]]><![CDATA[ TDD - Outside-in with Wicket and Scala-part 2 ]]>2018-12-24T01:00:00+01:00http://retro-style.software-by-mabe.com/blog/TDD+-+Outside-in+with+Wicket+and+Scala-part+2This is the second and last part of the series. It shows the login.
Since I forgot to show how the registration works in the browser after we've implemented it all I'm showing this in the beginning together with two book introductions.
Have fun.
And... Merry Christmas to all of you.
]]><![CDATA[ TDD - Outside-in with Wicket and Scala-part 1 ]]>2018-12-04T01:00:00+01:00http://retro-style.software-by-mabe.com/blog/TDD+-+Outside-in+with+Wicket+and+Scala-part+1This YouTube video demonstrates the Outside-In approach first explained in the book "Growing Object-Oriented Software Guided by Tests".
It'll create a simple Wicket based web application that works its way down to the domain and creates design by mocking.
Be aware that this is not intended for beginners of TDD.
The first part will impmenent the user registration.
]]><![CDATA[ Floating Point library in m68k Assembler on Amiga ]]>2018-08-09T02:00:00+02:00http://retro-style.software-by-mabe.com/blog/Floating+Point+library+in+m68k+Assembler+on+AmigaPart 1 - some theory
Someone told me lately: “If you haven’t developed a floating-point library, go home and do it. It’s a nice weekend project.”
I followed this advice. So, while I was away on vacation I’ve developed this using pen-and-paper and only later wrote and tested it on one of my Amigas.
I must say, it took longer than a weekend. :) But it was a great experience to see how those numbers are generated and handled, and how they 'jitter' at the last bits of precision.
The Amiga offers a number of programming languages, including C/C++ and more high level languages like Pascal or Oberon, and some Basic dialects like AMOS, BlitzBasic and others. But I thought assembler would be nice. The Motorola 68000 series is a very nice assembler. I do know it from my old Amiga times. But never really did a lot with it. So I‘m not an expert in assembler. Hence the assembler code introduced here might not be efficient or optimised. I took the assembler specs with me as print-out and studied them while developing the code.
(I’m posting the full assembler source code at the end of the post. It was developed using the ‘DevPac’ assembler. A well known macro assembler for the Amiga.)
As the first part of this blog I’d like to write a little about the theory of floating-point numbers. But I’m assuming that you know what ‘floating-point’ numbers are.
One of the floating point standards is IEEE 754. It standardises how the number is represented in memory/CPU registers and how it is calculated. IEEE 754 is a single-precision 32 bit standard. The binary representation is defined as (from high bit to to low bit): - 1 bit for the sign (-/+) - 8 bit for the exponent - 23 bit for the mantissa
The sign is pretty clear, it says whether the number is positive or negative.
The 8 bit exponent basically encodes the ‘floating-point’ shift value to the left and right. Shifting to the left means that a negative exponent has to be encoded. Shifting to the right a positive. In order to encode positive and negative values in 8 bit a so called ‘biased-representation’ is used. With an ‚excess‘ value of 127 it’s possible to encode numbers (and exponents) from –126 to 127.
The 23 bit mantissa combines the integer part of the floating-point number and the fraction part.
The integer part in the mantissa can go through a ‘normalisation’ process, which means that the first ‘1’ in a binary form of the number matters. And everything before that is ignored, considering the number is in a 32 bit register. So only the bits from the first ‘1’ to the end of the number are taken into the mantissa. The ‘hidden bit’ assumes that there is always a ‘1’ as the first bit of a number. So that IEEE 754 says that this first ‘1’ does not need to be stored, hence saving one bit for the precision of the fraction part.
Let’s take the number 12.45. In binary it is: 1100,00101101 The left side of the comma, the integer part has a binary value definition of: 1100 = 1*2^8 + 1*2^4 + 0*2^2 + 0*2^1 The fraction part, right side of the comma: 00101101 = 0*2^-2 + 0*2^-4 + 1*2^-8 + 0*2^-16 ...
That is how it would be stored in the mantissa. Considering the ‘hidden bit’, the left bit of the integer part does not need to be stored. Hence there is one bit more available to store the fraction part. Later, when the number must be converted back into decimal it is important to know the bit size of the integer part (positive exponent), or in case the integer part is 0, how many digits were shifted right to the first 1 bit of the fraction part (negative exponent).
There is more to it, read upon it here if you want: https:/en.wikipedia.org/wiki/IEEE_754
Part 2 - the implementation - dec2bin (decimal to binary)
We make a few slight simplifications to the IEEE 754 standard so that this implementation is not fully compliant. - the ‘hidden bit’ is not hidden :) - no normalisation, which means we don’t have negative exponents, because we don’t look into the delivered fraction part for the first ‘1’.
Now, how does it work in practice to get a decimal number into the computer as IEEE 754 representation. The library that is developed here assumes that the integer part (left side of the comma) and the fraction part (right side of the comma) is delivered in separate CPU registers. Because we do not have a ‚float‘ number type where this could be delivered in a combined way. It would certainly work to use one register, the upper word for integer part and the lower word for the fraction part. 16 bit for each, that would in many cases fully suffice. But for simplicity, lets take separate registers.
Say, the number is: 12.45. Then 12 (including the sign) would be delivered in register d0. The fraction part, 45 in d1. The binary floating point number output will be delivered back in register d7.
Converting the integer part into binary form is pretty trivial. We just copy the value 12 into a register and that’s it. The CPU does the decimal to binary conversion for us automatically, because the number consists only of positive powers of two. Hence, the input register d0 already contains the binary representation of the number 12.
As next step we have to calculate the bit length of that number because it is later stored in the exponent. The algorithm is to shift the register d0 to left bit-by-bit until register bit 32 is a ‚1‘. We need to count how many times we shifted. Subtracting that shift-count from 32 (the bit length of the register) will give as result the bit length of the integer value.
Here is the assembler code for that:
; d0 copied to d6
; if int_part (d6) = 0 then no need to do anything
cmpi.l #0,d6
beq .loop_count_int_bits_end
; now shift left until we find the first 1
; counter in d2
.loop_count_int_bits
btst.l #$1f,d6 ; bit 32 set?
bne.s .loop_count_int_bits_done
addq #1,d2 ; inc counter
lsl.l #1,d6
bra .loop_count_int_bits
.loop_count_int_bits_done
move.l #32,d3
sub.l d2,d3 ; 32 - 1. bit of int
move.l d3,d2
.loop_count_int_bits_end
In register d2 is the result, the bit length of the integer part.
The fraction part is a little more tricky. Bringing it into a binary form requires some thought. Effectively the fraction part bit values in binary form is (right of the comma): 2^-2, 2^-4, 2^-8, 2^-16, ... We setup the convention that the fraction value must use 4 digits. 45 then will be expanded to 4500. 4 digits is not that much but it suffices for this proof-of-concept.
I found that an algorithm that translates the fraction into binary form depends on the number of digits. The algorithm is as follows (assuming a 4 digit fraction part):
fraction part > 5000?
if yes then mark a ‘1’ and subtract 5000
if no then mark a ‘0’
shift 1 bit to left (shifting left means multiplication by factor 2)
repeat
This loop can be repeated until there are no more bits in the fraction part. Or, the loop only repeats for the number of „free“ fraction bits left in the mantissa. Remember, we have 23 bits for the mantissa. From those we need some to store the integer part. The rest is used for the fraction part.
The threshold value, 5000 here, depends on the number of digits of the fraction part. If the number of digits is 1 the threshold is 5. If the number of digits are 2 the threshold is 50. And so forth. (5 * (if nDigits > 1 then 10 * nDigits else 1))
Here is the code to convert the fraction into binary value:
; now prepare fraction in d1
.prepare_fract_bits
; the algorithm is to:
; check if d1 > 5000 (4 digits)
; if yes -> mark '1' and substract 5000
; if no -> mark '0'
; shift left (times 2)
; repeat until no more available bits in mantisse, which here is d3
move.l #5000,d4 ; threshold
.loop_fract_bits
subi.l #1,d3 ; d3 is position of the bit that represents 5000
clr.l d6
cmp.l d4,d1
blt .fract_under_threshold
sub.l d4,d1
bset d3,d6
.fract_under_threshold
or.l d6,d7
lsl.l #1,d1 ; d1 * 2
cmpi.l #0,d3 ; are we done?
bgt .loop_fract_bits
.prepare_fract_bits_end
The above code positions the fraction bit directly into the output register d7. And only so many bits are generated as there is space available in the mantissa.
Now we have the mantissa complete.
What’s missing is the exponent. We know the size of the integer part, it is saved in register d2. That must now be encoded into the exponent. What we do is add the integer part bit size to 127, the ‘excess’ value, and write the 8 bits at the right position of the output regster d7:
; at this point we have the mantissa complete
; d0 still holds the source integer part
; d2 still holds the exp. data
; (int part size, which is 0 for d0 = 0 because we don't hide the 'hidden bit')
; d7 is the result register
; all other registers may be used freely
; if d0 = 0 goto end
cmpi.l #0,d0
beq .prepare_exp_bits_end
.prepare_exp_bits
; Excess = 127
move.l #127,d0 ; we don't need d0 any longer
add.l d2,d0 ; size of int part on top of excess
move.l #23,d3
lsl.l d3,d0 ; shift into right position
or.l d0,d7
.prepare_exp_bits_end
Notice, there is a special case. If the integer part is 0, delivered in d0, then we’ll make the exponent 0, too.
The test
That’s basically it for the decimal to binary operation. The output register d7 contains the floating point number.
Test code for that is straight forward. The dec2bin operation is coded as a subroutine in a separate source file. We can now easily create a test source file and include the dec2bin routine. Like so:
; dec2bin test code
move.l #12,d0 ; integer part => 1010
move.l #4500,d1 ; fract part
; subroutine expects d0, d1 to be filled
; result: the IEEE 754 number is in d7
bsr dec2bin
move.l #%01000001111000111001100110011001,d3 ; this what we expect
cmp.l d3,d7
beq assert_pass
move.l #1,d3
bra assert_end
assert_pass
move.l #0,d3
assert_end
illegal
;include
;
include "dec2bin.i"
The test code compares the subroutine output with a manually setup binary number that we expect. Is the comparison OK a 1 is written in register d3. Otherwise a 0.
Part 3 - the implementation - bin2dec (binary to decimal)
We want to convert back from the binary float number to the decimal representation with the integer part (with sign) and the fraction part in separate output registers. And we want to assert that we get back what we initially put in.
In register d0 we expect the floating point number as input. In d6 will be the integer part output. In d7 the fraction part output.
Let’s start extracting the exponent, because we need to get the integer part bit length that is encoded there.
We’ll make a copy of the input register where we operate on, because we mask out everything but the exponent bits. Then we’ll right align those and subtract 127 (the ‘excess’). The result is the integer part bit length. However, if the exponent is 0 we can skip this part.
.extract_exponent
move.l d0,d1
andi.l #$7f800000,d1 ; mask out all but exp
move.l #23,d2
lsr.l d2,d1 ; right align
; if int part = 0
cmpi.w #0,d1
beq .extract_sign
subi.w #127,d1
; d1 is now the size of int part
As next step we’ll extract the integer part bits. Again we make a copy of the input register. Then we mask out all but the mantissa, 23 bits. It is already right aligned, but we want to shift out all the fraction bits until only the integer bits are in this register. Finally we can already copy this to the output register d6.
.extract_mantisse_int
move.l d0,d2 ; copy
andi.l #$007fffff,d2 ; mask out all but mantisse
move.l #23,d3
sub.l d1,d3 ; what we figured out above (int part size)
lsr.l d3,d2 ; right align
move.l d2,d6 ; result
; d6 now contains the int part
We also have to extract the sign bit and merge it with the integer part in register d6.
As next important and more tricky step is converting back the fraction part of the mantissa into a decimal representation. Basically it is the opposite operation of above.
First we have to extract the mantissa bits again, similarly as we did in the last step.
What do the ‘1’ bits in the fraction mantissa represent? Effectively they represent the value 5000 (in our case of 4 digits) for each ‘1’ we have. Considering the fraction bit values for the positions right side of the comma: 2^-2, 2^-4, 2^-8, ...
I.e.: assuming those bits: 11001 the fraction value is: 1/2 + 1/4 + 1/32 = ,78125
Now, if each ‘1’ represents 5000 we have the following: 5000/2 + 5000/4 + 5000/32 But that’s not all. We have to add the remainder of each division in the next step, and we have to multiply the quotient by 2 to get back to our initial input.
Here is the code:
clr.l d7 ; prepare output
clr.l d1 ; used for division remainder
move.l #1,d4 ; divisor (1, 2, 4, 8, ...
; equivalent to 2^-1, 2^-2, 2^-4, ...)
.loop_fract
subi.l #1,d2 ; d2 current bit to test for '1'
lsl.l #1,d4 ; divisor - multiply by 2 on each loop
cmpi.w #0,d4 ; loop end? if 0 we shifted out of the word boundary
beq .loop_fract_end
btst.l d2,d3 ; if set we have to devide
beq .loop_fract ; no need to devide if 0
move.l #5000,d5 ; we devide 5000
add.l d1,d5 ; add remainder from previous calculation
divu.w d4,d5 ; divide
clr.l d6 ; clear for quotient
add.w d5,d6 ; copy lower 16 bit of the division result (the quotient)
lsl.l #1,d6 ; *2
add.l d6,d7 ; accumulate the quotient
and.l #$ffff0000,d5 ; the new remainder
move.l #16,d1 ; number of bits to shift remainder word
lsr.l d1,d5 ; shift
move.l d5,d1 ; copy new remainder
bra .loop_fract
.loop_fract_end
If we look at the divu.w operation, it only allows a denominator of 16 bit length and we only use a denominator of powers of 2. Effectively that is our precision limit. Even if we had more fraction bits in the mantissa we couldn’t actually use them to accumulate the result. So we have some precision loss.
Let’s add a test case.
; test code for dec2bin2dec
;
move.l #12345,d0 ; integer part => 1010
move.l #5001,d1 ; fract part
; subroutine expects d0, d1 to be filled
; result: the IEEE 754 number is in d7
bsr dec2bin
move.l d7,d0 ; input for the back conversion
bsr bin2dec
cmpi.l #12345,d6
bne error
cmpi.l #5001,d7
bne error
moveq #0,d0 ;success
illegal
error
moveq #1,d0 ;error
illegal
include "dec2bin.i"
include "bin2dec.i"
Since we have now both operations, we can use dec2bin and bin2dec in combination.
We provide input for dec2bin, then let the result run through bin2dec and compare original input to the output.
I must say that there is indeed a precision loss. The last (fourth) digit can be off up-to 5, so we have a precision loss of up-to 5 thousandth.
That can clearly be improved. But for this little project this result is acceptable.
In the next „parts“ I’d like to implement operations for addition, subtraction, division and multiplication. Also rounding, ceil and floor operatiuons could be implemented. The foundation is in place now.
]]><![CDATA[ Cloning Compact Flash (CF) card for Amiga ]]>2017-12-25T01:00:00+01:00http://retro-style.software-by-mabe.com/blog/Cloning+Compact+Flash+(CF)+card+for+AmigaWhile being in the process of putting my A1000 with Vampire in production I was wondering how I can clone the Compact Flash (CF) card of my Vampireized A600.
The A600 is nicely set-up, has everything on it that I need. So I’d like to clone the CF card and put it into my A1000.
Certainly the screenmode settings have to be adjusted later, because the A1000 uses a 16:10 22“ display while the A600 has a 4:3 19” display attached. But that should not pose a problem at all.
It is possible on Linux or Mac to use the dd command to make a backup and restore it on another CF card.
Here is how to make a backup: sudo dd if=/dev/disk5 of=~/Desktop/amiga.img bs=1m
disk5 is the device here. But it may be different for you. Open the harddisk tool on Mac or check with 'diskutil list' for your CF card device.
Finally, when you made the image you restore it on another CF card: sudo dd if=~/Desktop/amiga.img of=/dev/disk5 bs=1m
And… hurray, it boots.
A1000 with Vampire
]]><![CDATA[ Writing tests is not the same as writing tests ]]>2017-12-08T01:00:00+01:00http://retro-style.software-by-mabe.com/blog/Writing+tests+is+not+the+same+as+writing+testsWhen I went to university to study computer science with no word were automated tests in any form mentioned. This was ~15 years ago.
My first encounter which tought me that unit tests are important and (depending on the environment) the easiest way of writing tests was when reading the book “Clean Code” [Clean Code] by Robert C. Martin.
That got me in the right direction. During the next few years I’ve heard about writing “tests first” and TDD (Test-Driven Development). But I couldn’t really imagine how one would write a test first, before any production code? How is that supposed to work?
But the topic was so interessting that after a while I read the book “Test-Driven Development” by Kent Beck. He explains in a step-by-step way the discipline of TDD, which helped me a lot. However, that still felt odd and I couldn’t yet adopt the practice. But it didn’t let me loose either. Somehow I was pulled towards it.
But finally I’ve have adopted it. And after practicing it for ~two years I have to say, once I got used to it, it’s one of the best practices that I was able to learn in my life as professional developer.
Because aside from validating the production code TDD has more advantages, which are kind of automatically applied:
with TDD you will end up having a good test coverage. That in turn makes you detect regression (changes to the code which might have broken something elsewhere).
you don’t have to be scared for refactorings. Refactorings should always be done to clean up the code and to make things simpler. Having a good test coverage you don’t have to worry too much about doing refactorings.
it is documentation for the production code, because tests use the production code. Hence other developers just need to look at the tests to find out how something works.
it enforces a better structure to your production code (at least that is what I have experienced). When tests get too complicated this is usually a sign that the production is too complicated as well. Then you should refactor. Refactor out components and create separate tests for them. Reduce your dependencies, etc. That will lead to less tightly coupled components and code.
Make no mistake, If you do not write your tests first you will end up having a test suite with a lot of holes. When you run it and it is „green“ it doesn’t really tell you a lot. Since you have not really covered everything there is still a lot of potential where something is broken.
Software tests are similar to empirical tests in science. You cannot prove that a software is bug free. The tests you write and the better your coverage is the more you can assume that you don‘t have a lot of bugs and from that you have to judge whether you trust your test suite and release or not. When do you trust your test suite? When you have applied TDD and have a good coverage.
]]><![CDATA[ Dependency Injection in Objective-C... sort of ]]>2011-01-20T01:00:00+01:00http://retro-style.software-by-mabe.com/blog/Dependency+Injection+in+Objective-C...+sort+ofThe post will be about Dependency Injection (DI) in Objective-C. DI or the pattern behind it IoC (Inversion of Control) is well known in the Java world. There are quite a few frameworks available like Spring, EJB, Guice, etc. On Mac I didn't find something like it. So I've implemented a proof of concept.
The goal was to inject a service class instance into another object, let’s say a consumer of that service. Also it should be possible that the service object can be mocked and a different instance of the service be injected for unit testing.
Let’s see, what we need first is some kind of registration facility where we can register classes by name. When an instance of that class is asked for a new instance will be created and it will be returned. Alternatively an instance of a class can be set for a name, then this instance will be returned instead. With this we can set mock objects for unit testing while in production the real class is used.
This is the „DependencyRegistration“ facility’s interface:
I’ve mixed interface and implementation here which normally is separated in .h and .m files. Good. We have our service. Now we create a consumer of that service that get’s the service injected.
This is the consumer. The interesting part is the INJECT(MyServiceRegName). Now where does this come from? The INJECT is just a #define. The MyServiceRegName is also a #define which specifies a common name for a service registration. We can add this to the DependencyRegistration class like this:
In fact all service registration names could be collected in this class but they could also be someplace else. The INJECT define does nothing else than get an instance of the DependencyRegistration singleton and call the -objectForRegName: method which will either return an instance from a created Class or an already set object instance.
The injection does occur here in an initialisation method. It could actually also do via a setter or init like:
The way this is implemented either every consumer get’s a new instance of the service or all get the same instance depending on whether an instance has been set in the DependencyRegistration object or not.
Now let’s create a unit test to see if it’s working:
You will see that it works when you execute this test. Here just a class name is registered which means that a new class instance is created and injected to the consumer.
There is plenty of space for improvements of this. In terms of Java what we have here is either an application scope object (when a service instance has been added via -addObject::) or a request scope object (when no service instance has been added and one is created each time) is passed the the caller.
Well, after all the DependencyRegistration class is not much more than an Abstract Factory for multiple class types.